trans3.JPG (1043 bytes)
Email to Brent Franker
div.GIF (2822 bytes)
Main
div.GIF (2822 bytes)
F-Bodies
1994 Supercharged
Z28 Camaro

-
1996 450hp n/a
Z28 Camaro SS

-
1995 Trans Am
-
4th Gen Appearance
Modification Guide

F-Body Install & Fix-it Guides
My Previous F-Bodies
My Favorite F-Body
Links

div.GIF (2822 bytes)
1995 Ninja ZX6
1991 KX250
div.GIF (2822 bytes)
Other Hobbies
div.GIF (2822 bytes)
About Me
div.GIF (2822 bytes)


Special Thanks to
LV-F-Body Association &
Badassride.com

for hosting this site!


seat00.JPG (10387 bytes)
flazbar.gif (4688 bytes)

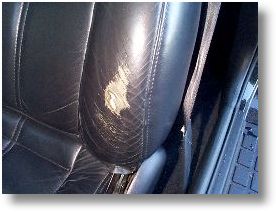
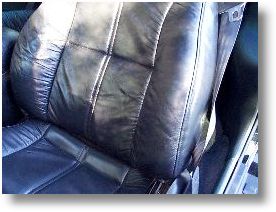
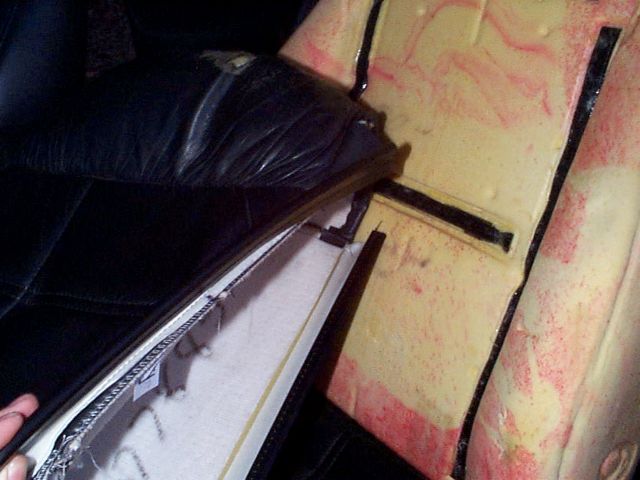
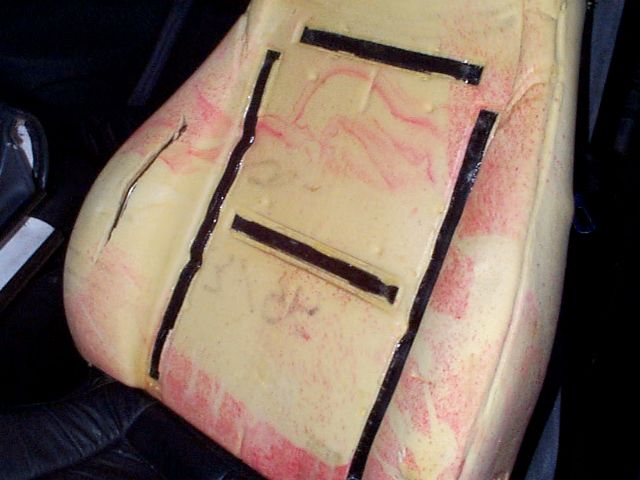
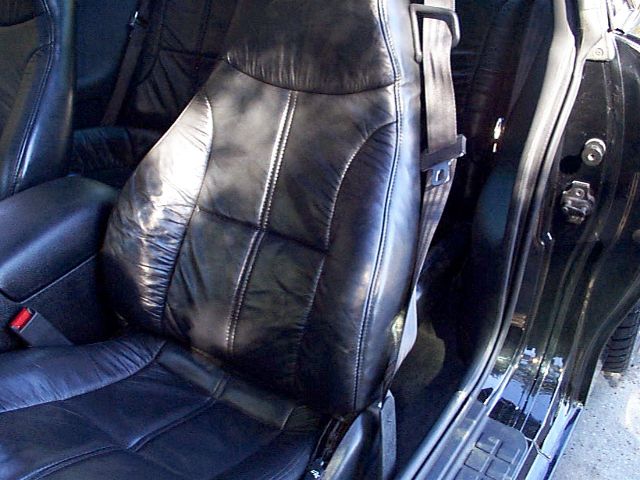
This is a very easy project.  The reason I've made this web page is because it, at first glance, wouldn't appear so simple. :-)

Unfortunately, every 4th generation F-Body from 93 and up I have seen that has a leather interior, has had a problem with the driver side seat bolster wearing thin.  This, in my opinion, is a design problem.  But, GM has yet to do something about it and therefore, we're all stuck with either buying new leather seat covers (at over $200 a pop!) or living with a ratty looking seat.

I first checked into the price of a new one some time ago.  It was a bit steep so I did nothing.  I also checked on having a local upholstery shop install it for me.  They told me it would be $40.  No biggie I thought since this wasn't something I could do myself.  Well, it just so happens that a buddy of mine had a 95Z with the same color interior and had his seat cover replaced under warranty.  He had only a very very minor scuff on the side bolster which is barely noticeable.  After the upholstery shop changed it, they left the old one in the car and he kept it. Him being a packrat like myself, never threw it away even though he hasn't had the car for almost 4 years. :)  When he saw that I had a 96SS with the same colored interior and how it had a big darn hole in the side bolster, he offered me his old seat cover!  Thanks again, John! :-)  I couldn't resist so I went over and picked it up.  That's when I realized that changing it out wasn't going to be as difficult as I had first thought.  I originally thought it would be difficult to get the leather to conform to the seat... which is why I was going to take it to the upholstery shop.  Well, one glance at the cover and I realized by the way it was built, I wasn't going to have any problems doing this myself and my $40 could be better spent elsewhere!

trans4.JPG (1048 bytes)

seat01.JPG (15014 bytes)
Before


seat02.JPG (16008 bytes)
After


Note:  All images below are thumbnails.  Click to view larger image.

blackline.JPG (3017 bytes)

1. There are a few items that need to be removed prior to taking off your old seat cover.  You'll first need to just pull off the seat release lever.  It's on there tight so just pull hard.  Next, the seat cover's front and back pieces are connected under the seat.  Push the seat forward and you'll see what I'm talking about.  In the picture to the left I have already "undone" the front and back piece.  A picture below shows them attached.   With the seat forward, reach your hand under there and push in... you'll be able to feel how it's connected to the front piece.  Work with it a little and you'll have it apart. seat03s.JPG (6939 bytes)

blackline.JPG (3017 bytes)

2. Remove the seat belt holder.  This will require a #2 Phillips head screwdriver. seat04s.JPG (6390 bytes)

blackline.JPG (3017 bytes)

3. With steps 1. and 2. complete, there is nothing holding the seat cover except for the Velcro on the seat itself.  Reach up under the front part of the seat and with your hand, pry the seat cover away from the seat.  You'll see that this is some killer Velcro!!! :-)  Once you have the seat cover separated from the Velcro, you can now work the seat cover off.  Start at the bottom.  The first thing you will need to do is pull the seat cover out, away, and over the seat release lever.  Now just go little by little by pulling up a little on the bottom then pulling from the top.  Also, in this picture you can better see how the front and back sections of the seat connect together via the hard plastic strip and the plastic channel. seat05s.JPG (6867 bytes)

blackline.JPG (3017 bytes)

4.  This shot shows you the bare seat.   Notice the Velcro.  Also, now is a good time to take note of how the plastic seat belt holder is attached to the seat.  The screws go into a metal bracket on the seat.  Get a good look at this prior to putting the new seat cover on the seat.   If you fail to look at them, you'll have a hard time screwing your bracket back in.   Trust me... I know.  I had to take the seat cover back off because I didn't look at this prior to putting the new cover on and ended up not being able to find the screw holes.  I took it back off, took a look, and whala, no problem the second time around :-) seat06s.JPG (6817 bytes)

blackline.JPG (3017 bytes)

5.  You're now ready to put the new seat cover on (don't forget to look at the seatbelt mounting bracket!).  Work the seat cover on the seat in a way similar to how you removed it.  Don't forget about the seat release lever!  Once you start getting close to having the cover fully on, pull the cover out and over the metal release lever.  Be careful as it would be terrible for you to rip your new cover!  Once the cover is in place, push the seat cover onto the seat to "attach" it to the Velcro.  Now, attach your seatbelt bracket first... make sure your belt isn't all twisted up!  Put your release lever back on.  Finally, attach the front and back portions of the seat.  This might take a little tugging and pulling.  Just work it down as far as you can.  Then, starting at one side, push and pull the back portion under the seat until you can feel the plastic channel on the front piece.   Starting at this one side, try to fold the hard plastic piece on the back portion into the channel on the front piece.  This might sound confusing but once you get your hands in there you'll know what I'm talking about. seat07s.JPG (6865 bytes)

blackline.JPG (3017 bytes)

6.  Done!  It will take a few days for the seat cover to "mold" to the exact line of the seat like your old one did.  The picture to the right shows what the seat cover will look like right after being installed.  If you have any questions or comments, feel free to shoot me an email!

  bfranker@tampabay.rr.com  

seat08s.JPG (8487 bytes)

blackline.JPG (3017 bytes)