    Special Thanks to LV-F-Body Association & Badassride.com for hosting this site! |

|
Special Thanks to LV-F-Body Association & Badassride.com for hosting this site! |
|
![]()
| On this page I'll show you some pictures and
give you several pointers for installing vinyl stripes. Actually, these techniques
will work for any vinyl decal installs. Installing stripes is a bit more difficult
than most vinyl installs due to the size of the pieces of vinyl. Because of this, it
is a bit tricky but still doable by the average guy. Many thanks to my buddy Rick at The Sign Connection for making the stripes for me. He did a fantastic job on them! Also, if you have ever looked around for 30th anniversary stripes for an SS you know there are VERY few places to purchase them. Update:
Rick no longer has The Sign Connection business. I bought a vinyl cutter and
can now make these :) If you're interested, check out my page... Also have to thank my buddy John for helping me install them (or maybe I helped him! :) I do not recommend doing this little project by yourself. A helping hand is a near must on this one. |
 This picture and the rest may be clicked for a larger image.
|
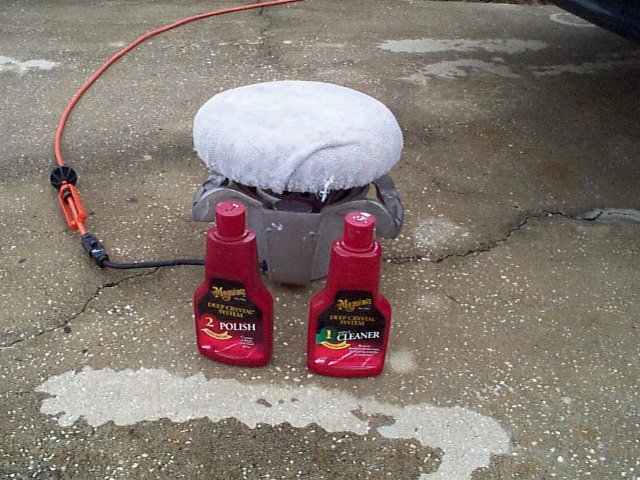
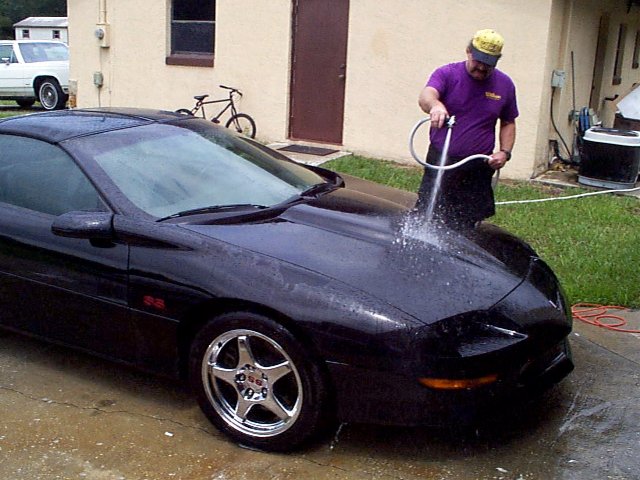
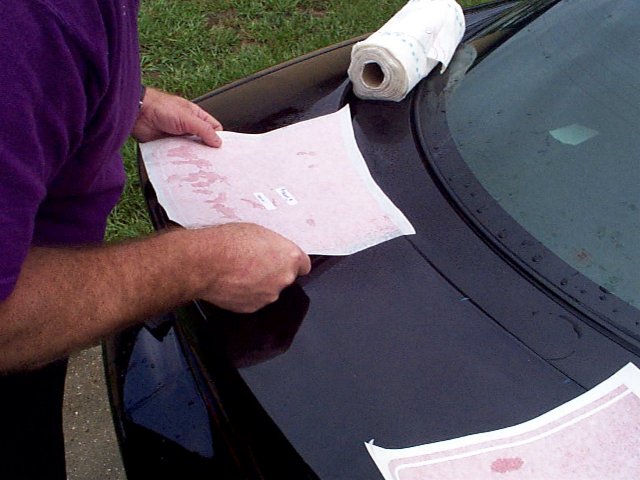
| You need to get the wax off your car in order
to ensure the vinyl decals will stick a good long time. I did this as a two step
process. First I washed the car with Dawn dishwashing liquid and used a lot of Dawn!
Wet the car and squirt Dawn directly on the car then use a cotton towel to
"wash" the car. After doing this I wanted as smooth of finish as possible
to install the stripes on so I buffed the car with an orbital buffer and compound. I
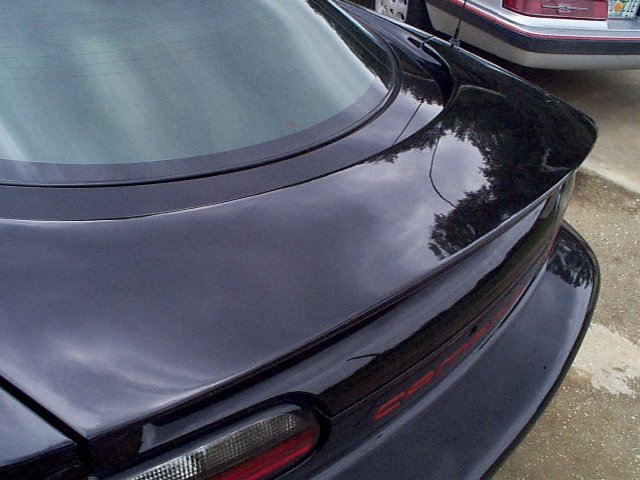
used Meguire's #1 cleaner then followed that up with the #2 polish. The last picture shows the rear spoiler washed and buffed. |
|
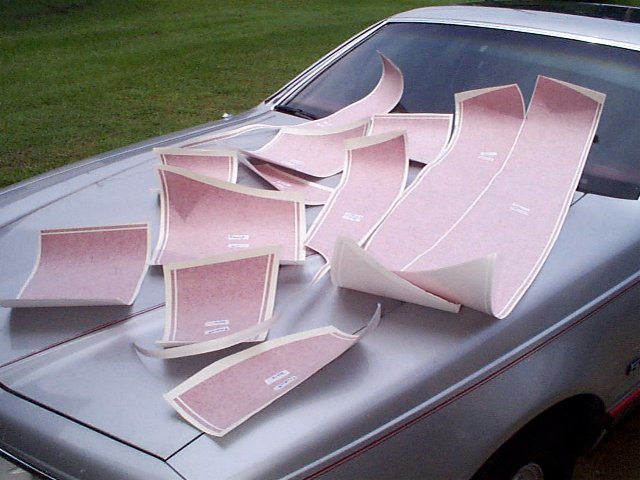
| Lay out all your stripes so you can get a good
idea of what you have and also to make sure that you got what you ordered! As you
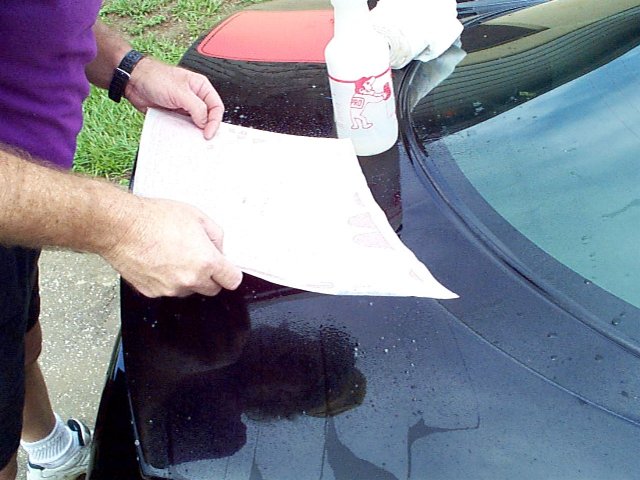
can see, there are quite a number of pieces for the 30th Anniversary SS kit! Now is also a good time to make yourself a soapy water solution. Because of the size of these stripes it is impossible to do this without first spraying the surface with soapy water. This will allow you to move the stripes around on the paint, get them lined up properly, and also squeegee out any air bubbles. You're going to need a squirt bottle and I recommend a hard and soft plastic/rubber squeegee. You'll see these in some pics below. You don't need a ton of soap in your soap, water mixture. 5 to 10 drops in an average size bottle is enough. Remember the more soap you use the longer it will take for them to dry and also it will be more difficult to remove the air bubbles because they will be moving around and not sticking when you really want them to :) |
 |
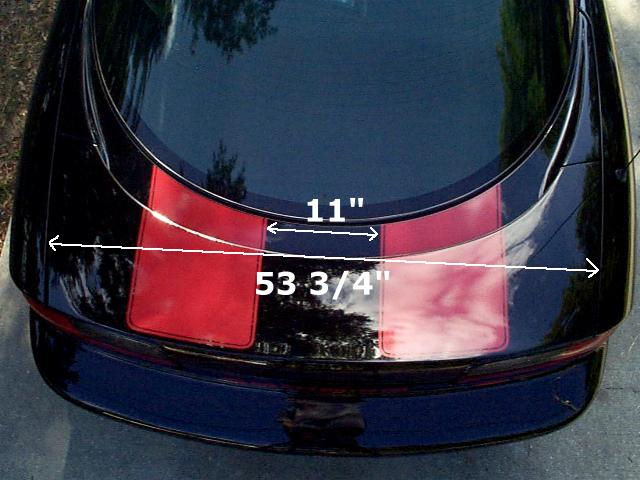
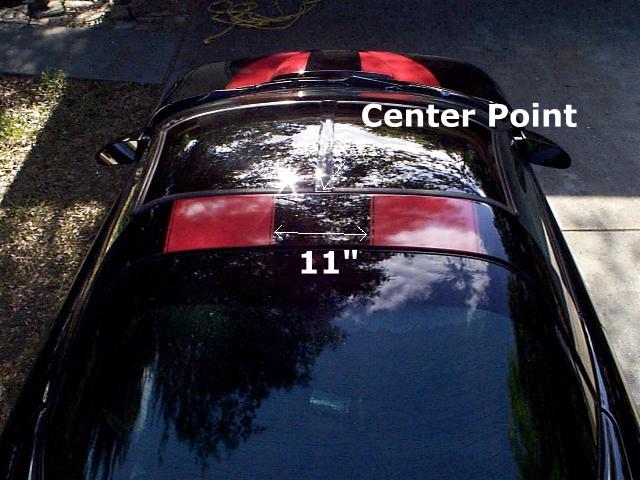
| This was a bit difficult for us because we had
no measurements. I knew the stripes on the rear needed to be 11" apart and had
one measurement for one of the small front stripes on the nose, but other than that, we
had to "wing" it. It's going to be much easier for you because I'll
provide all the measurements you'll need :) To mark on the car, we used a blue
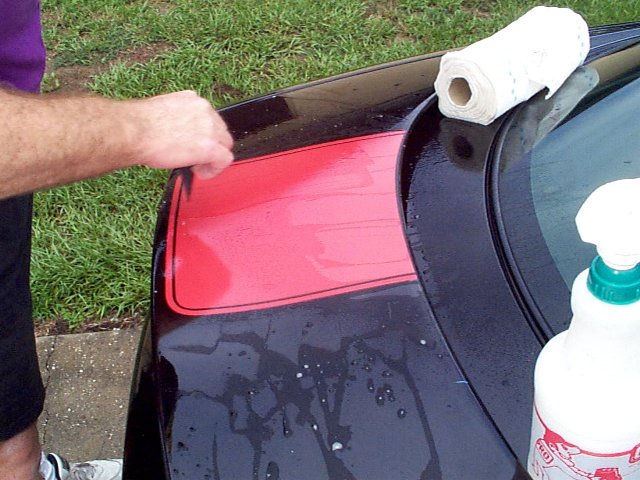
grease pencil. This worked well on the black paint. We started on the rear pieces because they looked the easiest and we wanted to see how it was going to go on an "easy" piece :) For the rear, it is best to measure across the entire hatch area like shown in the picture. Just make sure your tape is straight from one end to the other. I found the easiest way to do this is to measure across at the point where the spoiler "cups" in the furthest. On my car, this measurement was 53 3/4". You take this measurement, divide by two, and that'll give you a center point to measure from. Since the stripes need to be 11" apart, take off 5 1/2" from your center mark, and add 5 1/2" from the center mark. These two marks will be the inside edges of the rear stripes. I took the measurements after the stripes were installed which is why I'm flipping back and forth between pics with and without the stripes :) |
|
| Now with the markings, you are ready to lay
down your first stripe! These 30th Anniversary stripes have another smaller
"pin stripe" going around the outer edge. This makes installing these
stripes way more difficult than just a standard racing stripe. This is because you
have to maintain the distance between the pin stripe and main stripe and keep everything
lined up properly. When using the soap water solution, you'll sometimes have this
smaller pin stripe move away from the main stripe. If this happens, you can just use
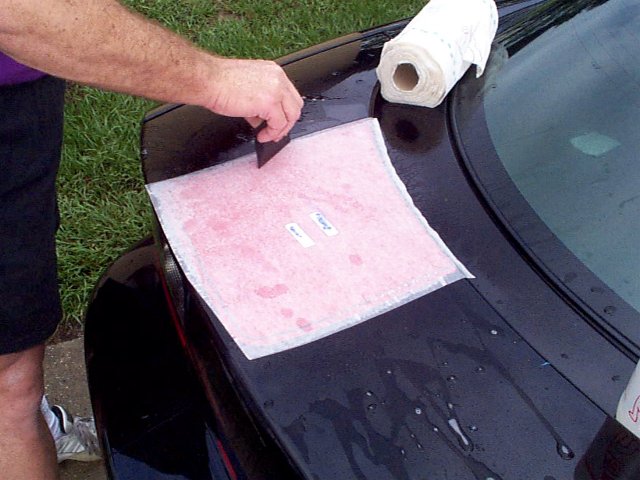
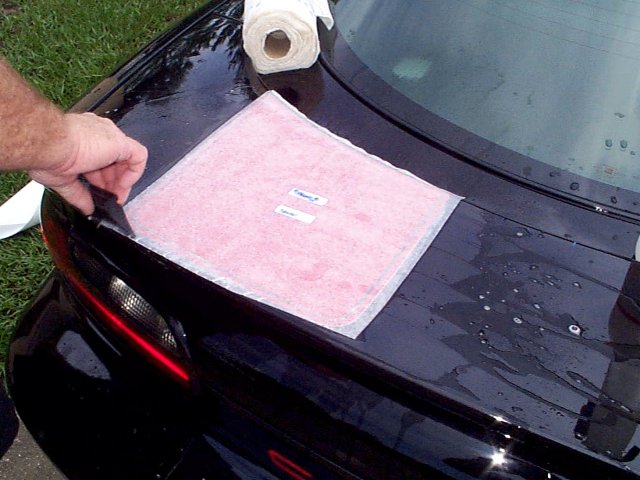
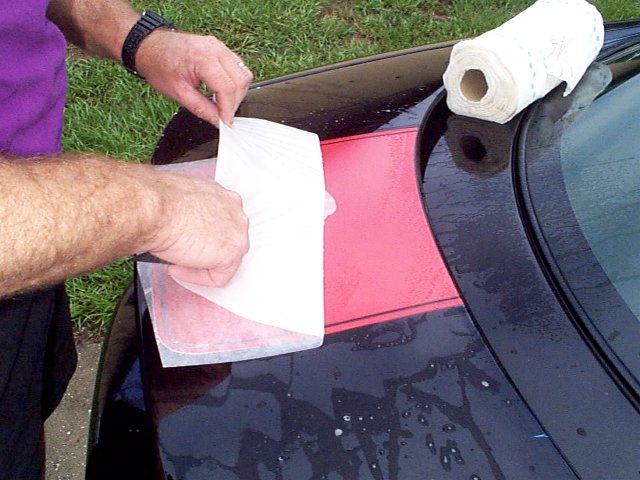
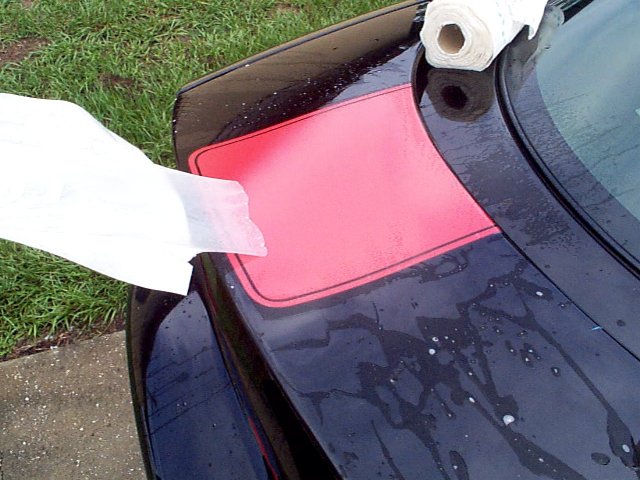
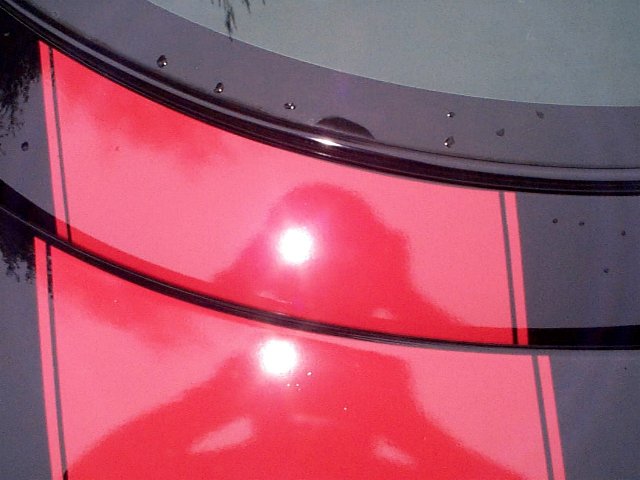
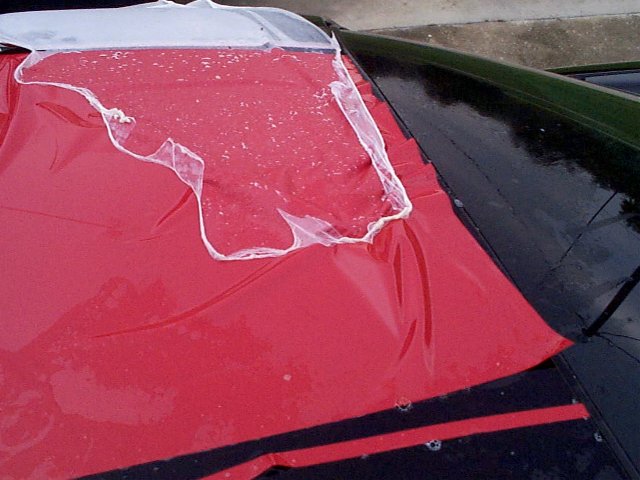
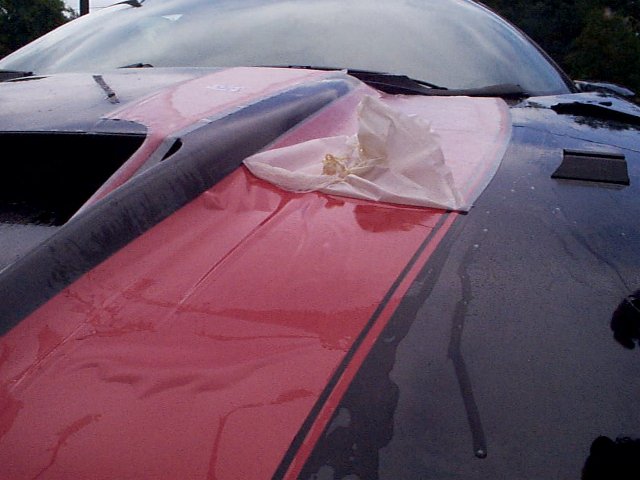
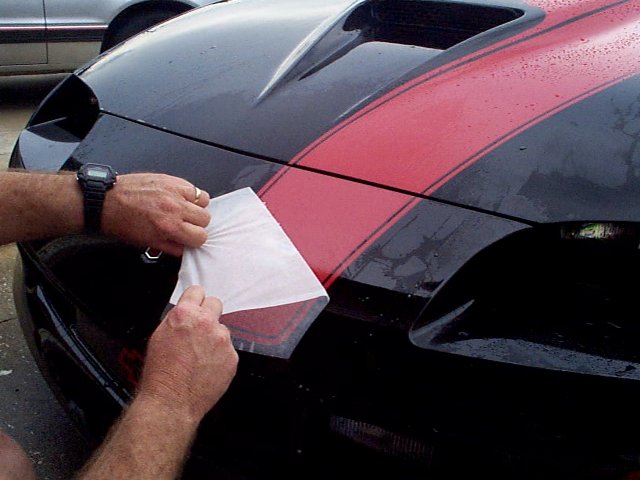
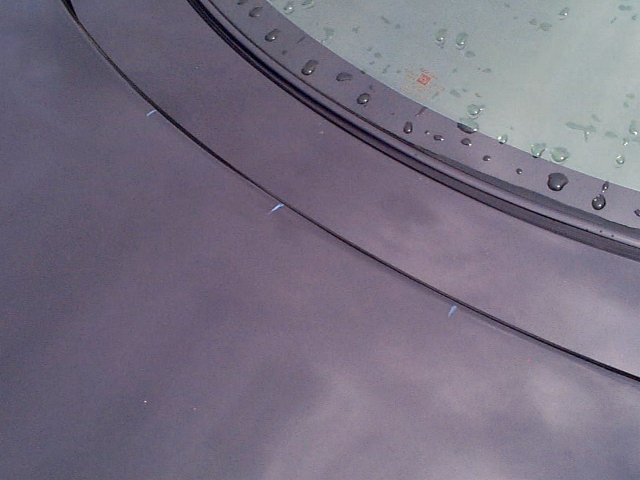
your rubber squeegee and push it back into place. Don't get skimpy with the soap/water! This is what is keeping you from ruining your stripes! If you don't squirt enough water on your car and stripe, you won't be able to move it once you place it on the car. About the only way you can ruin the stripe is if you crease it. Just make sure you don't crease it and you'll be fine. See some of the below pics... you'd think the stripe would be ruined but we were able to get it on and looking good. To start with, place your stripe on the car without taking off the backing. Make sure you have an idea of how it is supposed to look and it will fit properly with your marks. This isn't an exact science and there is no perfect way to measure this back piece because of the rounded lip. We just butted it up to the rounded lip just prior to it starting to "round off." I thought the stripe looked better being flat so that is how we did it :) When you are ready, completely soak the area on the car with your squirt bottle. Remove the backing to expose the adhesive on the vinyl and squirt down the stripe too. This will ensure all areas are covered. Place the stripe on the car but do NOT push on the stripe. You can slide it around so long as you don't put pressure on the stripe. Move the stripe around and get it in place. Once in place, use your squeegee and, starting at the center, push towards the outside. Keep in mind that once you start this process, your stripe will be stuck and stuck good. Once you have squeegeed the entire stripe and it looks like you have removed all the air bubbles you can remove the masking. Pick an area and carefully lift the masking off the stripe. As you can see in the picture, for whatever reason, we had some trouble with the masking. The glue was sticking to the stripe and separating from the masking. This made things a bit difficult as you'll later see. Also notice that, on this stripe, we did not need to mess with the smaller pin stripe as it did not "move" on is as we pulled up the masking. If it does move on you, no big deal, just push it in place with the squeegee and let it dry for a bit. Now with the masking removed, check for any air bubbles you may have missed and squeegee them out. Be careful because even though the stripe is stuck, you probably still have some water/soap mixture left under the stripe and the stripe may still move on you. If it moves and you completely screw everything up, you can squirt more water under the stripe and start over (you just won't have the masking on the stripe). |
|
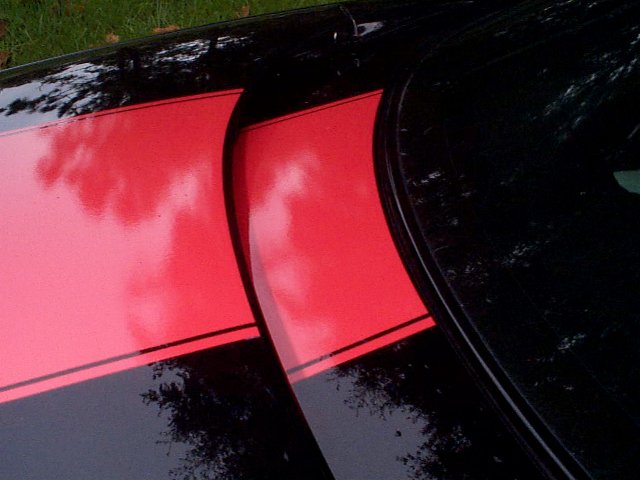
| After doing the stripes on the spoiler, we did
the stripes that butt up near the glass. We didn't make any measurements for these
and instead just eyeballed them to line up with the spoiler stripes. You can see in the
first picture how the stripe didn't stick as well for us as did the spoiler stripes.
No big deal, just completed pulling off the masking then squeegeed out the air
bubbles and straighten the stripe. These are very forgiving and as long as you keep
them wet with your water and soap, it is hard to mess them up. In the close up picture from the top, it looks like the stripes are a different size but they really aren't. I just took this one to show you how I lined up the spoiler stripe in relation to the lip. And finally, the completed rear stripes. Not bad, eh? :) |

|
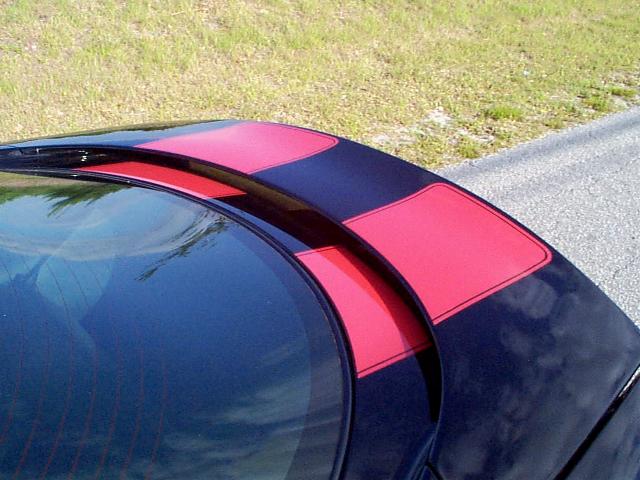
| The top stripes aren't too bad either. I
have t-tops and therefore the stripes are smaller and the center t-top bar gives you a
good center point to measure from. Like the rear stripes, these are also 11"
apart. Just need to measure 5 1/2" off center for your marks. As you can see, we had some more glue/masking troubles with these but all turned out OK. It looks "scary" but goes to show you how bad they can look but still be fine :-) |
|
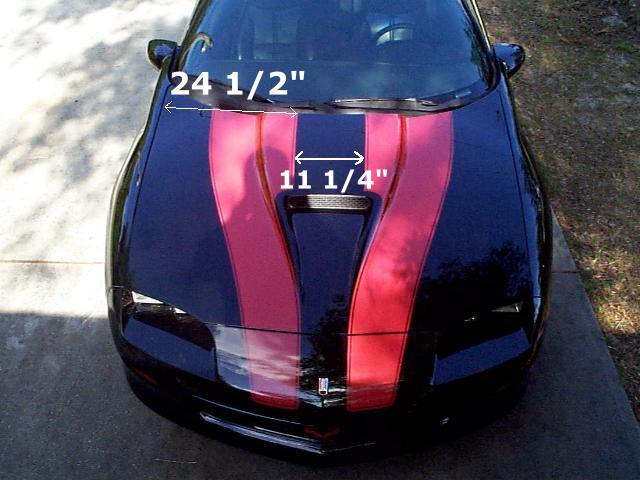
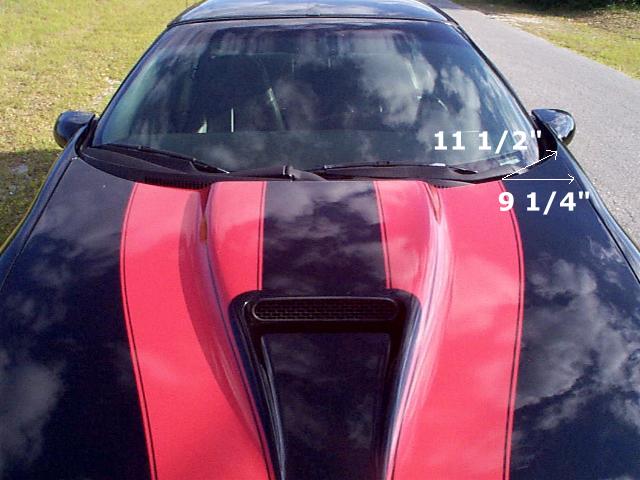
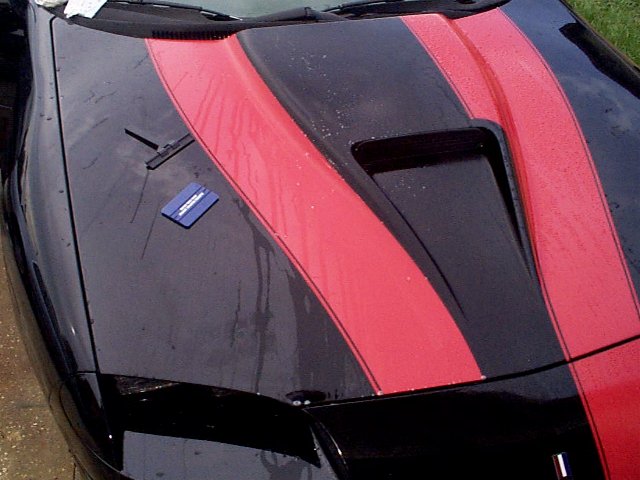
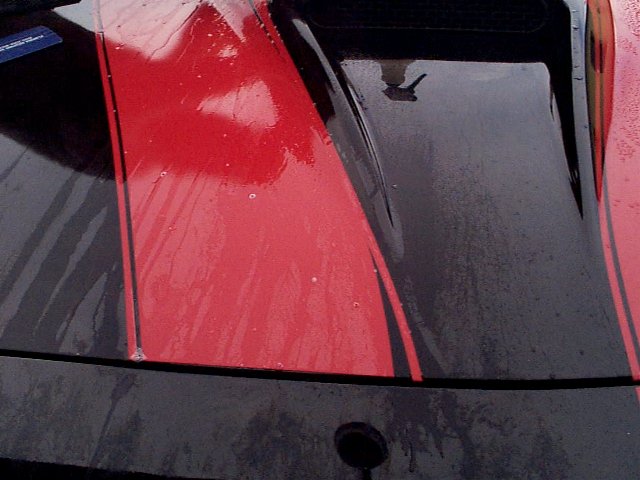
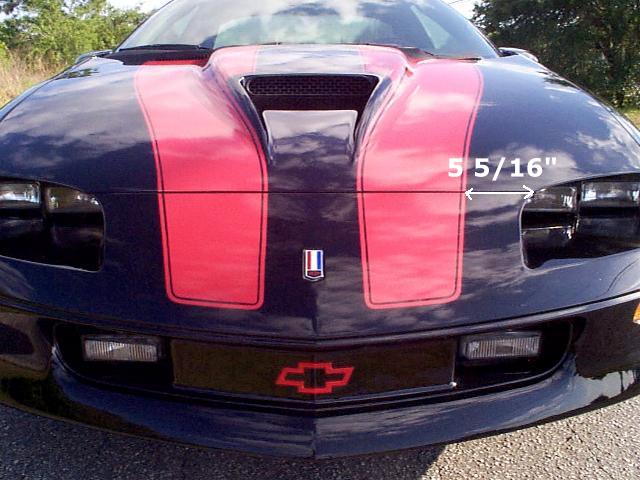
| Ok... now for the bad boys on the hood :)
Here are the necessary measurements. The first one shows how far from the
"point" in the headlight opening. This should be 5 5/16".
On the back side of the hood stripes you can get a measurement for the
outside stripe by measuring over from the edge of the hood 9 1/4" straight across.
Move the tape until the 9 1/4" mark is right on the curved portion of the
hood. Now, if you measure down from the corner of the hood to this mark, you should
get 11 1/2". Keep in mind that these measurements are to the EDGE of the hood
even though the stripes don't go all the way to the edge. To get a mark for the inside stripes, go 24 1/2" from the edge to the top portion of the cowl. The space between the two hood stripes on the cowl measured 11 1/4" when we were done. Not sure if it is supposed to be 11" like the rear and top stripes, but since we were winging these hood stripes, 11 1/4" is close enough for me and this is where they seemed to fit the best. |
|
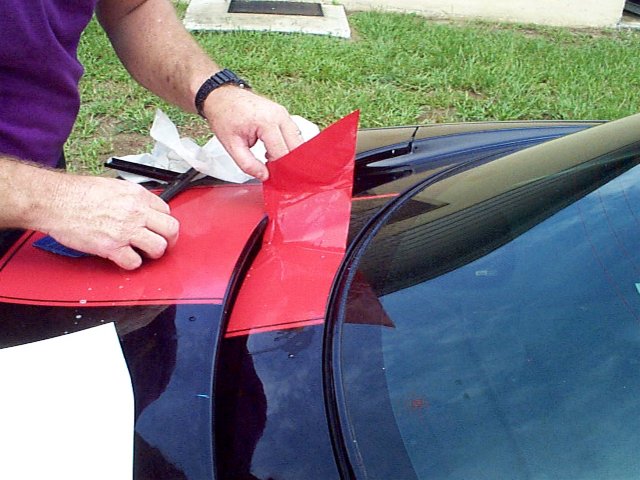
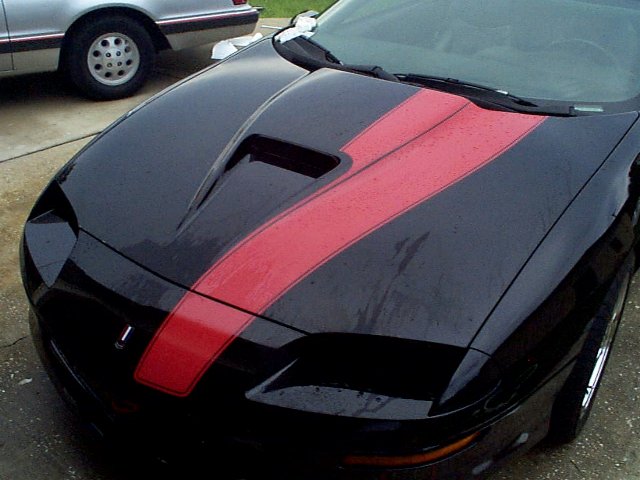
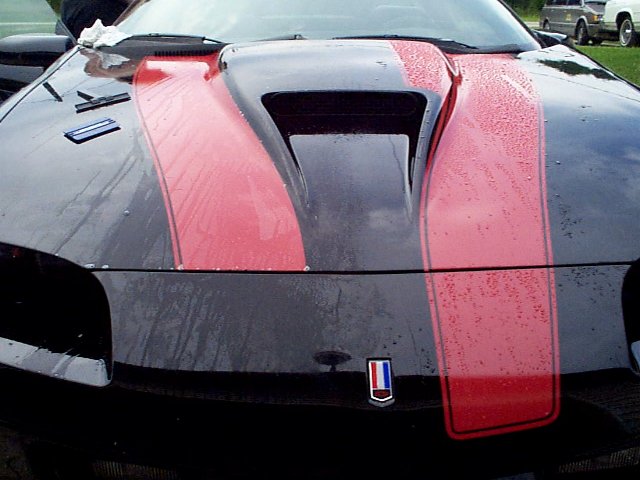
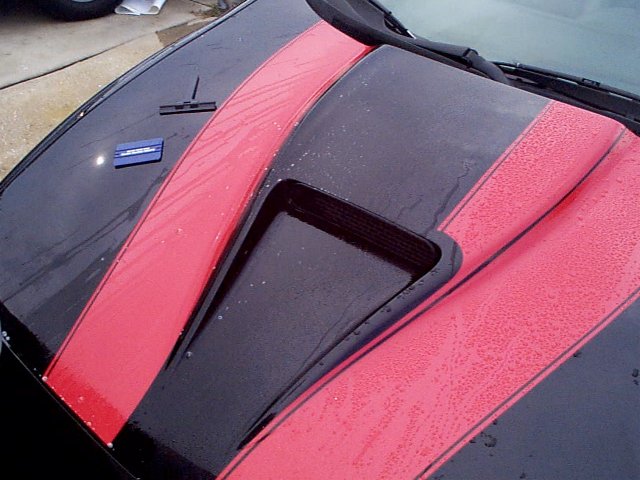
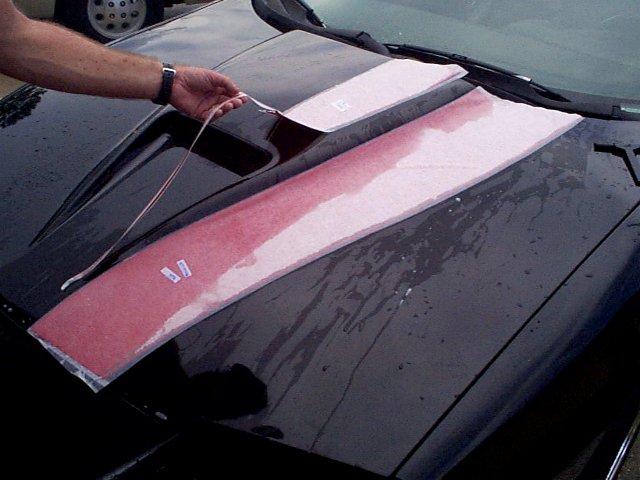
| Ignore the smaller inside stripe here and
don't do that one at the same time as the wider stripe like I have pictured. Since
we had no measurements, we thought we would need to install them both at the same time in
order to line them up properly. Since you have marks to start with, you only need to
do one at a time. I recommend starting with the larger stripe. Align this
stripe with the mark on the back side of the hood and the mark you made on the front of
the nose. Keep in mind that the stripes will not go all the way to the edges but
this short distance can be eyeballed easily. Don't expect to keep the smaller pin
stripe aligned when you pull off the backing here. As you can see in a below
picture, we lined these up after pulling off the masking. You can also see some pics
of a couple more squeegees we used.
|
|
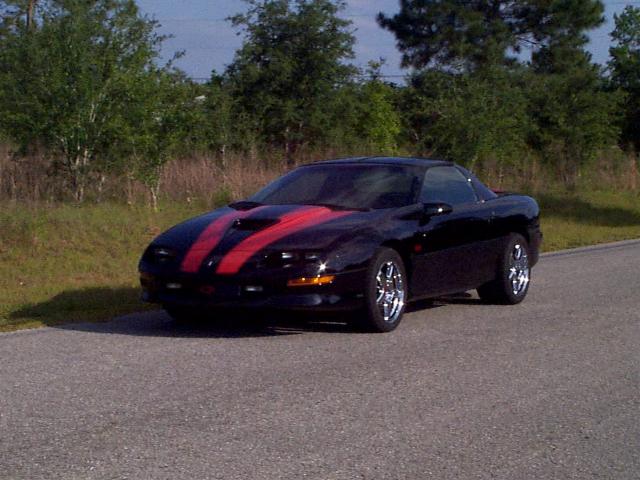
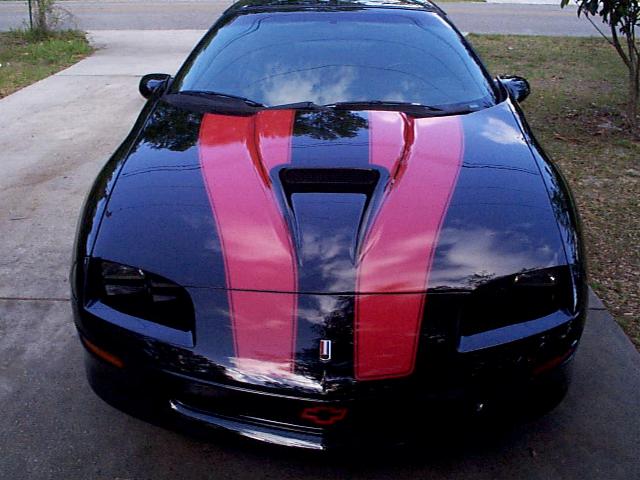
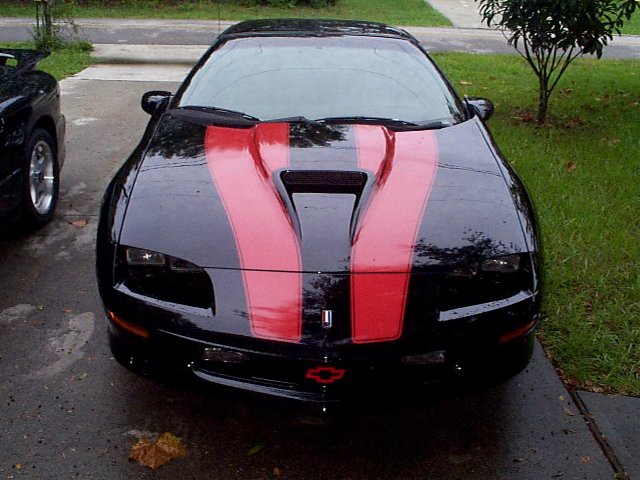
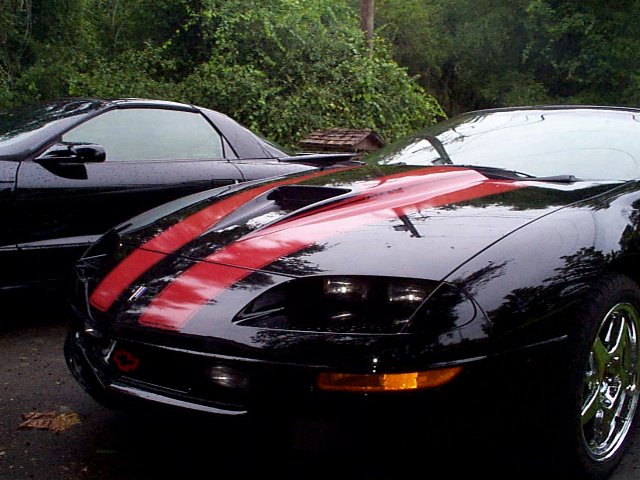
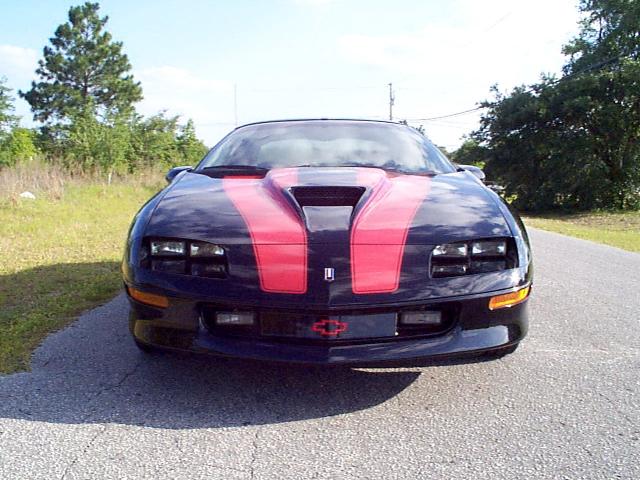
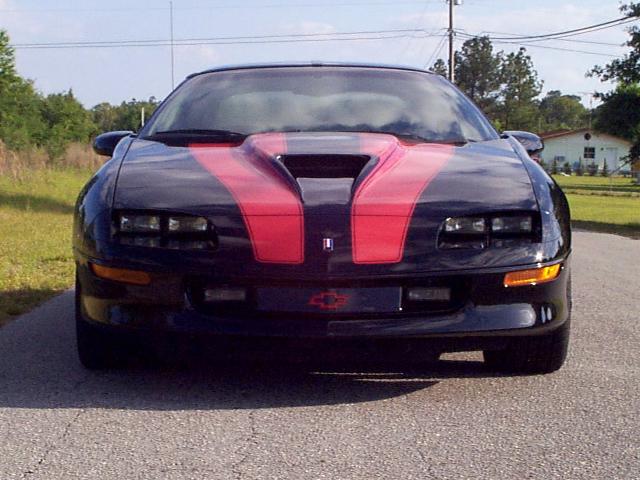
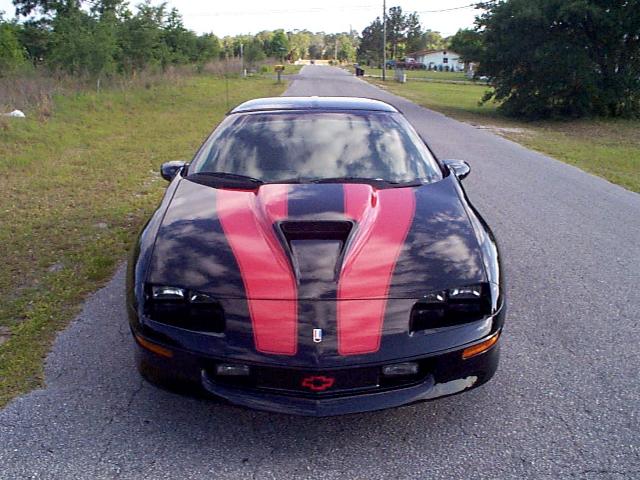
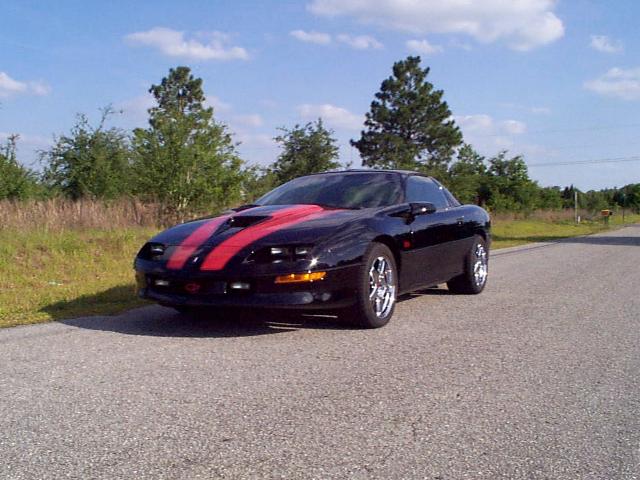
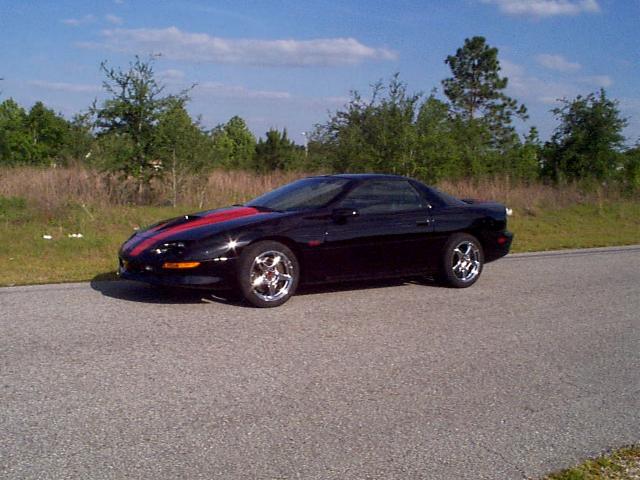
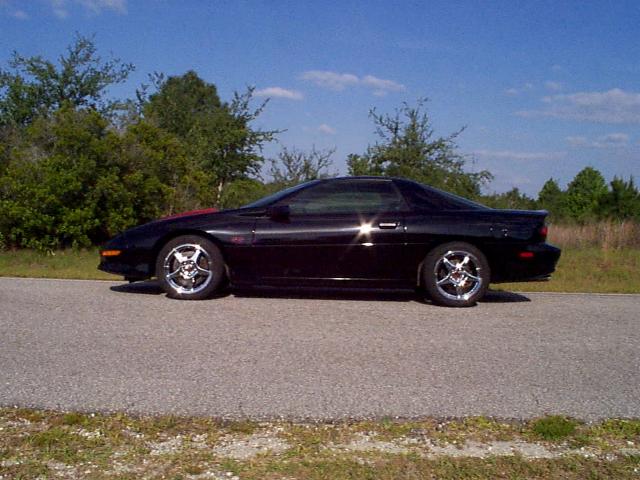
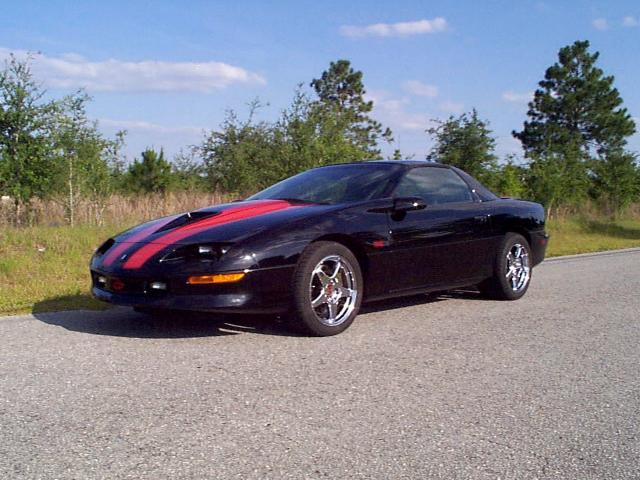
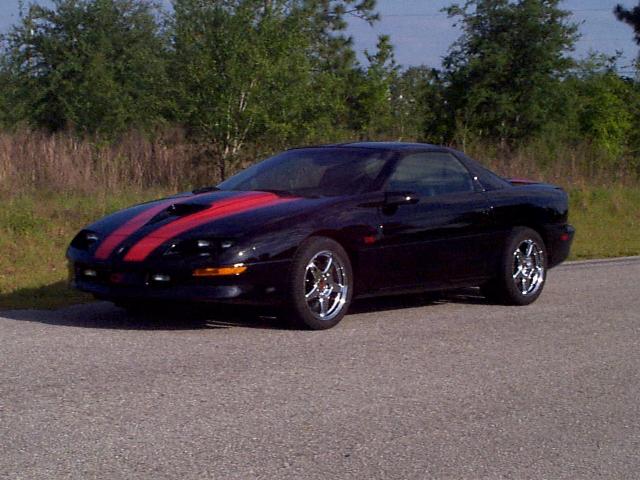
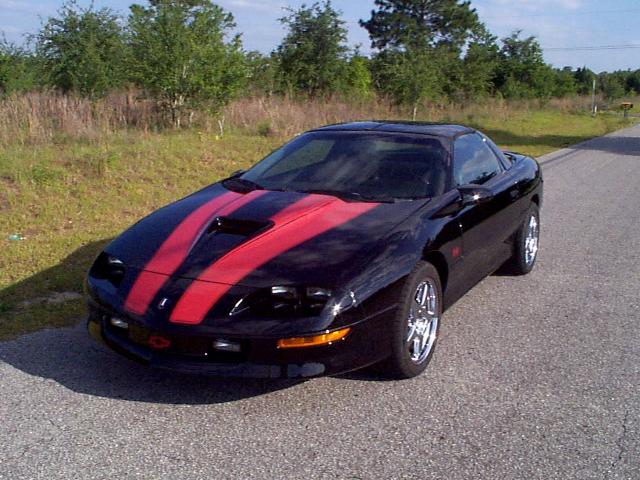
Here are a few more pics of the completed project. Good luck! Several similar angles are pictured here so you should be able to find a pic for good reference should you need it!
|
|
![]()
![]()