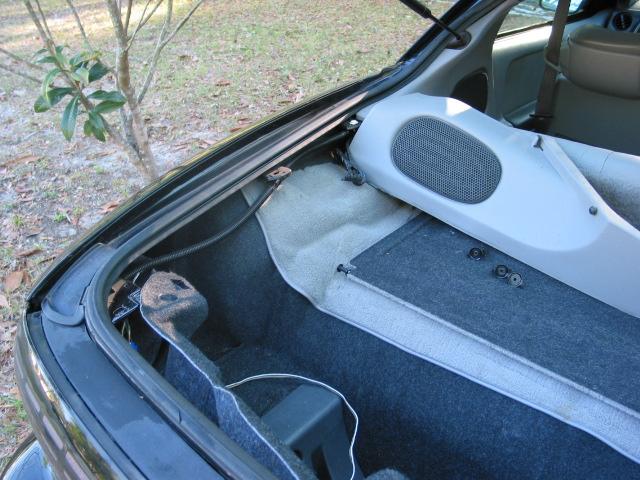
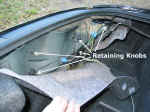
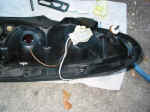
| I'm only going to detail the driver side
install on this page. The Passenger side is essentially the same except for a couple
wire colors which I'll tell you about later. First off you
need to remove the back side plastic panel to gain access to the retaining knobs which
hold the tail light in place. The driver side is held in place by plastic ribbed
retainers. You just need to pull up on the panel (with a little force) to remove it. |
 |
|
 |
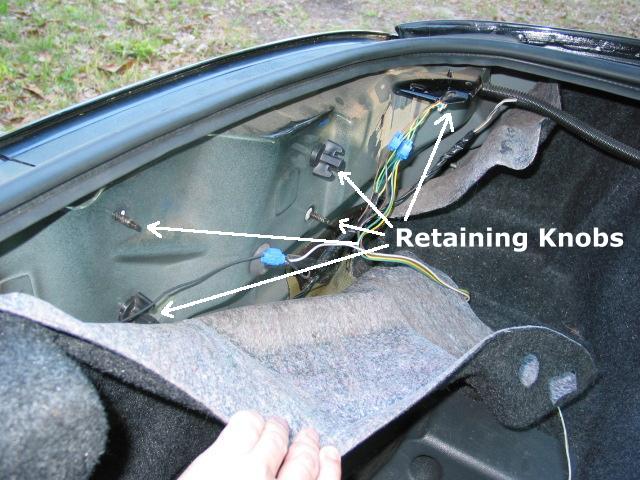
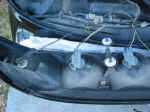
| There are 5 retaining knobs which hold
the tail light in place. Unscrew these plastic knobs. In the picture I have
already removed some of them. |
 |
|
|
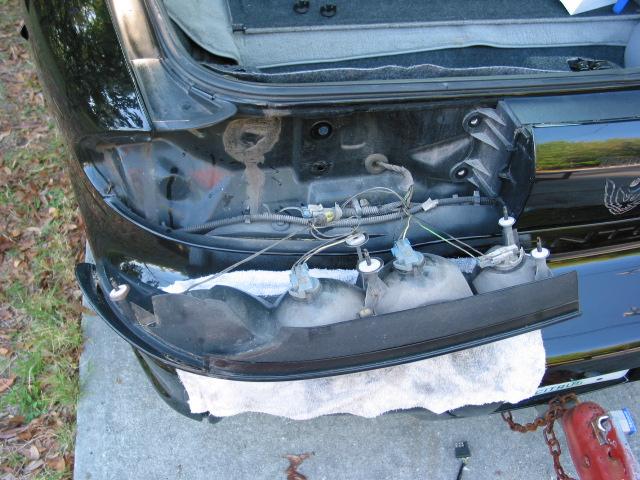
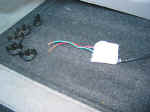
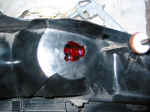
| With the retaining knobs removed, place a
cotton rag on your bumper (to keep from scratching your car!) and gently pull the tail
light out. |
 |
|
|
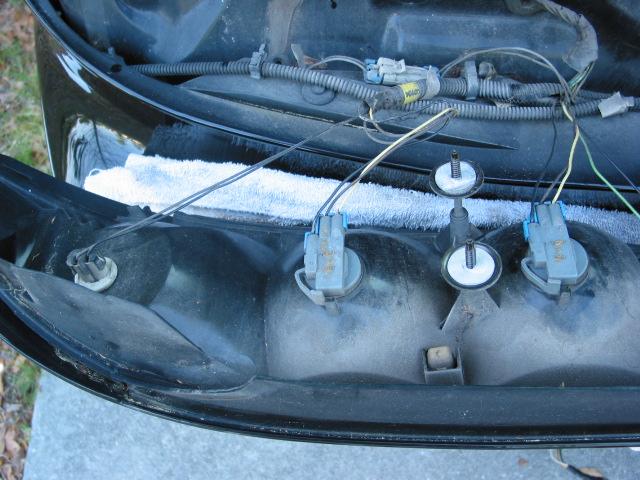
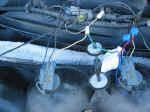
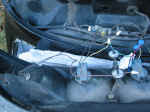
| Pictured here is the sequencer and the
retaining knobs which hold the tail light in place. |
 |
|
|
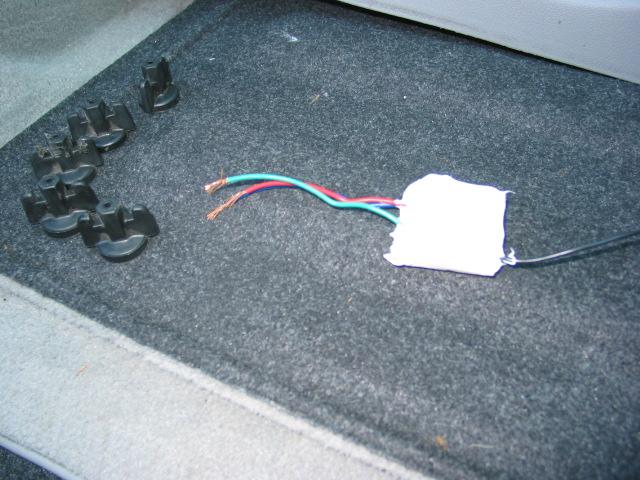
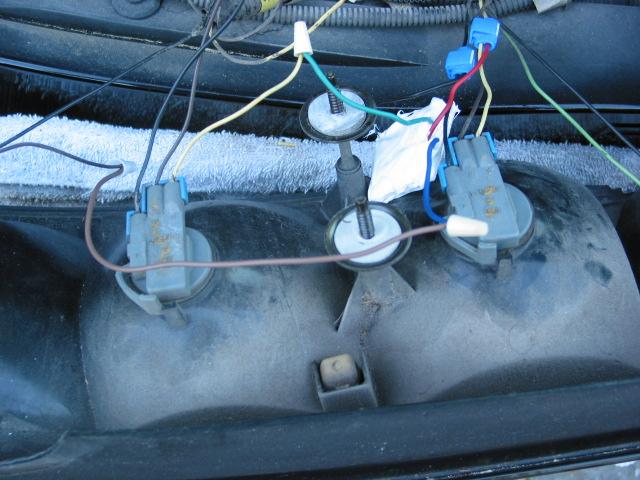
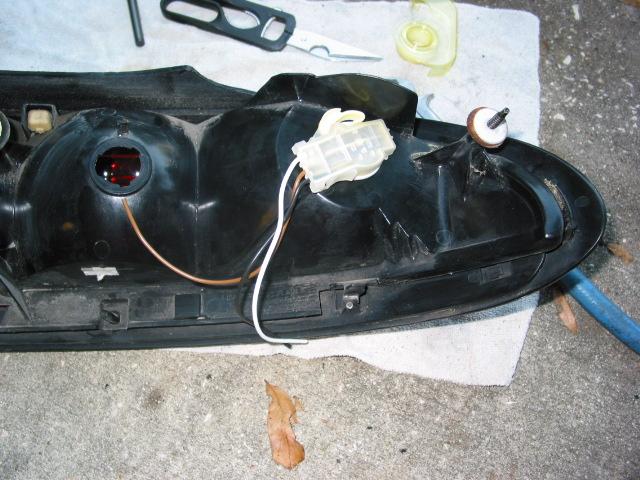
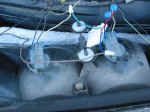
| Here is a close up picture of the wiring
you'll be working with. The back-up light socket isn't shown and is further to the
right. When describing these separate light compartments
I'll refer to them as the INNER, MIDDLE, and OUTER. The inner is closest to the
center of the car :)
From the factory, the inner compartment uses a 3 wire socket.
The 3 wire socket is so a dual filament bulb can be used. One filament is for
the blinker and brakes and the other filament is for the tail lights. The
middle compartment is the same as the inner and also uses a 3 wire socket. The outer
compartment is used ONLY for tail lights (no blinker/brake function) so only has a 2 wire
socket with single filament bulb. |
 |
|
|
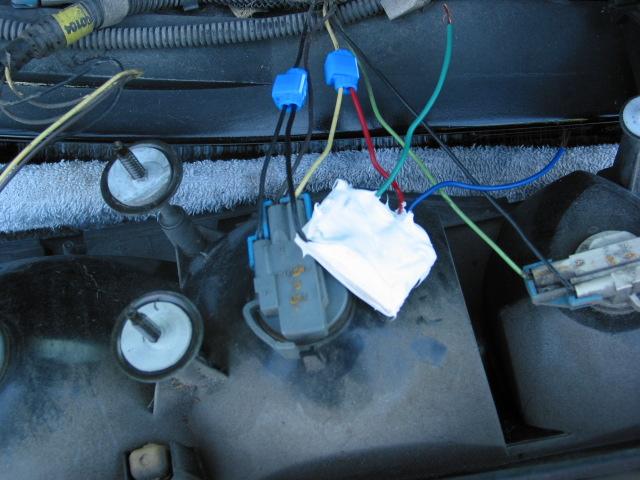
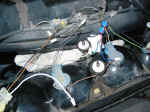
| We are first going to connect the
sequencer module to the inner 3 wire socket. There are three wires on this factory
socket. A BLACK wire for ground, a YELLOW wire for the
blinker and brakes, and a BROWN wire for tail lights. I used blue quick splice connectors to make these connections. These
can be purchased at any auto parts store or Radio Shack. If you don't have these you
can simply cut the wire then twist the three wires together.
Splice the sequencer's BLACK wire to the socket's BLACK wire.
Splice the sequencer's RED wire into the socket's YELLOW wire. NOTE: Remember, I'm only detailing the
driver side install. All connections will be the same with the exception of the YELLOW wire shown here. On the passenger side, splice into
the GREEN wire. This completes the inner socket
hook-ups. |
 |
|
|
| Now move to the middle socket.
CUT the middle socket's YELLOW wire (GREEN for passenger side). For the wire leading back into the
car, tape it up or cap it as it will not be used. Connect the sequencer's GREEN wire to the socket's YELLOW wire
(GREEN for passenger side). |
 |
|
|
| Up to this point the installation has
been the same for both the Basic Install or Full Install. The outer tail light is
where the difference is at. With the Basic Install Kit you will use the factory 2
wire (single filament bulb) socket. From the factory this bulb is used only for tail
lights. You are going to change this so it is used only for the blinker and brake
lights. If you purchased the Full Install Kit you received another 3 wire socket.
The Full Install Kit allows you to not only have the outer compartment act as a
blinker/brake light but you'll also maintain it as a tail light too. I prefer the
Full Install even though it is the most difficult part of the install. I think
things look much better with all three lights lit when the lights are on instead of just
the inner and middle (which is all you'd have with the Basic Install). Keep in mind,
if you purchased the Basic Install Kit and would like to do the Full Install, all you need
to do is go to the auto parts store and pick up a 3 wire socket. Details about this
socket are on the Camaro Sequential Tail Light Install Page. |
Basic
Install or
Full Install? |
|
|
| BASIC INSTALL: Cut the BROWN wire on the outer socket.
Tape up or cap the BROWN wire going back into the car as it
will not be used. Connect the sequencer's BLUE wire to
the outer socket's BROWN wire. You may find that you'll
need to use an additional piece of wire here like I did. For me, the wire wasn't
long enough and I had to use another hunk of wire to make the connection. The
wiring is now complete! Put the tail light back in place and test it out to ensure
everything works and is connected properly prior to putting it all back together ;)
Skip the following details for the FULL INSTALL. |
|
|
|
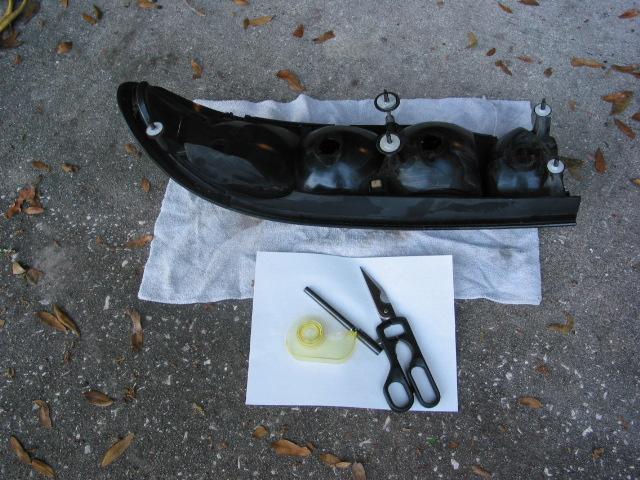
| FULL INSTALL: This
is going to take a little extra time and requires some extra tools. You'll need to
disconnect all the light sockets and remove the tail light from the car. Since the
factory outer socket is a 2 wire socket and of a different style/shape than the 3 wire
socket, we need to modify the hole to accept the 3 wire socket which came in your kit or
that you purchased from the auto parts store. For this you will need a Dremel with a
cutting bit (looks similar to a drill bit), tape, paper, scissors, and permanent marker. |
 |
|
|
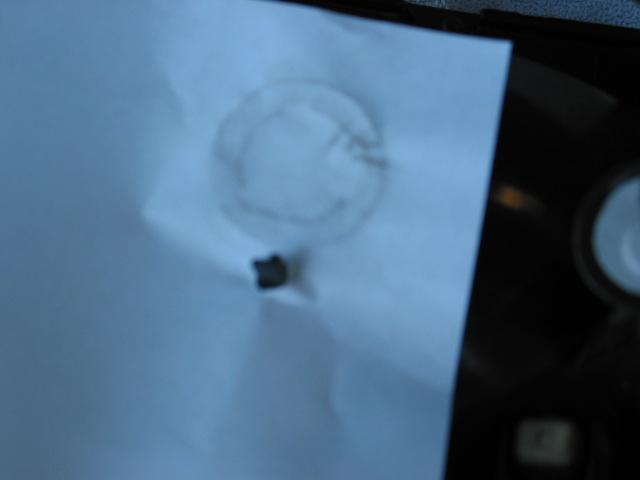
| FULL INSTALL: This
picture didn't come out all that great but will give you an idea. To modify the
socket hole, it is easiest if you make yourself a template. I found the easiest way
to do this was to stick a piece of paper over one of the other 3 wire socket holes.
There is a plastic tab that sticks up which works pretty good to hold the paper :)
Ok... now this is a bit strange, but my hands were a bit dirty from working on the car,
so, instead of using a pen to outline the socket's hole, I just rubbed my fingers around
the socket hole! The dirt transferred from my fingers onto the paper and was darker
at the edges of socket hole and thus made me a perfect template. LOL! Ok, let us
assume your hands aren't dirty enough to do this... you can hold the tail light up to the
sun and trace around the hole with a pen :) However you make your template
outline, when you are done, cut it out. :-) |
 |
|
|
| FULL INSTALL:
Tape your template over the existing hole and trace around it with a permanent
marker. You can see, if you look hard, the outline of my template in this picture.
It is important that you keep in mind the orientation of your socket when you tape
your template to trace it! You want the socket to be about like mine in the picture
when it is locked in place. If you don't do this correctly you'll end up with the
socket maybe not fitting because the "long" part will run into the vertical
plastic portion which is sticking up! |
|
|
|
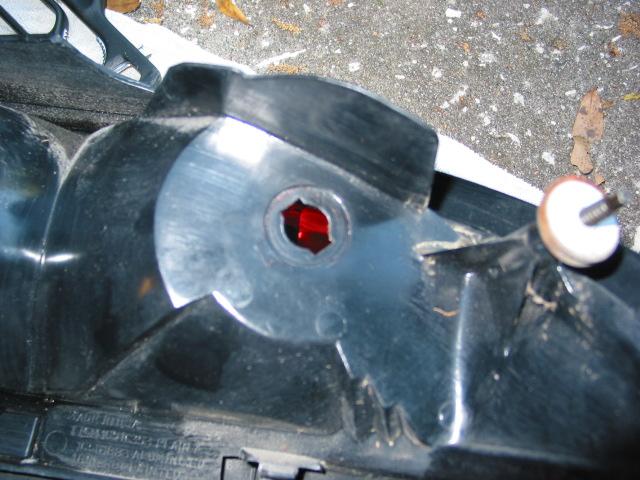
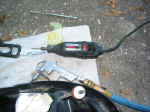
| FULL INSTALL:
The top picture here shows what it should look like after you are complete with the
Dremel. It doesn't have to be exact or pretty, just functional with a tight fitting
socket :) You can see what the Dremel bit looks like in the
bottom picture. Also, notice the air hose. You'll get some plastic shavings in
the tail light when Dremeling out the hole. I used compressed air to blow these
shavings out. |
|
|
|
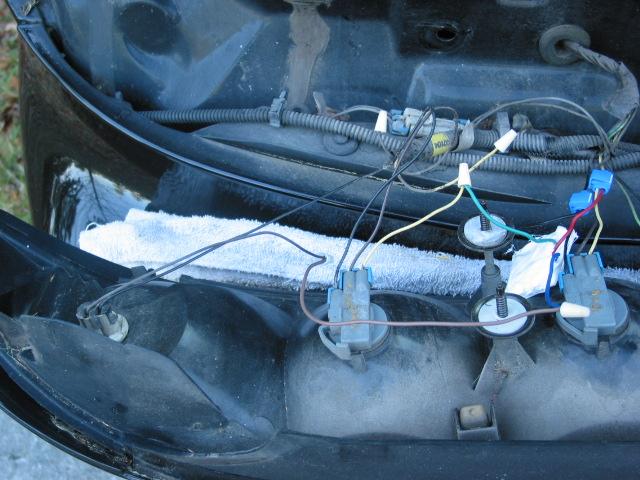
| FULL INSTALL:
With the socket installed (with an 1157 or 2057 bulb... I can't figure out the
difference and they both work???) you are now ready to make the final electrical
connections. Cut the old 2 wire socket off (two wires... BLACK and BROWN). Connect the new socket's WHITE wire to the
sequencer's BLUE wire. If you'll notice in the picture,
my wires weren't long enough so I had to add a section of wire. Connect the new
socket's BLACK wire to the BLACK wire going back into the car which you just cut.
Connect the new socket's BROWN wire to the BROWN wire going back into the car which you just cut. All
connections are now made so put the tail light back in place and test it out! You
want to make sure everything is working properly and the connections are good prior to
putting everything back together :) |
 |
|
|
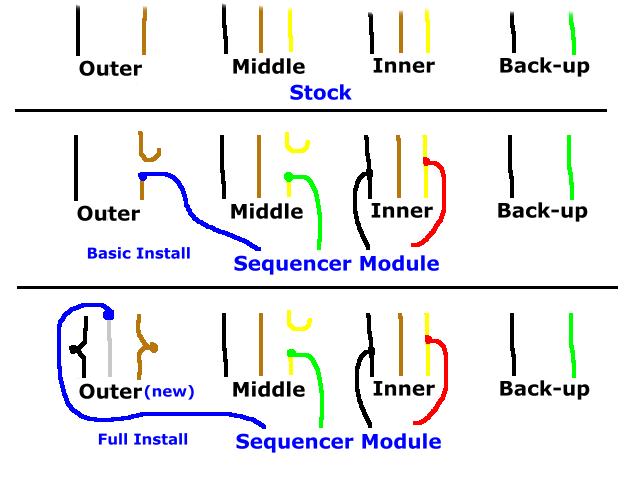
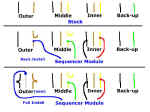
| For you electrically inclined people who
don't need exact step by step instructions, here is a simple diagram which you can print
and take out to the car with you. At the top is the wiring as it is stock. The
middle portion of the diagram shows a Basic Installation. The bottom portion shows a
Full Installation with the new outer socket. Note: In the diagram the GRAY wire is
really the socket's WHITE wire. If I have to explain why I didn't make the wire
WHITE you'll need to have somebody else install this for you. LOL! :-) Also, please
excuse the non professional drawing. I have a CAD program but just whipped this out
quickly in my basic paint type program :) |
 |
|
|
| Well, that's it! All
that is left is to button everything back up and enjoy your new sequencing blinker and
brake lights! I suggest before you start this project to
also take a look at the page I made for doing this on a Camaro here.
You may also notice that with the Camaro you need a different
flasher. On my Trans Am this didn't seem to be required. I haven't pulled my
dash apart yet to check but I expect the Trans Am flasher may be different than the Camaro
flasher due to the fact that the Camaro only blinked one light in the rear where as the
Trans Am/Firebird blinks two. However, if you find the blinkers are blinking a
little too fast for you, you can try a hazard flasher to slow them down. This is
flasher #552. |
|
|