I had
added sequential lights on my 1994 Camaro Z28 and now have them on my 1996SS as
well! Let me tell you, this mod is well worth it because these things are very cool
and certainly are an attention getter! Heck, if for nothing else, not only does this
add some spice to your "blah" tail lights but it increases safety as well.
When you step on your brakes instead of just the center section coming on bright, each of
the three sections initially sequence on! Plus, with your stock signals only the
middle red section blinks when you are signaling but now all three sections blink and
sequence on the Camaro... on the Firebird you get two bright sections from the factory but
now all three just like the Camaro with the sequencers. So you are bound to stick
out a little more both when you are signaling and braking!
On my 1994 Camaro Z28 I ended up using a kit that required
modifying the outer socket to accept a large dual filiment bulb so I could have all three
sections lit (dim) for when the lights are on normally at night as well as all three
sections be bright for the turn signals and brake lights. With this new sequencer,
however, you get the same effect but do NOT have to modify the outer socket... just use a
921 bulb and you are good to go as the sequencer is designed to give partial voltage for
the normal lights and full voltage for the brakes and turn signals. Much easier
install!
I'll first start off by describing a little about just what
this kit does and also show you how this compares to a stock 93 to 96 Camaro Tail light.
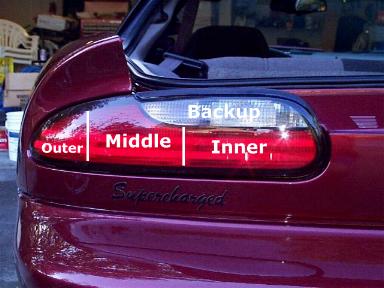
Listed below are the different sections of the
Camaro tail light
Below is the layout for a stock tail light
Parking light
Parking light
Brake light
Turn signal
Backup light
Parking light
Below is the layout you'll have once
you are complete with this install
(B) = Bulb Bright Filament (D) = Bulb Dim Filament
Parking light (D)
Turn signal 3rd (B)
Brake 3rd (B)
Parking light (D)
Turn signal 2nd (B)
Brake 2nd (B)
Backup light
Parking light (D)
Turn Signal 1st (B)
Brake 1st (B)
After the install, you'll end up (per
side) with 3 sequenced brake lights instead of just the 1 in the middle and 3 sequenced
turn signal lights instead of just the 1 middle.
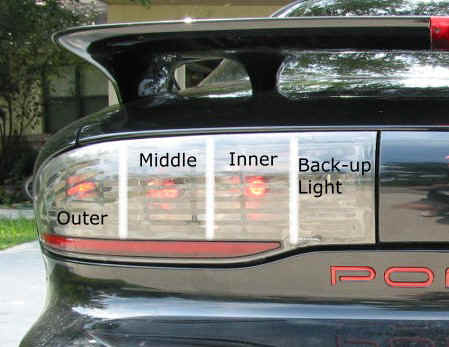
FIREBIRD/TRANS AM
Listed below are the different sections of the
Firebird/Trans Am tail light
Below is the layout for a stock tail light
Parking light
Parking light
Brake light
Turn signal
Parking light
Brake light
Turn signal
Backup light
Below is the layout you'll have once
you are complete with this install
(B) = Bulb Bright Filament (D) = Bulb Dim Filament
Parking light (D)
Turn signal 3rd (B)
Brake 3rd (B)
Parking light (D)
Turn signal 2nd (B)
Brake 2nd (B)
Parking light (D)
Turn Signal 1st (B)
Brake 1st (B)
Backup light
After the install, you'll end up (per
side) with 3 sequenced brake lights instead of just the inner and middle and 3 sequenced
turn signal lights instead of just the inner and middle.
Now on to the install!
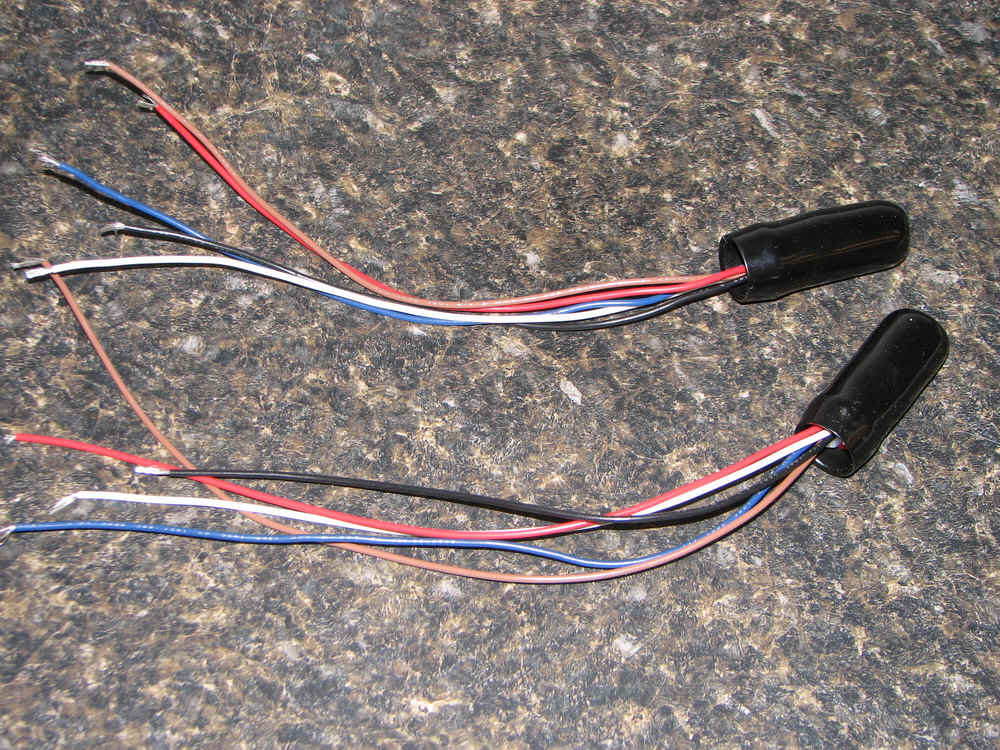
Here is a picture of the sequencer modules.
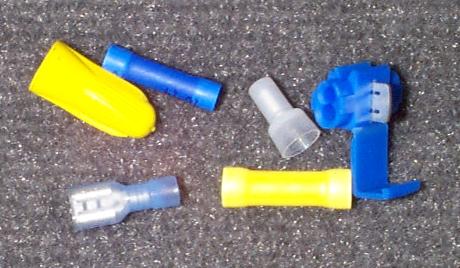
In addition to the sequencers, you'll also need your
basic tools for crimping wires and making electrical connections. I used blue Sotch Lok
connectors (far right of picture) for splicing and either butt connectors or crimp caps
(top middle) for other connections. A nice pair of wire cutters/strippers is also
recommended! Note: other items pictured you'll not need.
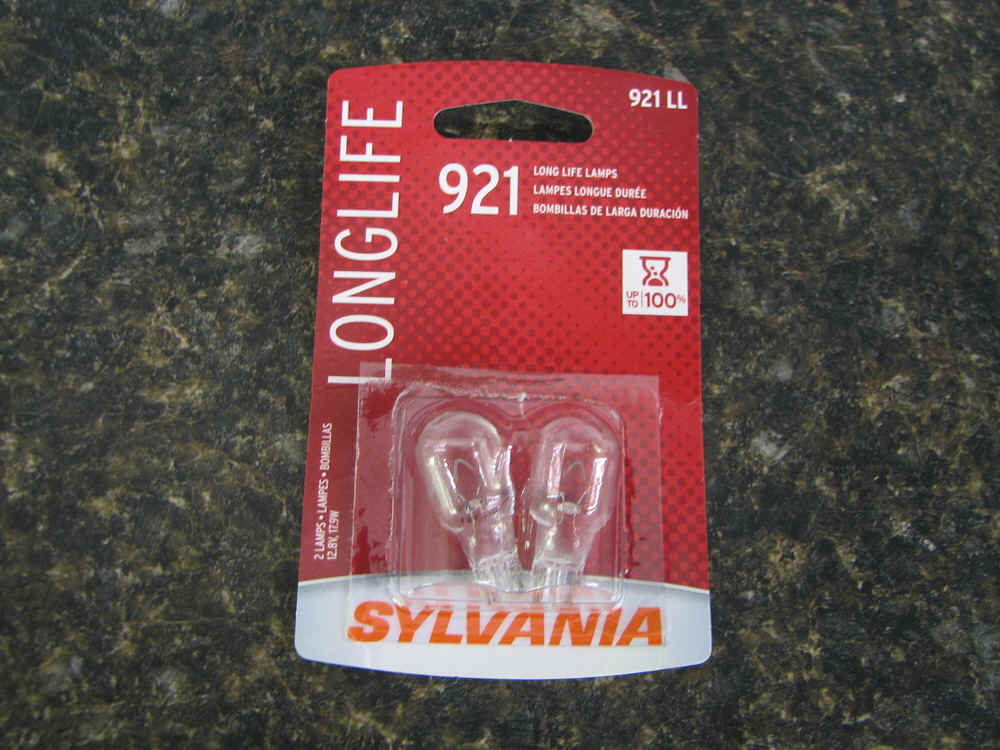
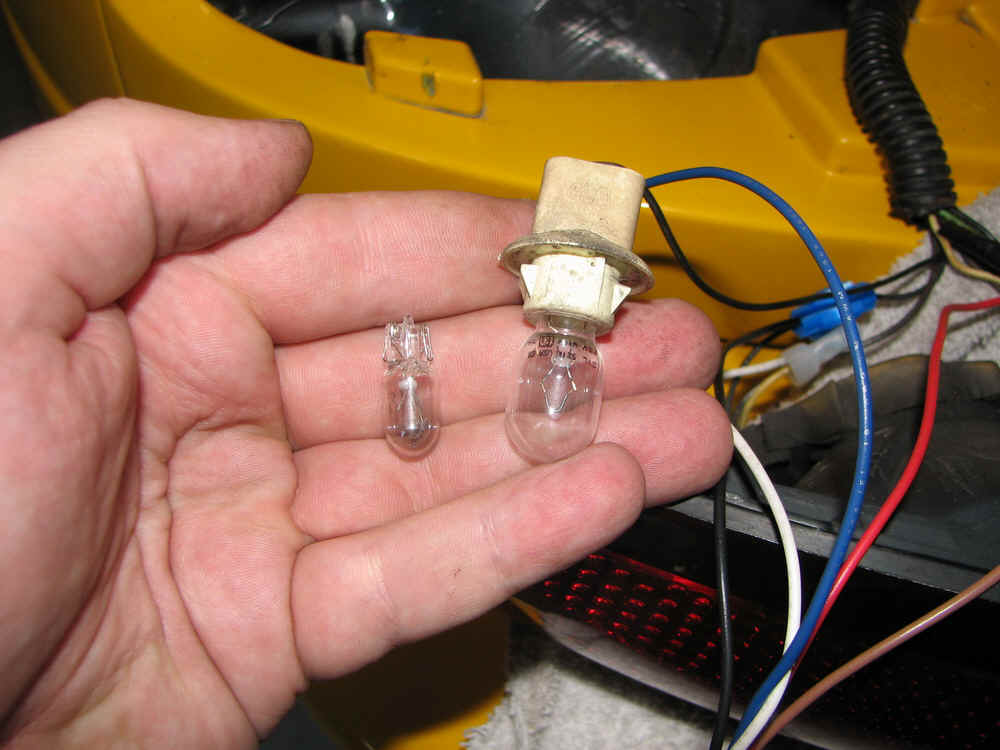
For both the Camaro and Firebird install you'll need a
pack of 921 bulbs. These bulbs will replace the 194 bulbs currently in your outer
sockets.
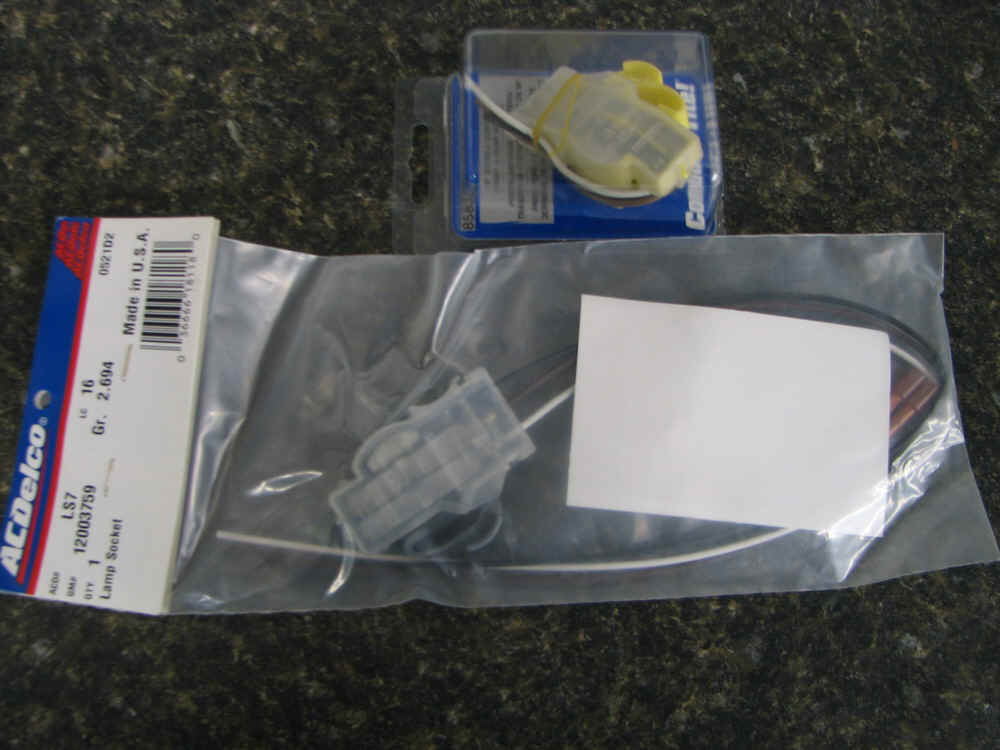
For the Camaro install, because it only has the dual
filament socket in the middle, you'll also need two additional dual filament sockets.
You can get a "generic" socket from a place like AutoZone or a genuine GM
socket (part number 12003759). Firebird guys don't need this because their inner
sockets already accept dual filament bulbs! Pictured here are both a generic socket
as well as a GM socket.
Now, you may or may not need a new flasher. I
have found that on each of the installs I have done, I personally have needed a hazard
flasher to replace my turn signal flasher due to the lights sequencing too fast and the
outer light barely lighting. The hazard flasher slows down the time between the full
sequence series and thus allows the outer light to stay on the perfect amount of time.
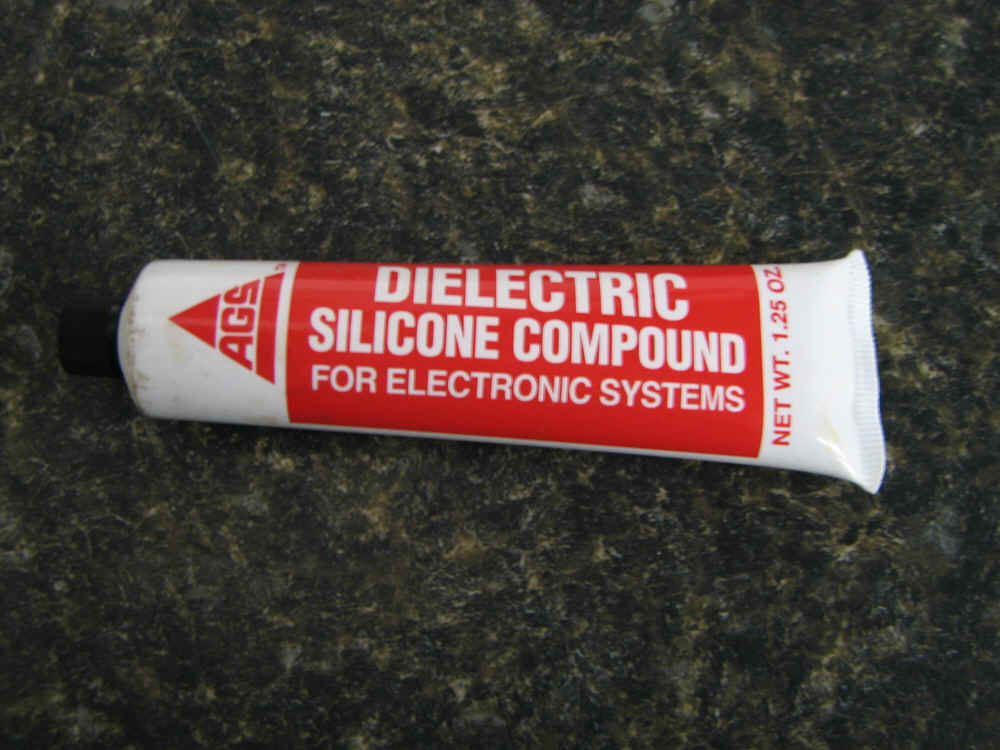
If you are doing the install on a Camaro, I also
recommend some type of dielectric grease. You should fill up the new socket with
this grease/silicone as it helps to preserve the connection and prevent corrosion.
There are many different kinds/brands that will work just fine.
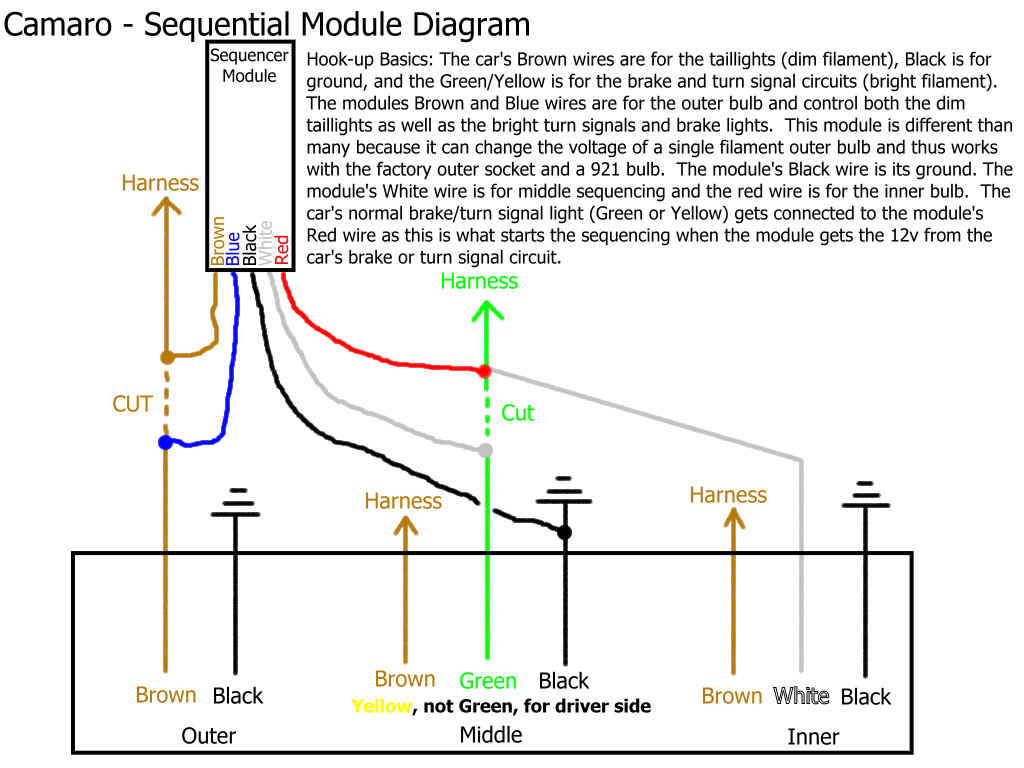
There are 5 wires on each sequencer module. Black, Red, Brown,
Blue, and White. Black is ground, Red is what gets voltage from the car's brake/blinker circuit, Brown and Blue are used for the outer
light, and White is used for the inner light.
If you don't
need detailed step by step installation instructions and just need a wiring diagram,
simply print the graphic to the right and you can skip the rest of this install!
Even if you read through the rest of this install, it won't be a bad idea to print this
any and take to the car as a reference while hooking it all up!
The detailed install below will detail how to remove the panels
from the Camaro and then start with the outer light.
For panel removal, the pictures shown are for the
Camaro but the Firebird will be very similar.
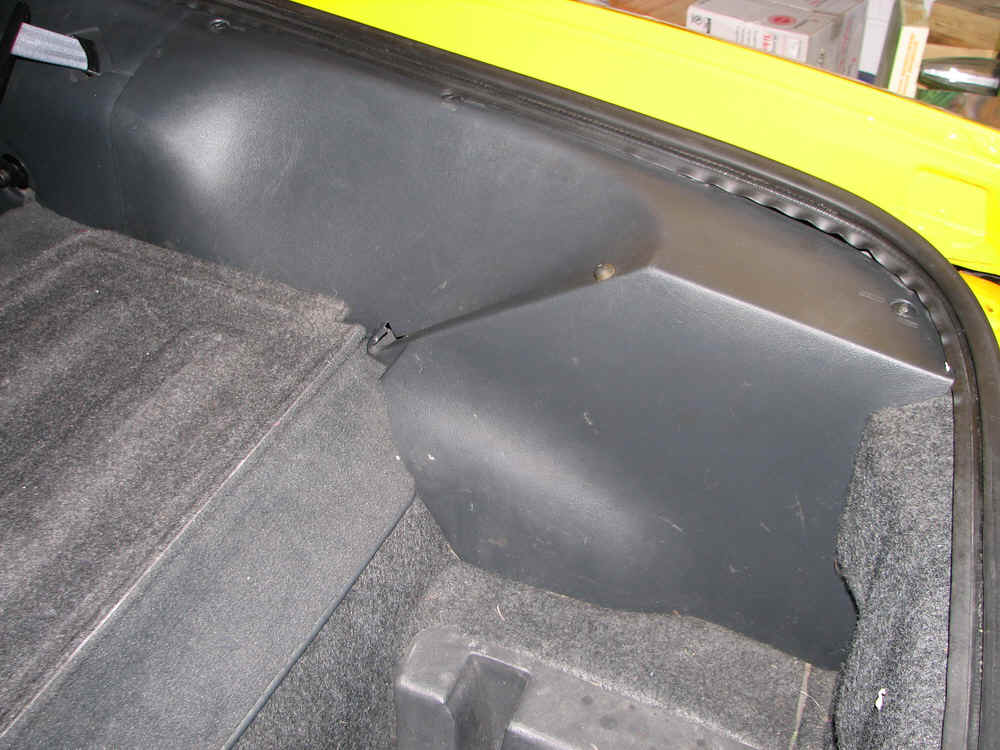
We need to
remove both rear side panels from inside the car to gain access to the two thumb type
plastic "nuts" which hold the light in place. The passener side where the
spare tire is located has three large plastic fastners. Turn these to the
"unlock" position with a quarter.
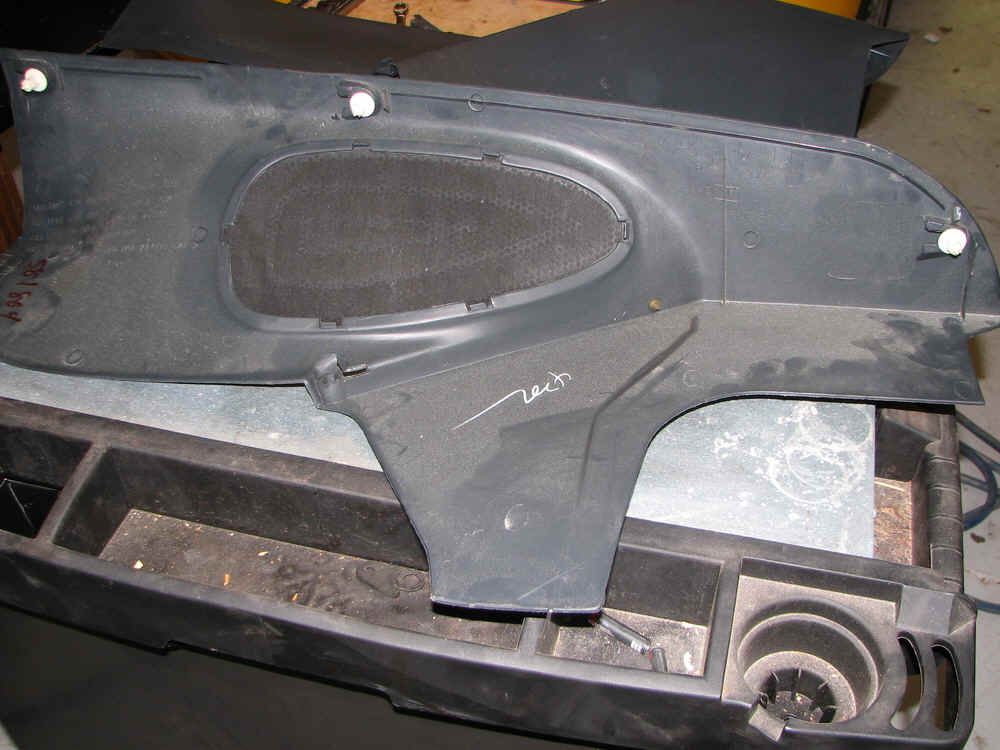
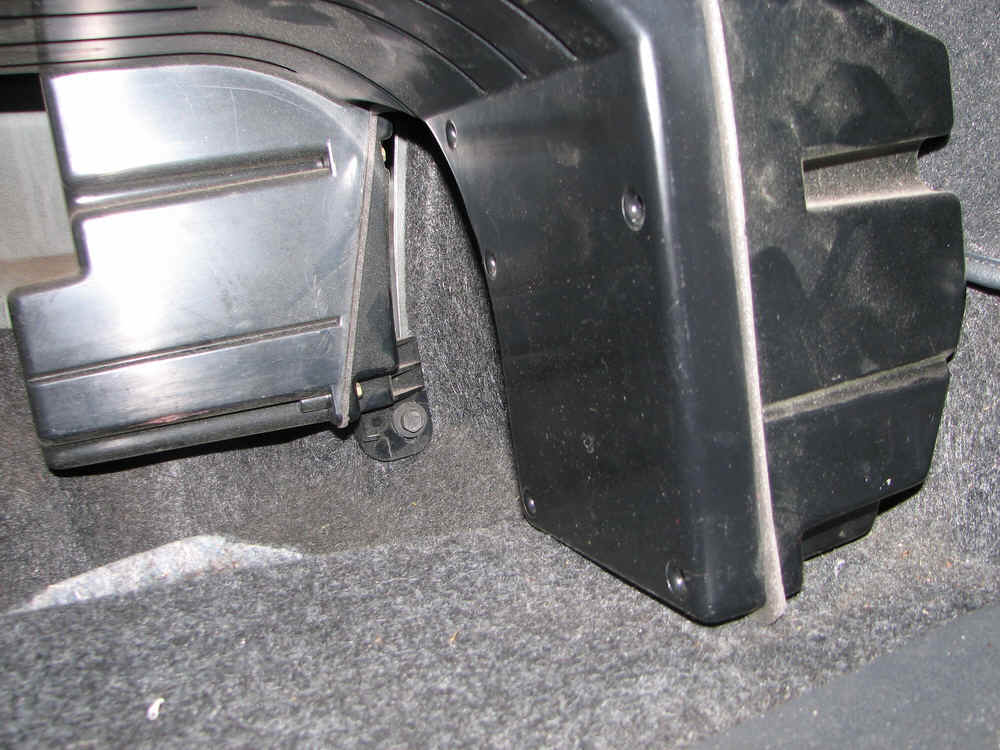
On the driver side, you just need to pull up on the
panel to release the ribbed plastic fastners.
The second
picture shows what these ribbed fastners look like. Once you have the panel removed,
check to see if any of these remain in the metal clips in the car. If so, remove
them and slide them back in their spot on the rear panel.
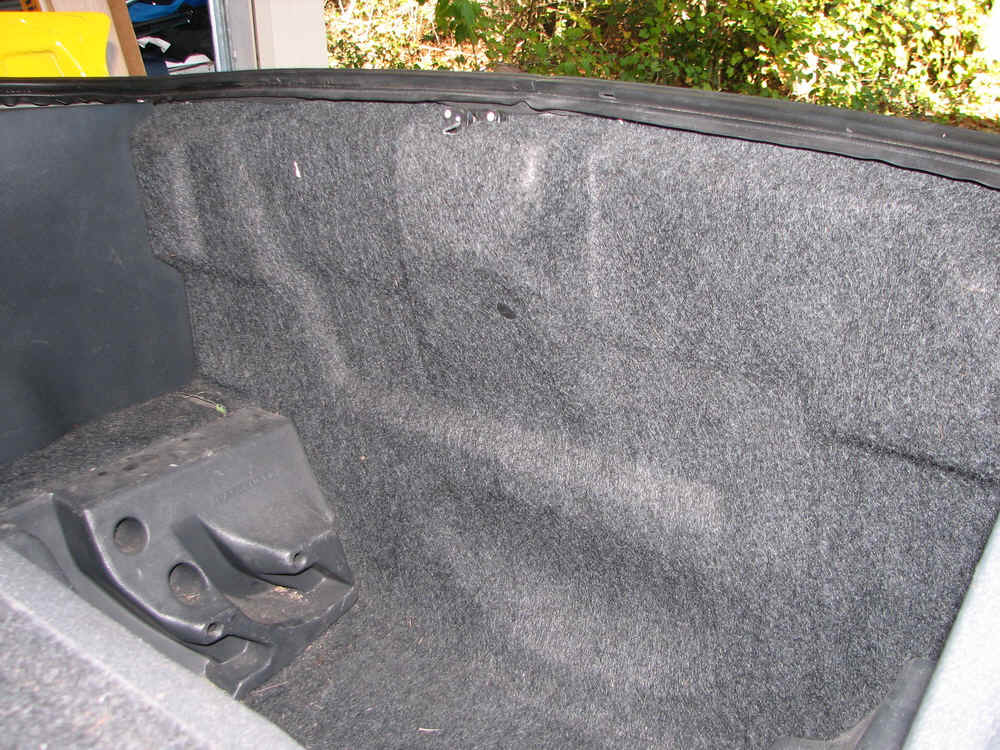
For the rear carpet panel, you don't need to remove
it. It is flexible enough that it can be moved far enough out of the way.
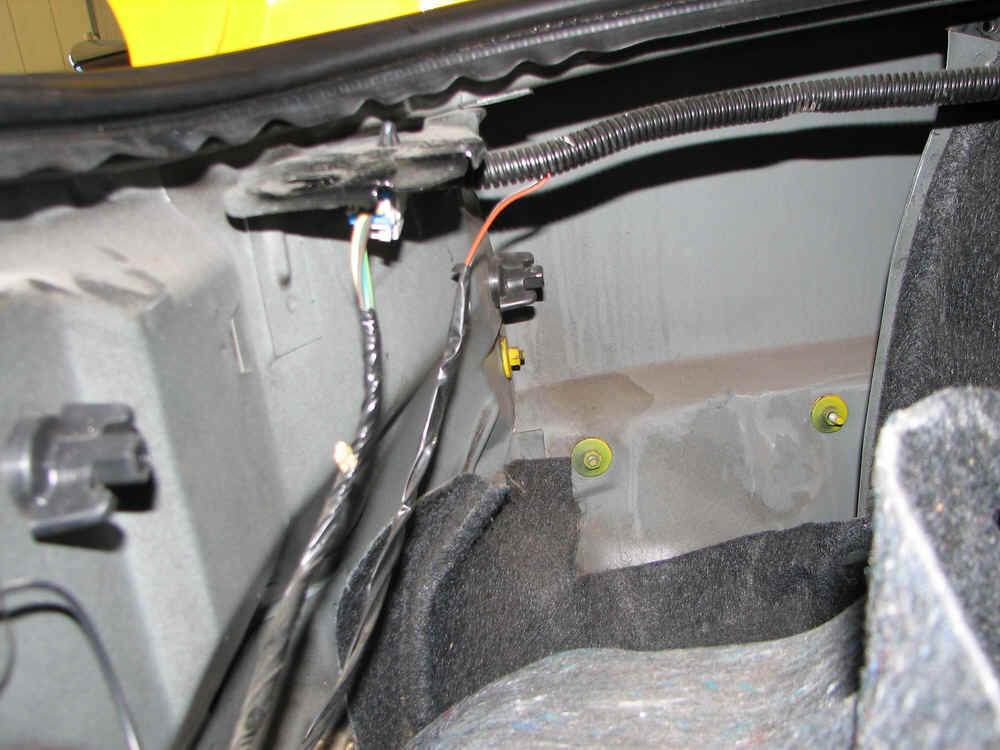
With the side panels removed, you need to remove the
plastic thumb fastners. There are two for each light. On the passnger side,
depending on the size of your hands you may also need to remove the spare tire to get
access to it.
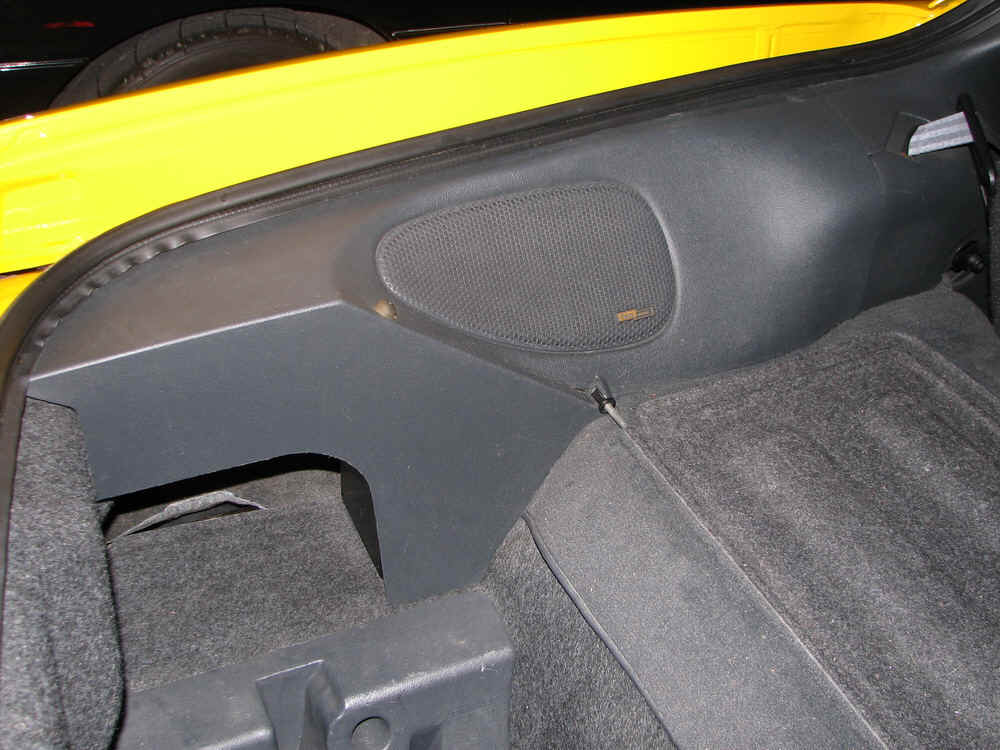
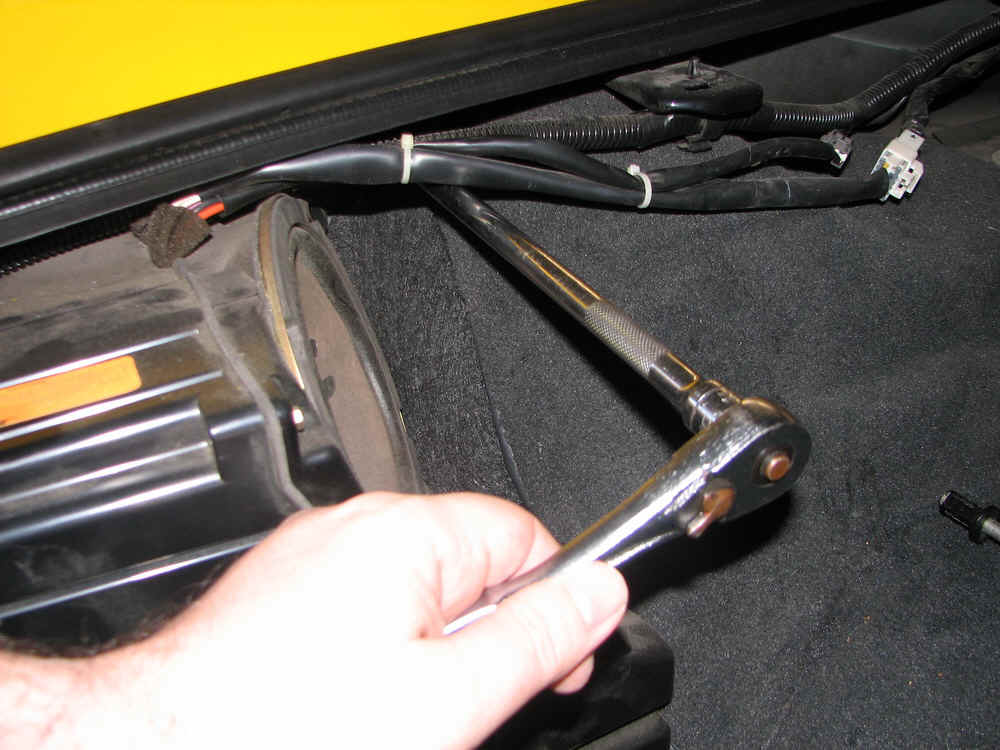
On the driver side there are a couple of 10mm bolts
which hold the speaker in place which need to be removed. You may have something
different here depending on your type of stereo option.
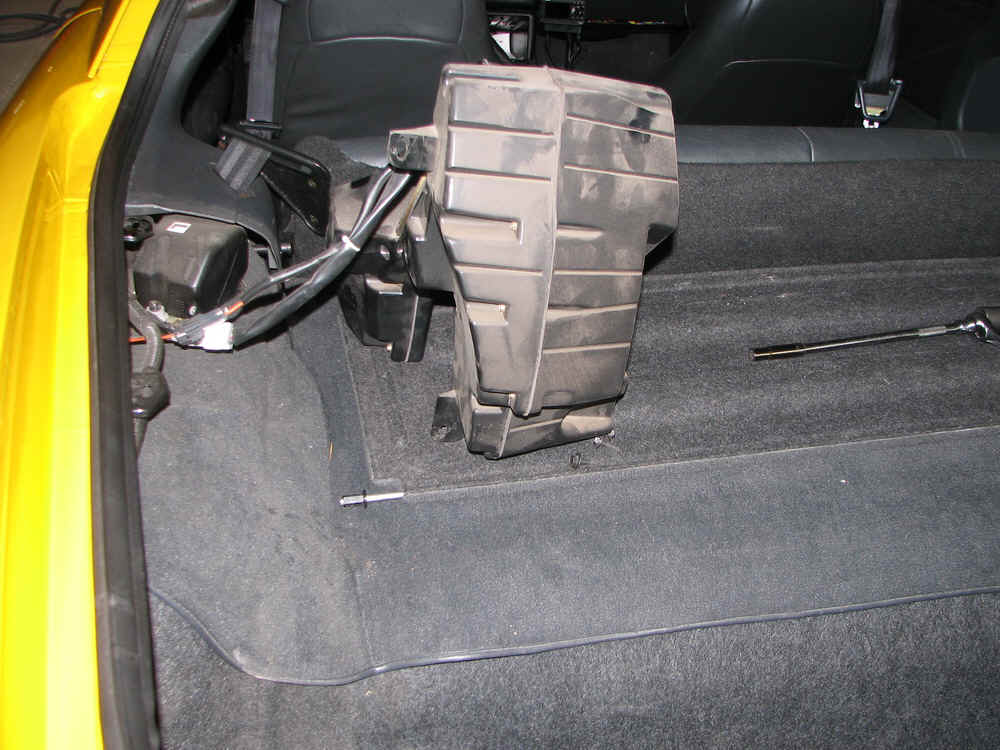
With the two 10mm bolts removed, I just left the
speaker box connected and moved it up and out of the way.
Now that the speaker box is out of the way, you have
access to the two plastic fasteners on the driver side.
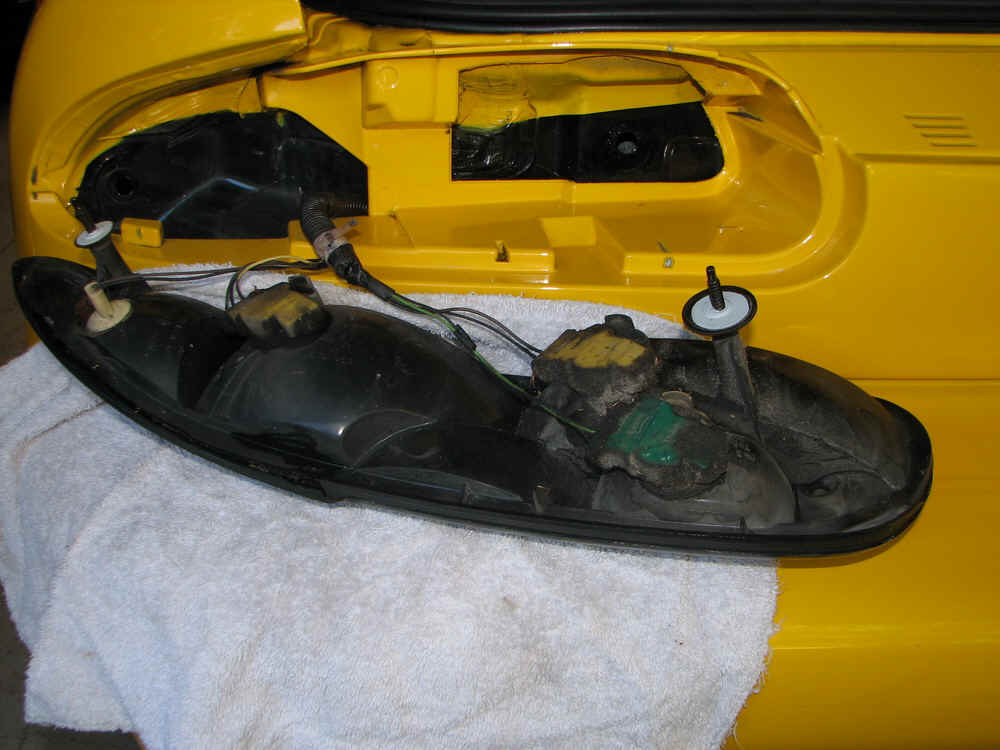
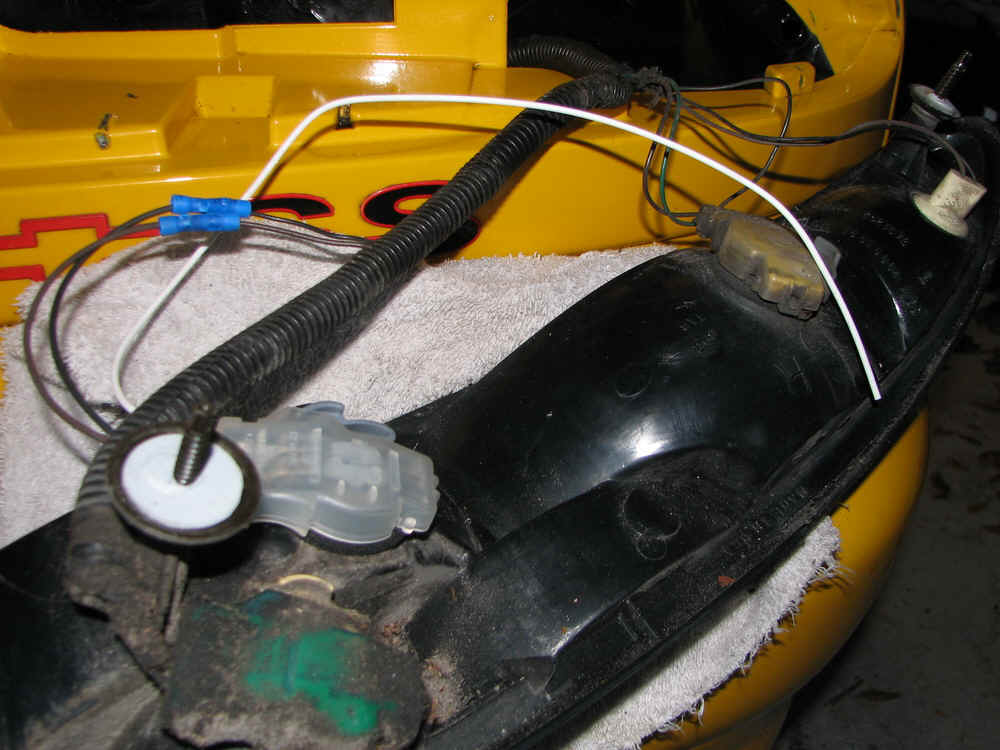
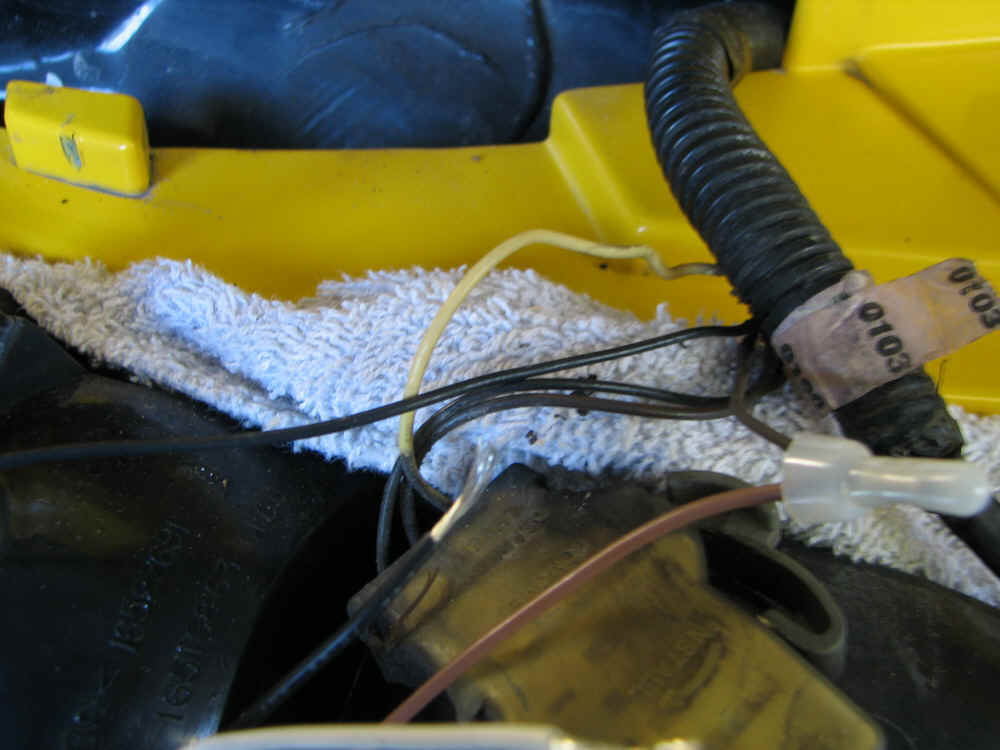
With both lights ready to remove, you can now pull the
light straight out and rest it on the bumper. If you care about your paint, you'll
want to lay down a towel as shown here.
Now that we can see the wiring on both sides, time to
hook up the modules!
I'll show pictures of how to do this on
the passenger side starting with installation of the 921 bulb. Remove the 194 bulb
and replace it with a 921 bulb. Picture here are the two... the 921 is the larger
bulb.
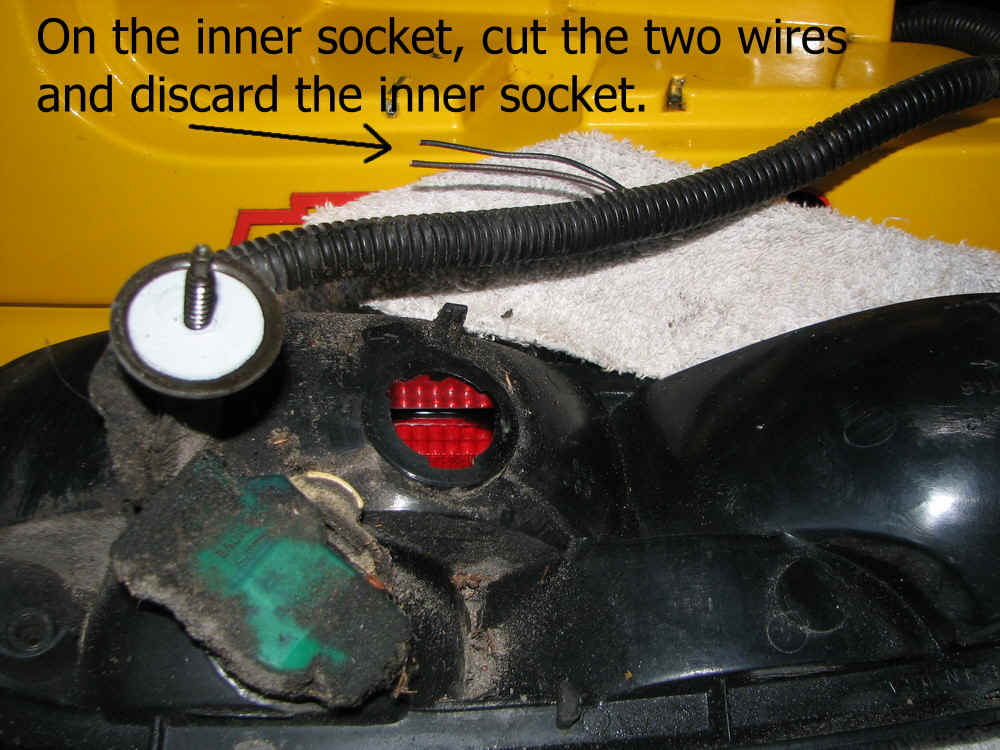
Passenger Side - Inner socket
install
Camaro: Cut the
two wires to the inner socket (not the reverse lights!) and discard the socket. Be
sure to leave yourself plenty of wire to work with.
Get your new dual filament socket and put some dielectric grease in
the area of the contacts. Install a 2057 bulb and install the new socket.
I used a GM socket so connect the socket's Black wire
to the Black wire
you just cut and the socket's Brown wire to the Brown wire you just cut as shown
in the 2nd picture. The White wire will connect to the sequencer module.
Firebird: The Firebird already has the
correct socket so simply splice into the passenger side Green
wire with the sequencer's Red wire. This can be done with a
blue Scotch Lok connector or you can cut the Green wire and twist the two Green wires back together along
with the sequencer's Red wire.
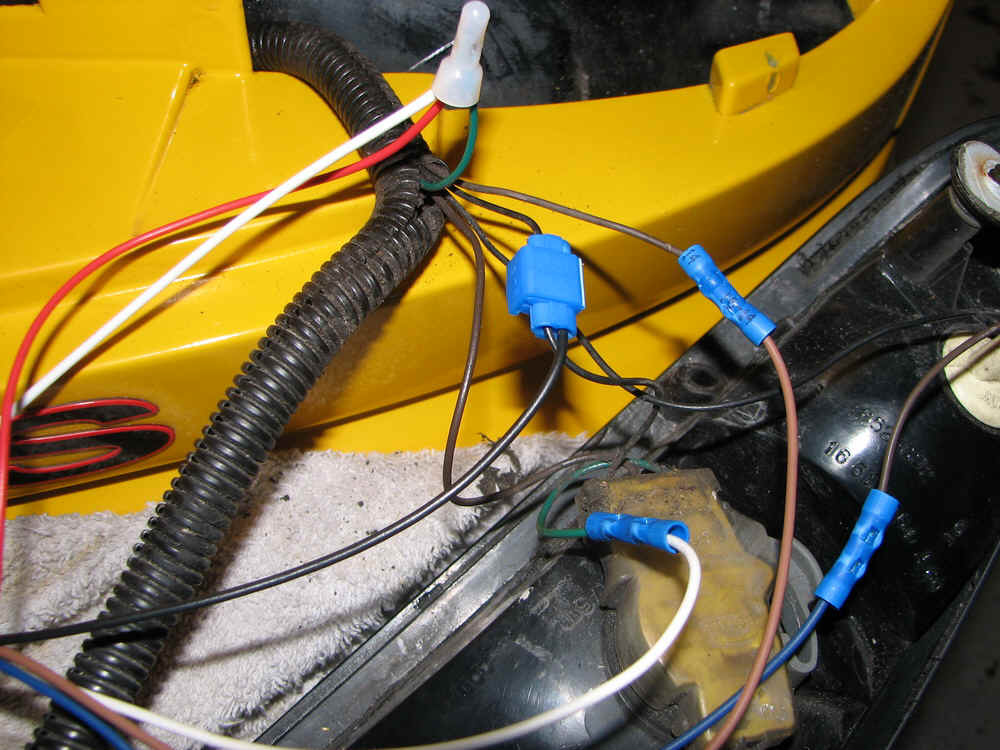
While the modules are desinged to be water resistant,
I went ahead and added some extra precautions by applying some duct tape...just to be
sure! (First picture)
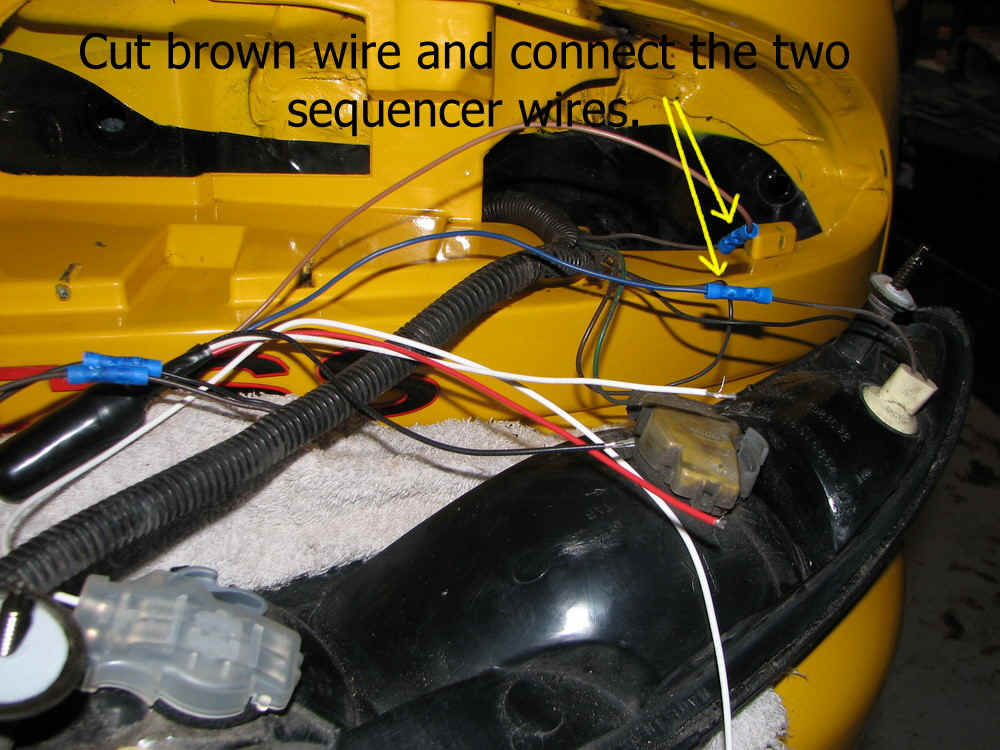
Passenger
Side - Outer hook-up
Camaro: Cut the outer socket's Brown wire. Connect the
sequener's Blue wire to the Brown wire of the socket and the sequencer's Brown wire to the Brown wire going back into the
car's harness.
Firebird: Same as the Camaro for the
outer socket!
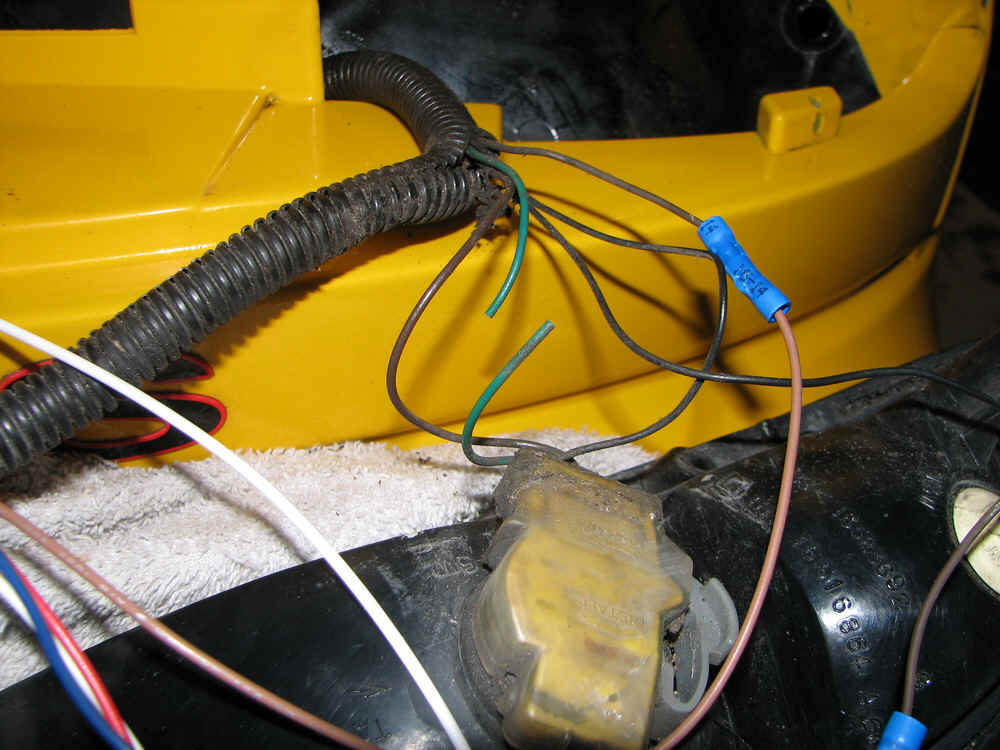
Passenger Side - Middle
hook-up
Camaro: Cut the
middle socket's Green wire as shown in the first picture.
Connect the sequencer's White wire to the Green wire going to the middle socket as shown in the 2nd picture. Leave
the Green wire going back into the car's harness alone for now... that is now going to be
used to power the sequencer and light the inner socket.
Firebird: Same as the Camaro for the
middle socket too! But, for the Firebird, the Green wire going into the harness will be
"extra" and you can tape this up or cap it off as it will not be used. The
signal from the car's brake light/turn signal circuit we'll get from the inner socket.
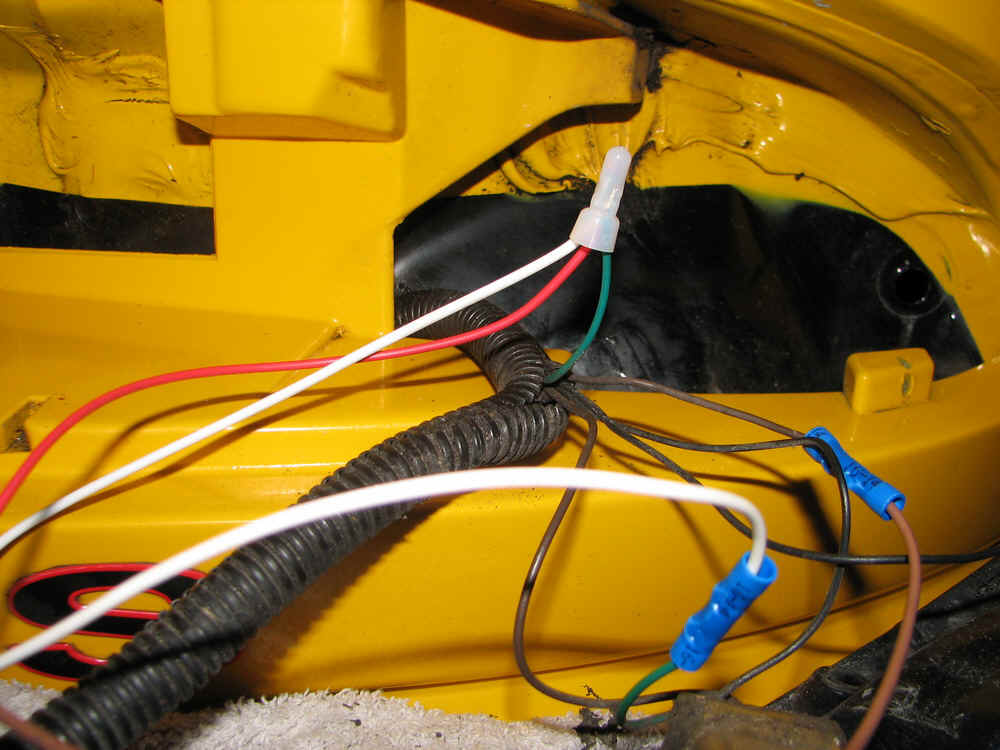
Passenger Side - Inner hook-up
Camaro: On the Camaro if you installed a GM
socket, you still have an extra White wire. (If you are using a generic socket,
you'll need to use that socket's wire which lights the bright bulb filament) Take this
White wire, the sequencer's Red wire, and the Green going back into the car's harness originally from the middle socket, and
connect these all together as shown in the picture. I used a clear crimp cap here as
I prefer them over wire nuts.
Firebird: The Firebird already has the
correct socket so simply splice into the passenger side Green
wire with the sequencer's Red wire. This can be done with a
blue Scotch Lok connector or you can cut the Green wire and twist the two Green wires back together along
with the sequencer's Red wire.
Passenger Side - Sequencer
Ground hook-up
Camaro:
I used a blue Scoth Lok connector and spliced the sequencer Black
wire into the middle socket's ground/Black wire. You can splice into any of the socket's Black wires though.
Firebird: Same as the Camaro.
Driver Side Install
The driver side install is pretty much the same as the passenger side
install. The only difference is that on the driver side, the middle socket of the
Camaro is Yellow instead of Green. The Firebird is similar with the
driver side inner and middle wires being Yellow instead of Green as well.
Pictured is the Camaro middle socket on the driver side.
That's about it!
I'd print that simplified diagram I made above and double-check all your
connections. Once you are confident you have your wired it correctly, gently set the
light back in place and test it out to ensure it is all working correctly. There is
plenty of room behind the light and in the bumper area for the module to rest. Once
verified that you have it all working correctly then button everything back up and enjoy
your new cool and safer (in my opinion!) rear lights!