    Special Thanks to LV-F-Body Association & Badassride.com for hosting this site! |

|
Special Thanks to LV-F-Body Association & Badassride.com for hosting this site! |
|
![]()
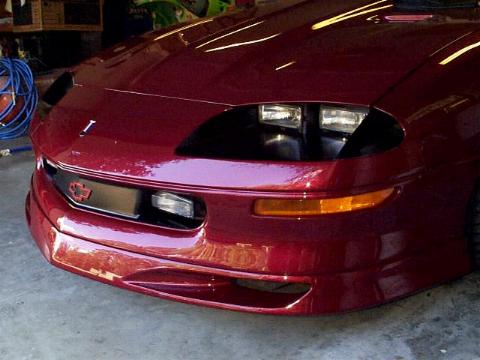
A very common question I see asked is "How do I change the fog light bulb on my 4th gen Camaro?" I've done this a few times and because of a few different projects I have done, I have gathered some pics on this little project. You'll see I am showing pics on both my 94Z and 96SS so don't get confused if it appears as though the color of the car changed mid stream :) Another reason why I wanted to make this page is because I also have heard numerous times people telling others that they need to remove their front clip in order to change this bulb and that is simply not the case!!! There are two completely different methods you can use to change this bulb and I'll describe both. The first method doesn't require going under the car at all and instead you remove the fog light itself from the front to gain access to the bulb on the back. The second method involves leaving the fog light itself in place and gaining access to the rear of the fog light from the bottom of car. I prefer method the first method because it is easier for me and takes less time. The bulb you will need for this is a #885 bulb and can be purchased at most auto parts stores. |
|
| Method #1 | |
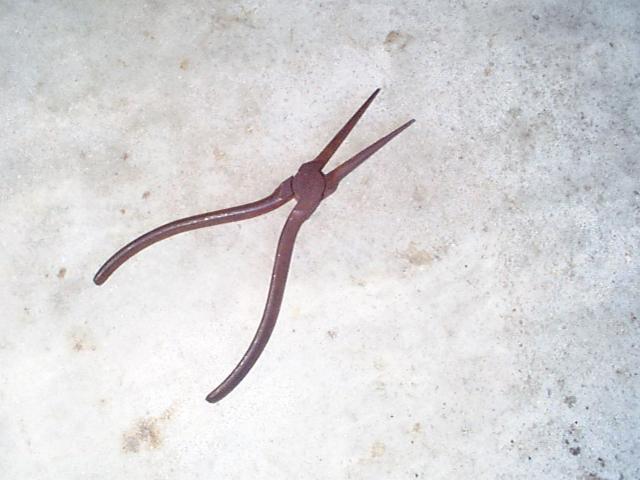
| This method requires a few simple tools. You'll need a #15 Torx driver to remove the adjustment screw from the top of the fog light. You'll also need a pair of narrow needle nose pliers. It is important they are narrow as this will make things much easier for you. A flat headed screw driver can also help you but may not be required. Pictured to the right is the type of needle nose pliers you will need. |
|
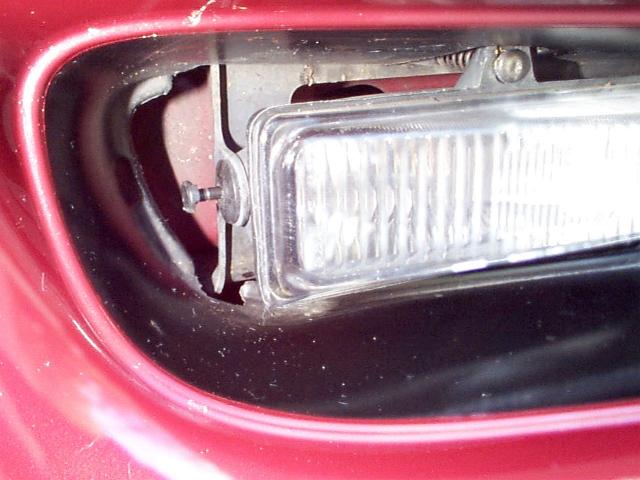
| The fog light is held in place by two plastic pins and an adjustment screw for height. The idea behind this method is to remove the two pins and screw to allow you to pull the fog light out the front and gain access to the rear side of it. This can be tricky because the plastic pins are difficult to get to. | 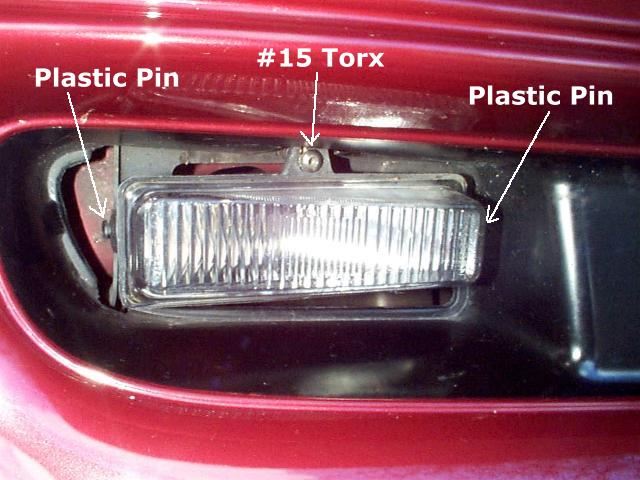 |
| In this picture you can see exactly how this plastic pin/clip works. There is a center "pin" which slides into the main clip piece. This keeps it securely in place. In order to be able to pry this clip out, the center pin needs to be pulled out slightly to release the pressure on the inside of the clip. With this clip installed, the center pin fits flush against the clip. | 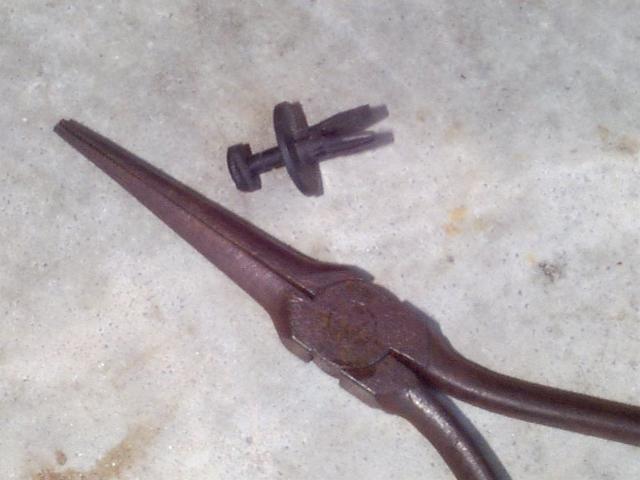 |
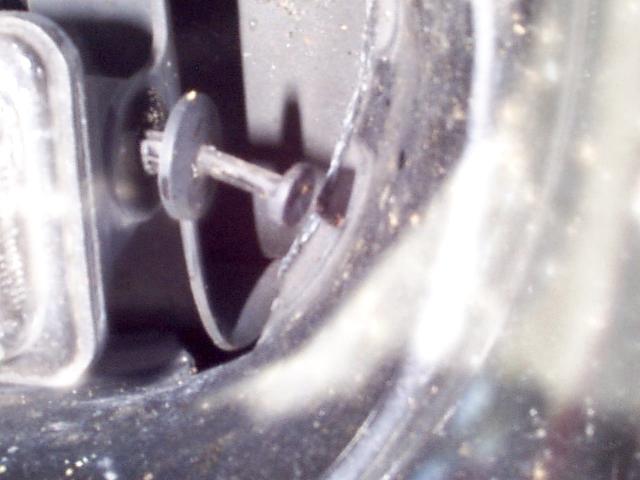
| Here you can see the center pin pulled out
slightly but far enough to allow removal of the actual clip/fastener. I don't pull
the pin out all the way but if you do, be careful to not drop it! Update: Paul K was using this page to change his fog light bulb and sent me a tip. He said he printed this page out and when he got to this point (pulling out the pin and removing the clip) he folded up the instructions a little and slid them under the light. This made it so if he dropped the pin it would fall onto the paper instead of into the front facia. Sounds like a heck of a good idea to me! |
|
| In these three pictures you can see the
process for removing the clip. The first picture shows the clip as it is normally.
The second picture has the center pin pulled out and the third has the clip
slightly pulled out from the fog light. Once you get to this point, you can use your
long, narrow, needle nose pliers to pull the clip the rest of the way out. Be
careful when doing this and make sure you have a good grip on the clip! If you drop
this piece, it will go down inside the front fascia... ask me how I know :) Yes, I
have dropped this INSIDE the fascia and it is a bit of a pain to get back! IF you do
drop the clip, you can get it out by reaching under the car and hitting the underside of
the fascia. This will "bounce" the clip to the edge. You can feel up
in there and see what I'm talking about. I just bounced mine to a point where I
could reach up in there and grab it. Even though this is possible, don't drop the
clip... it's a pain :) The inner clip is more difficult to get to because there is even less room to work with than you see pictured here. I don't have pics when removing the inside clip. You may need to push in on the fiberglass front a bit in order to be able to move your pliers enough to pull the pin/clip out. Just be careful to not scratch your paint. Once you have both clips out, you can remove the fog light adjustment screw with your #15 Torx driver. There is a spring on this screw so be careful not to lose it. |
|
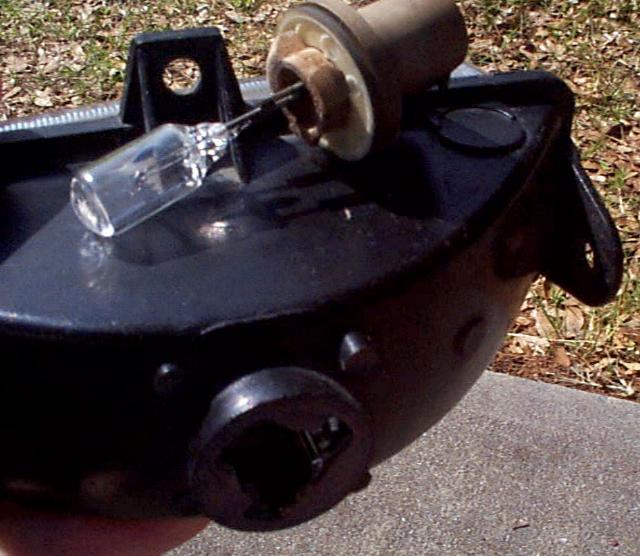
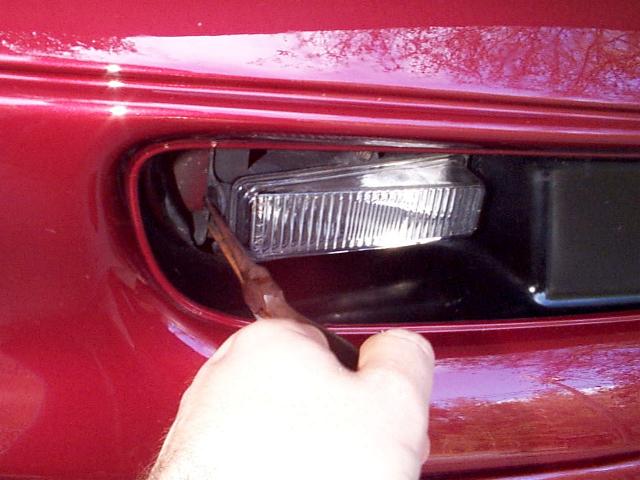
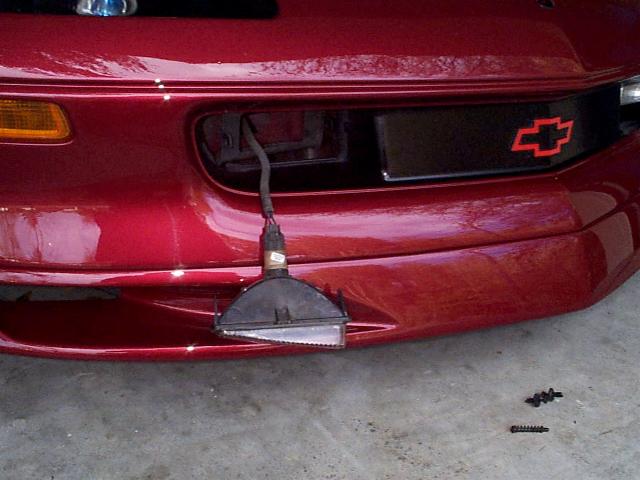
| With the two clips and adjustment screw
removed, you can simply pull the fog light to gain access to the rear as shown here to
allow you to change the bulb. It is important that you do NOT directly touch the
bulb itself. With these type bulbs, you do not one to get any oil/sweat, anything on
the lens surface. I also don't recommend using a higher wattage bulb other than what
is recommended because you risk "melting" things due to the higher heat output.
With the bulb changed, you are ready to button things back up. Just do the reverse of what was done above. There is a trick to installing the clip though. If you did remove the center pin, I have found it easier to halfway insert the pin into the clip and then, using your narrow needle nose pliers, grab the clip and insert it through the fog light bracket and fog light. This is the most difficult part of changing the bulb using this method because it may take you a couple tries to get the clip and pin inserted. Once you get the clip inserted fully, just push in the center pin and you're done. With the two clips re-installed, you can now install your adjustment screw... don't forget the spring! Now, if you are only changing one bulb at a time which will most often be the case, just wait until it gets dark and re-align the light you just changed with your other fog light by parking about 10 feet away from a garage door or wall and "matching" both beams. If you are changing both at the same time, you'll have some experimenting to do to get it right :) |
 |
Method #2 |
|
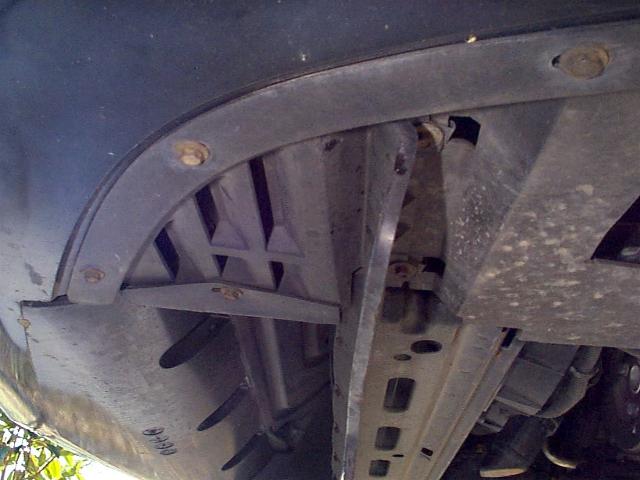
| This second method won't take nearly as much
explaining and may be the better method for you if you don't have long and narrow needle
nose pliers. I've never tried going under the car without using ramps so for this
method I'd highly recommend getting the car up a bit. If you use ramps or a jack,
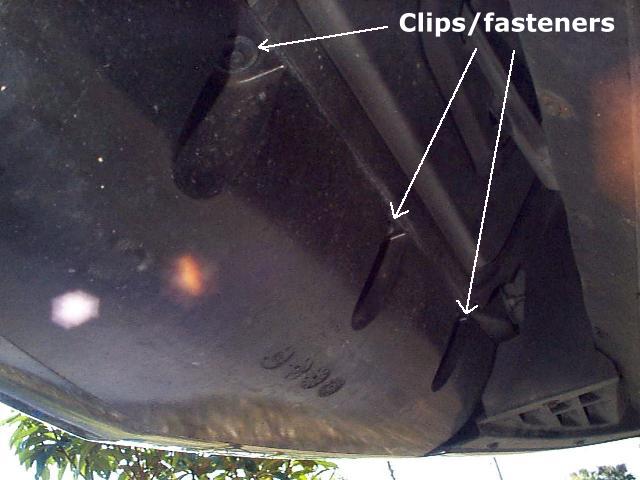
just make sure you have everything safe and secure before going under the car! Once under the car you'll see three clips similar to what I described above. These are pictured here. |
|
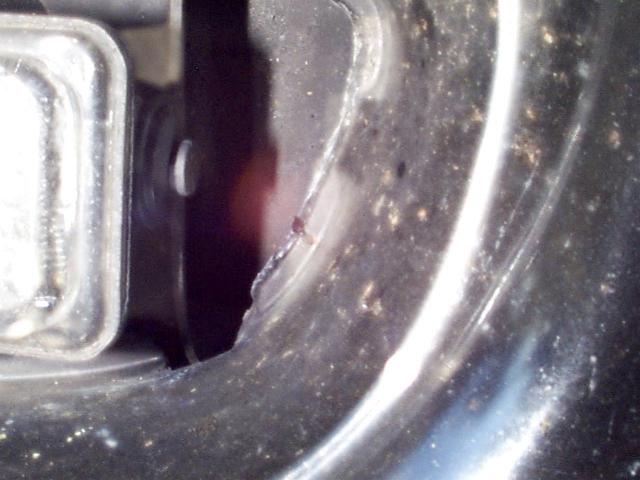
| Here is a close-up of this clip. Once these three clips are removed, you will be able to pry/pull down this piece. While holding this piece down you will be able to see the back side of the fog light and can twist the bulb out and pull the bulb and wiring out into the open a bit more. Again, when changing the bulb, be careful to NOT touch the bulb directly with your fingers. | 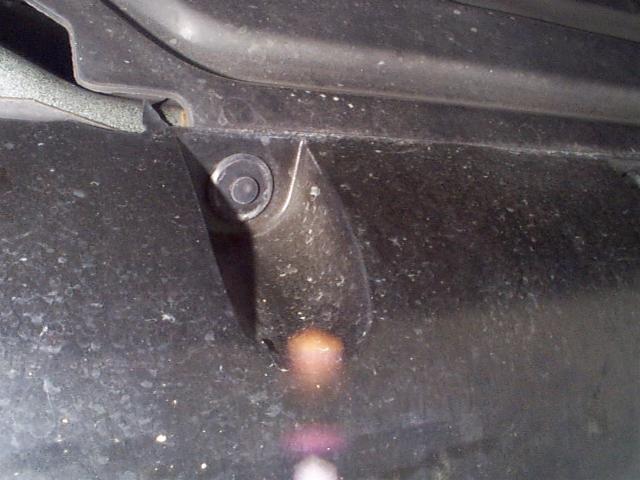 |
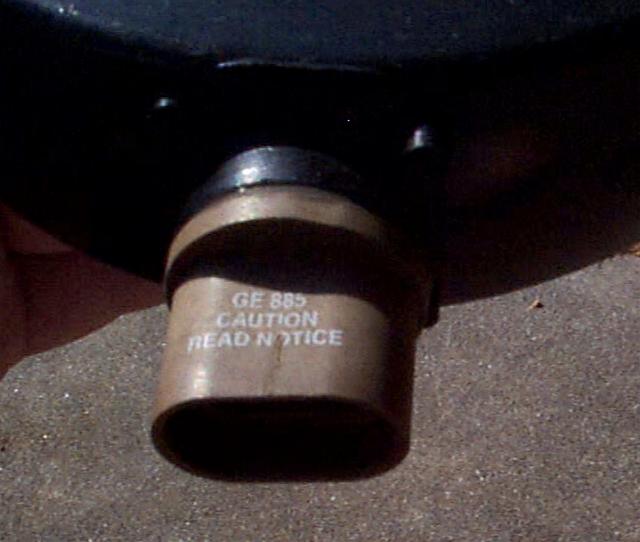
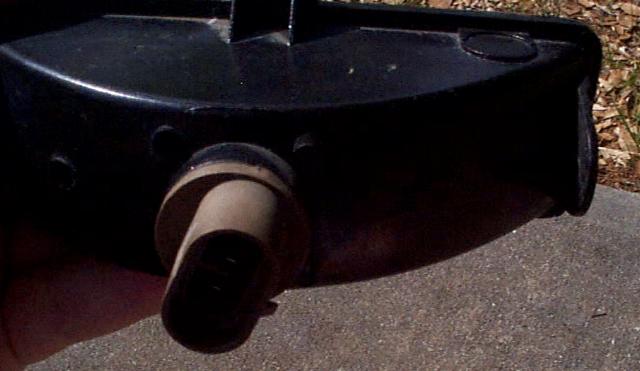
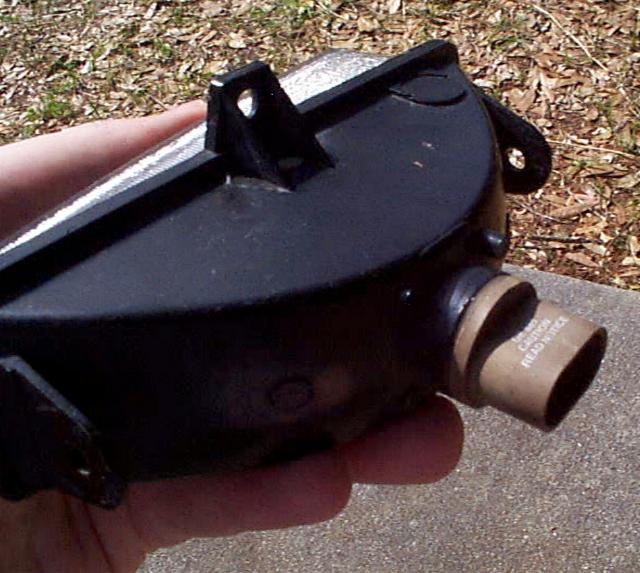
| Shown here are pics of the back of the fog
light. The first pic shows the entire fog light. You'll see that if you are
using this method it can be difficult to look up in there. Hopefully with these pics
you'll have a good enough idea of what things look like that you may not even need to see
what you are doing. The second picture shows the normal position of the fog light base itself. To remove the fog light, you twist to the left (counter clockwise) about 1/4 turn. The third picture shows this. And the fourth picture will show you what the tabs look like on the bulb and how they connect to the fog light housing. |
|
Bet you didn't think there could be so much detail to describe in changing a fog light bulb! LOL :) Hopefully this will help some of you less experienced people try to do this yourself rather than pay the dealer an outrageous price. I know of some people who have been charged over $100 to do this so if even just one of you find this useful, I'll be happy ;-) Enjoy! |
|
![]()
![]()