    Special Thanks to LV-F-Body Association & Badassride.com for hosting this site! |
 (Also including a comparison of the "old" vs "new" style Baer rotors)
|
Special Thanks to LV-F-Body Association & Badassride.com for hosting this site! |
(Also including a comparison of the "old" vs "new" style Baer rotors)
|
![]()
| Since I wanted to do all the painting at the same time, it was necessary to place jack stands under all four corners to remove all the wheels. For some jacking guidance you can check David Mills F-Body Maintenance Page. If you paint your calipers like I did it will take several days to complete this project so you'll need to park in an area where you won't need to move the car for a while ;) | 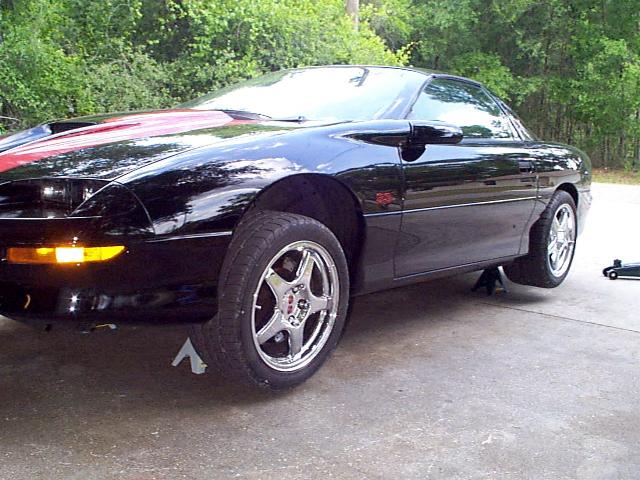 |
| Tires removed and ready to get to work! | 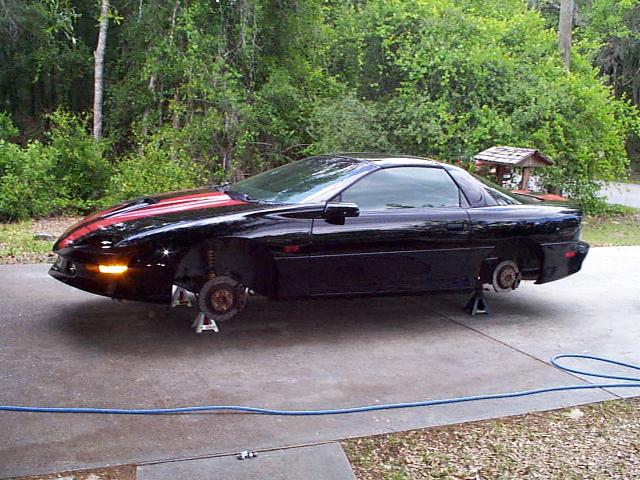 |
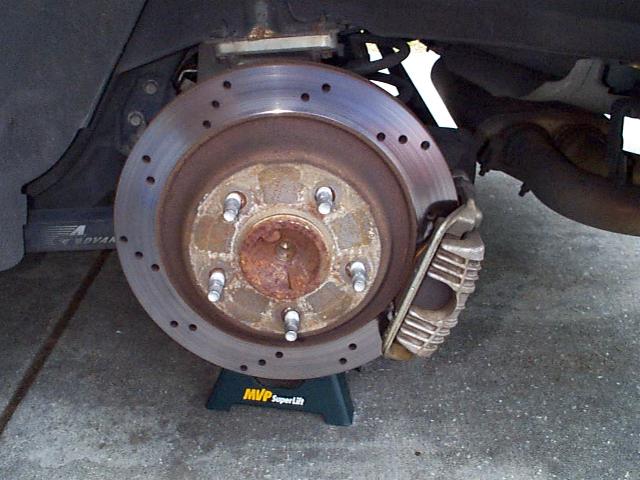
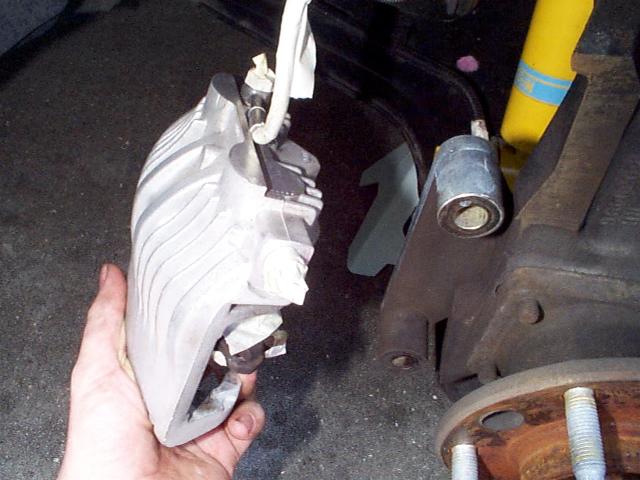
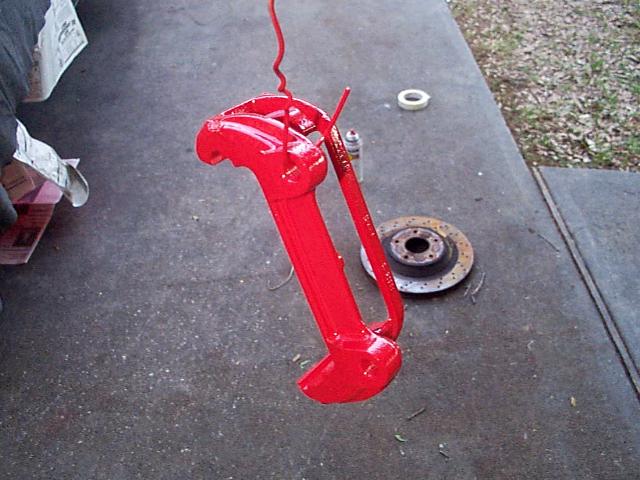
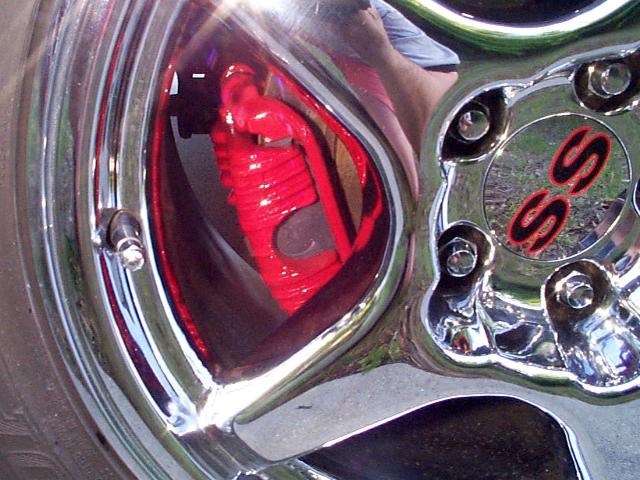
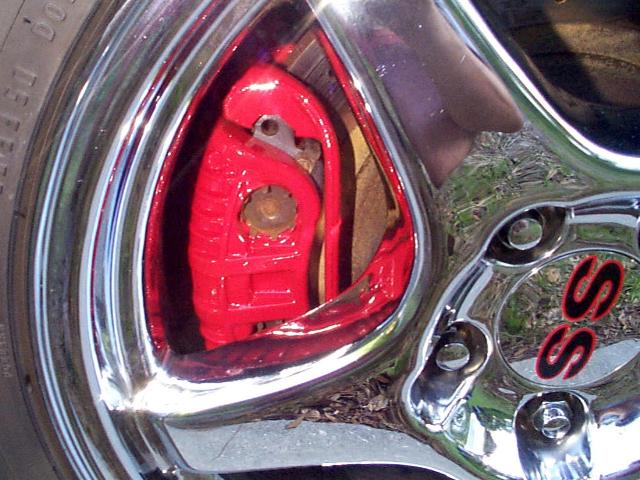
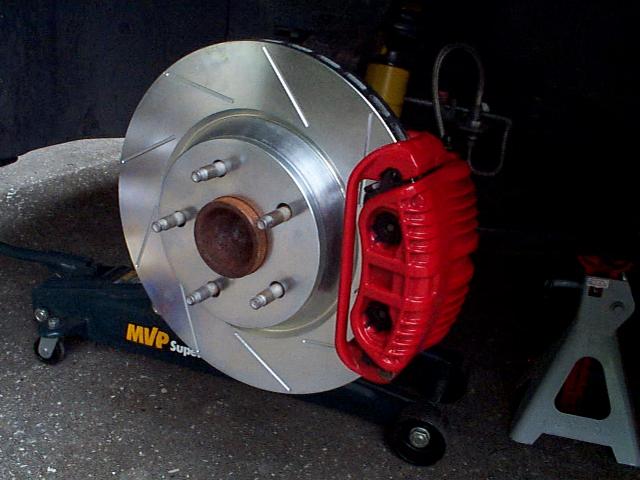
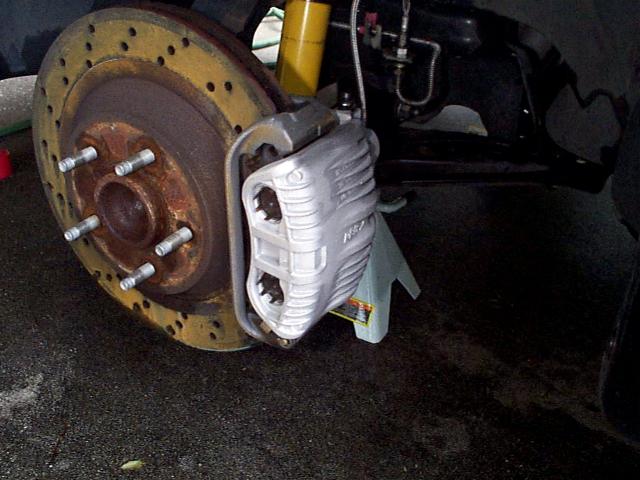
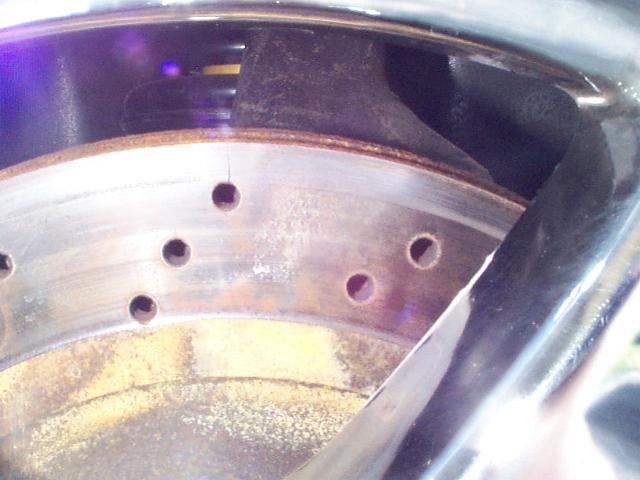
| As you can tell, these calipers and rotors may not
look like yours. The fronts are the Baer Track kit with cross drilled rotors.
You'll notice on this page that my rotors are shot and have cracks going from the outside
holes to the edge of the rotor. That's one of the downfalls of the cross drilled
rotor :( The rears are stock calipers but cross drilled rotors. These are pictures of what things looked like prior to cleaning. Nasty! |

|
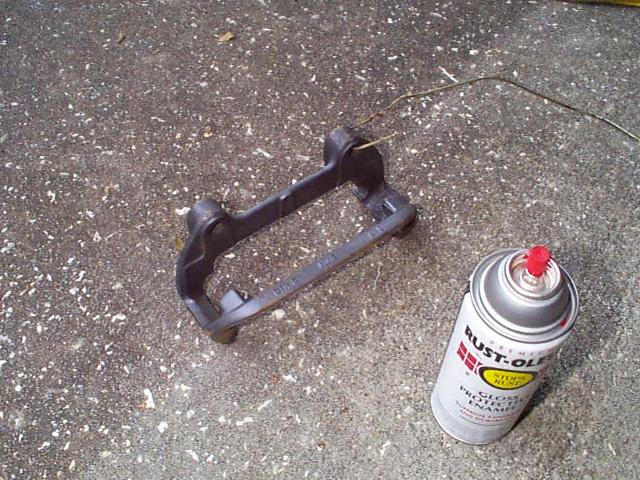
| You'll need some cleaning tools and chemicals. In the picture here I have brake cleaner and some wire brushes. I quickly found that even the brake cleaner and degreaser did NOT get the calipers as clean as I wanted. So instead I used some wire wheel acid (not pictured). This wire wheel acid did the trick! It is professional strength and you can get it from the people who supply the professional detail supplies to auto dealerships. To get them as clean as I have here, you'll need something like this wire wheel acid. | 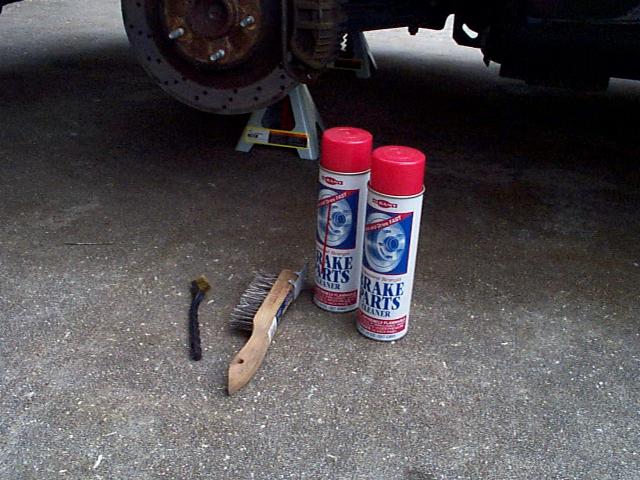 |
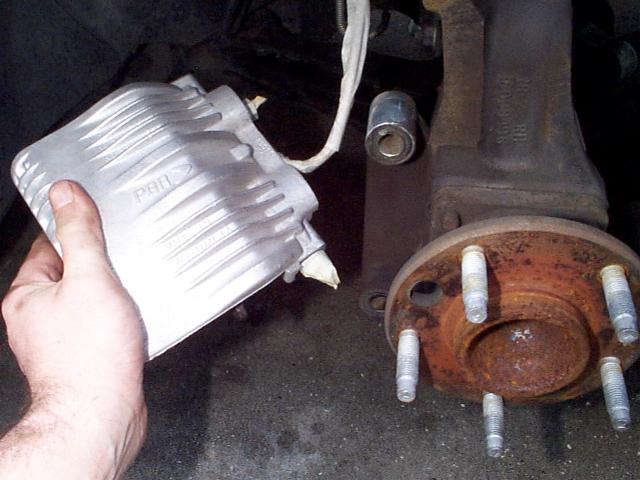
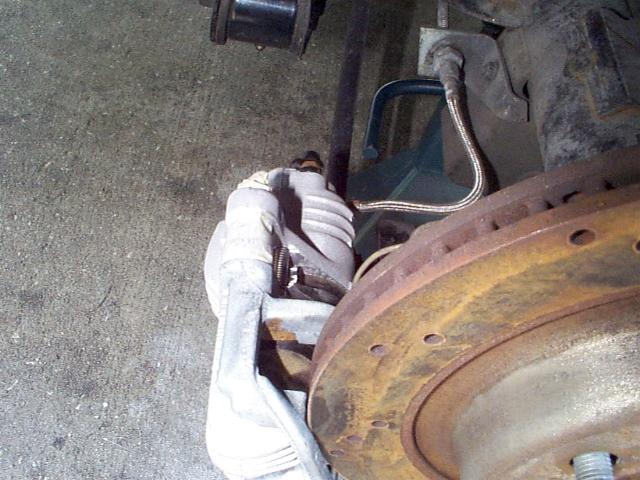
| Here are some shots of the front and rears all
cleaned up and ready to be taped. I started the cleaning process with them still
bolted up in place. After I scrubbed them as good as I could I unbolted them and
cleaned the areas I couldn't get to before. Once you unbolt them it is a good idea to get some wire clothes hangers and cut them into about 12" pieces. You'll use these to "hang" your calipers on while they are unbolted. It isn't good on the brake likes to let them hang by the brake lines. I have braided lines but it still isn't a good idea :) As you can tell by these pictures, the wire wheel acid WORKS! If you can get your calipers looking like this with degreaser and brake cleaner I'd like to know how you did it! |
|
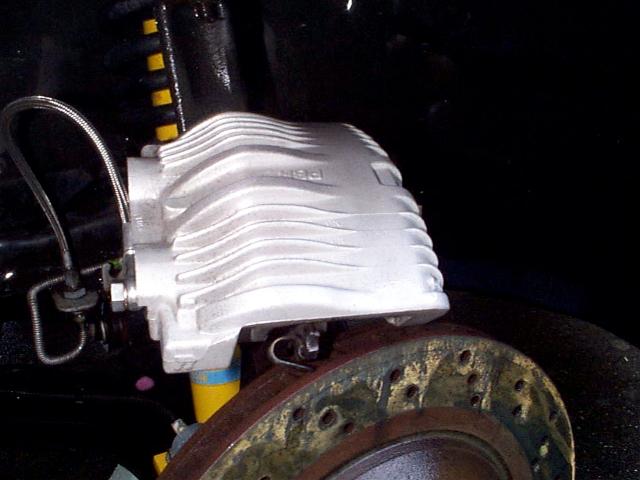
| On a side note, I got a bit carried away a week or so before doing this caliper painting project. I ended up going from like 100mph to 30mph three times in a very short time frame and it ruined my front rotors!?!? See the cracks and in the first pics you can see how the outer 1/2" or so is a different sheen. Well, even though these are the Baer Track brakes and are supposed to be high performance, the cross drilling severely weakens the rotor and is what lead to these cracking. These are being replaced with a new design from Baer and I am NOT having them cross drilled this time :) |  |
| Grab some masking tape and tape up everything you
don't want painted. As can see I taped up the braided lines, rubber pieces, and misc
metal parts of the caliper I did not want red. I went to quite a bit of trouble during this project to try and do everything "right." Many others barely clean the calipers, don't unbolt anything, and tape up only a few things. They say theirs come out great. Maybe I went a little overboard here? I know it was quite a bit of work and took a span of a few days waiting for everything to dry. If you were to not unbolt everything like I did you'd be able to do this project in a day. That'll probably be the route you'll end up taking unless you can be without a car for a few days. |
|
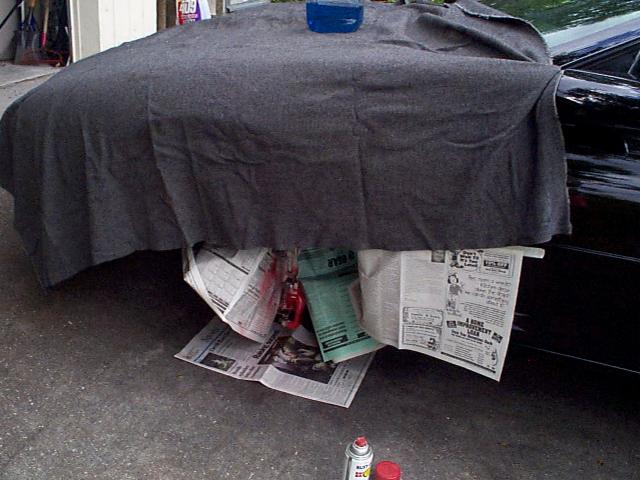
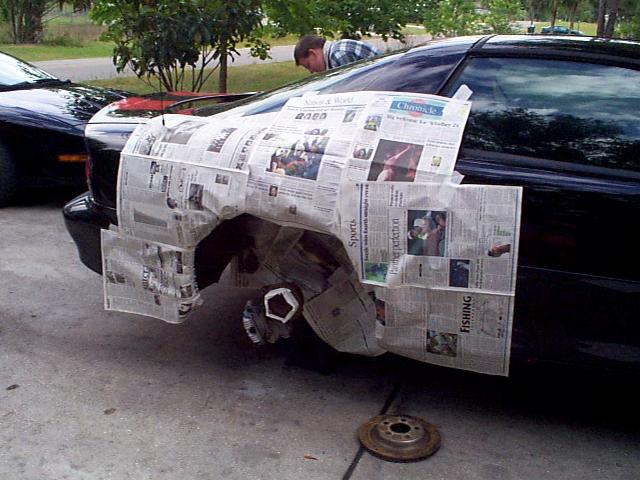
| Ok... on day 2 now and getting the rest of the car
ready for painting the calipers. I'll let you know that even though it LOOKS like I did a good job prepping the car, it was not enough :( I don't know if it was the paint, the wind (don't recall any) or what, but after I finished I noticed both the SS and the Trans Am sitting off in the distance a bit were COVERED with overspray. I spent a few hours buffing the damn overspray off each car. ARRGGHH!!! So, just so you're aware, cover the ENTIRE car with a blanket, old sheet, whatever, unless you want to spend several hours buffing off overspray! Learn from my mistakes :-) |
|
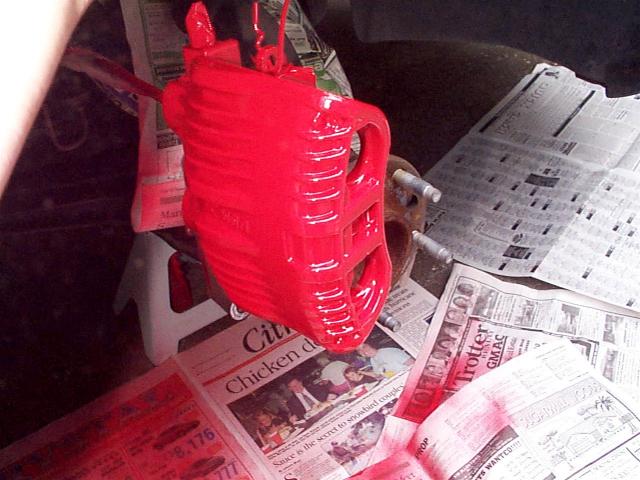
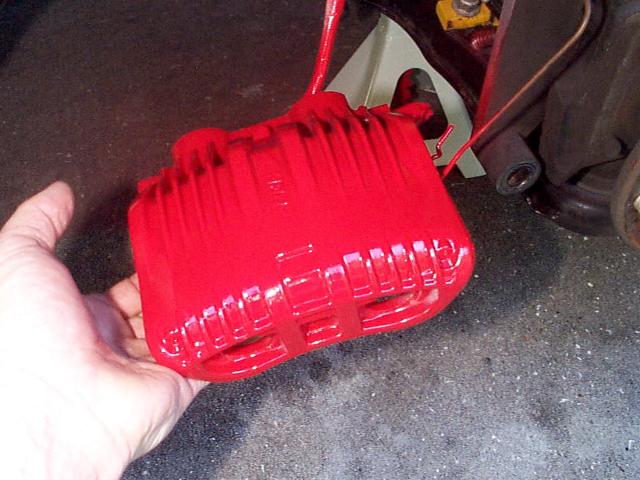
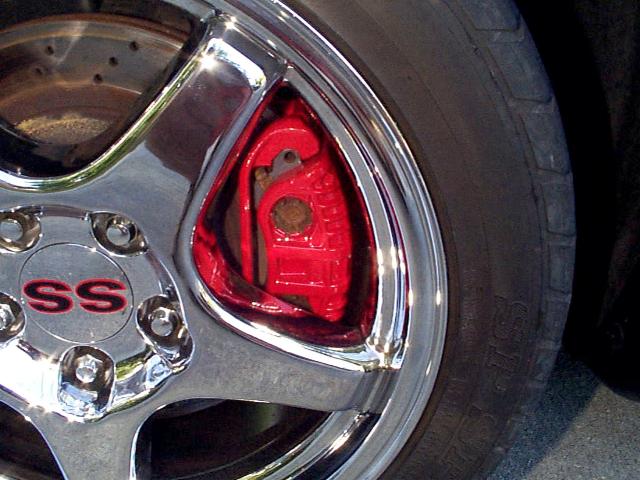
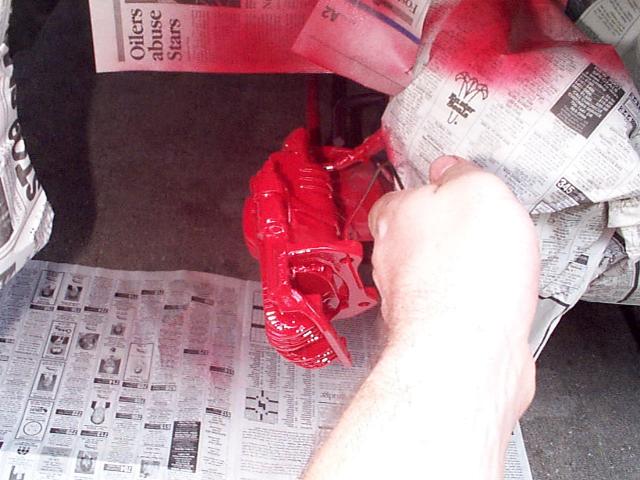
| My Baer front calipers kinda come apart and this is
one of the pieces. I used red gloss Rust-Oleum purchased from K-Mart. It isn't necessary to use an expensive high temperature paint here... just a good quality paint. I know others have had good results with Krylon. After the red dried I completed the painting with a high temperature clear (not pictured). I'm not certain if high temperature clear was really required or not but I've had some experience with the cheap $0.99 clear and decided to go with some higher quality stuff. I found some high temperature clear at AutoZone. |
 |
| Time to get busy and paint them now. It is
difficult for me to say just how to go about painting them. You kinda learn to paint
from experience and trial and error :) Anyway, since these are, after all, just brake calipers it really doesn't matter if you screw up a little :) The best advice I can give you is it is generally better to do several light coats than a couple heavy coats. I'm making this guide up a little after the fact and I can't recall exactly, but I think I did like 3 coats of paint and 3 or 4 coats of clear. I did all the painting on the 2nd day. The warmer it is outside and the thinner your coats of paint are the quicker it will dry. If you try to paint over wet paint you'll cause yourself problems so be sure to give plenty of time between coats for drying. |
|
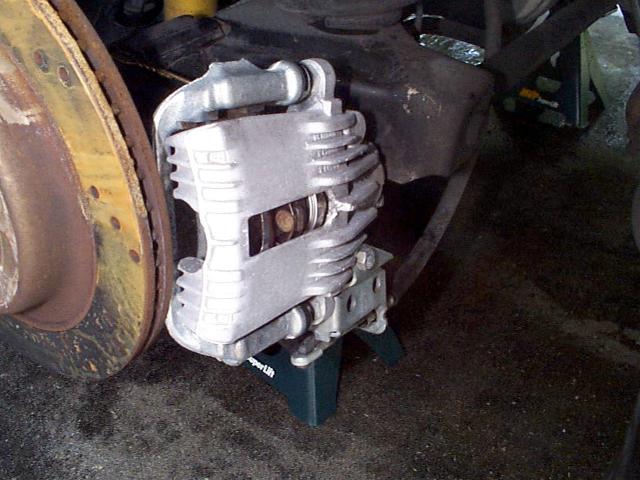
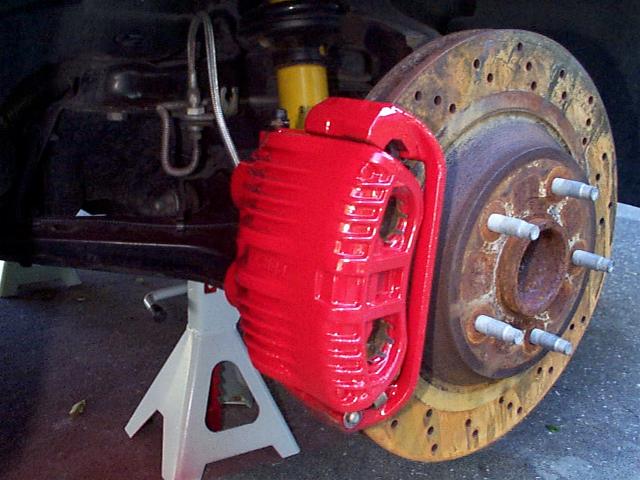
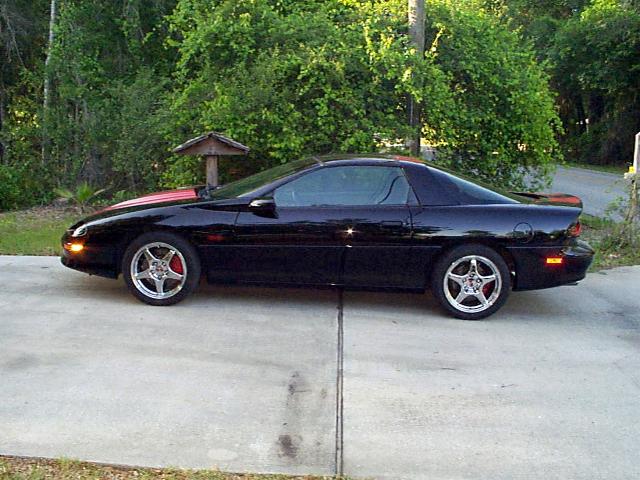
| With the painting complete, I picked up the mess and left the car sit overnight to allow the paint to dry. As it turns out, one day of drying was NOT enough!!! I messed up the paint a little when going to put things back together. Hmmm? So, in reality, this 3 day project should have taken 4!!! I installed my supercharger in one LONG day, headers in under 6 hours, springs and shocks in about 2 hours, but it takes three days to paint my calipers. What's wrong with this picture??? :-) | 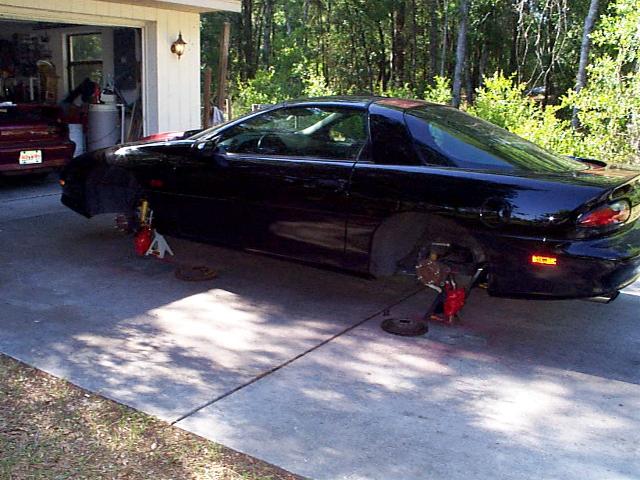 |
| Day THREE! Putting it all back together. You can't see it in these pictures but there are a couple places where I had to apply pretty good force to get these back on and when I did the paint "wrinkled" a little because it wasn't completely dry. ARGGH!!! Oh well, they're just brake calipers :) | 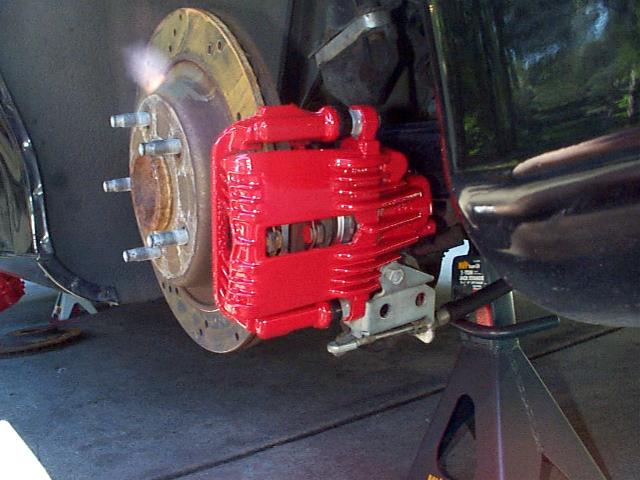
|
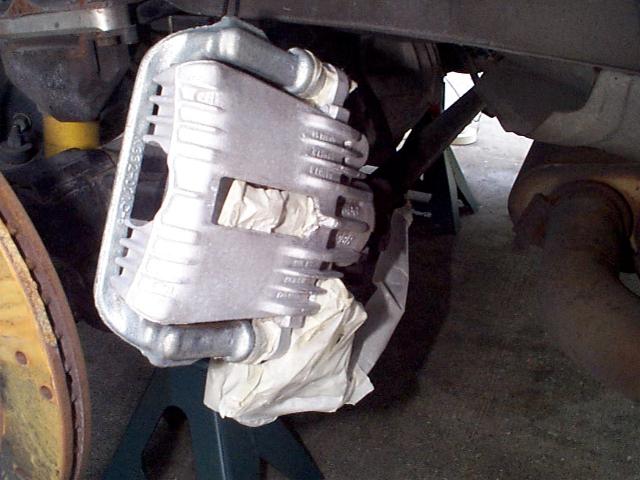
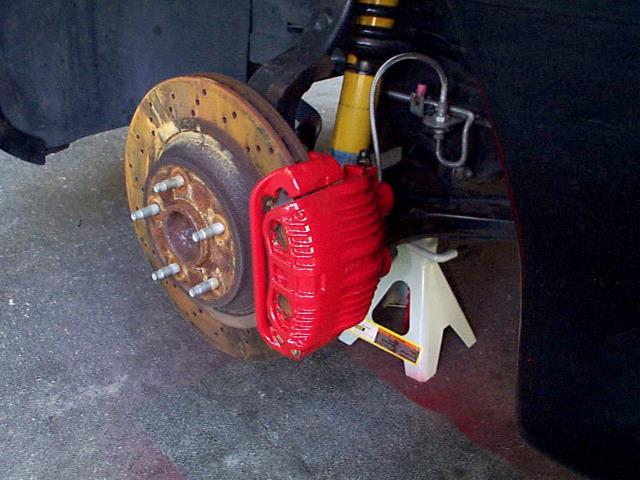
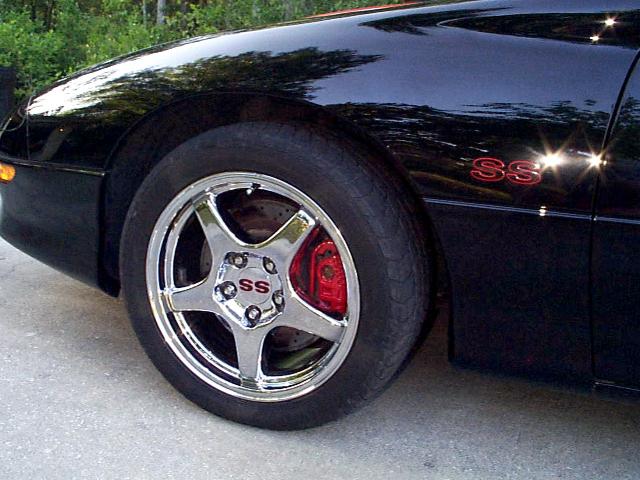
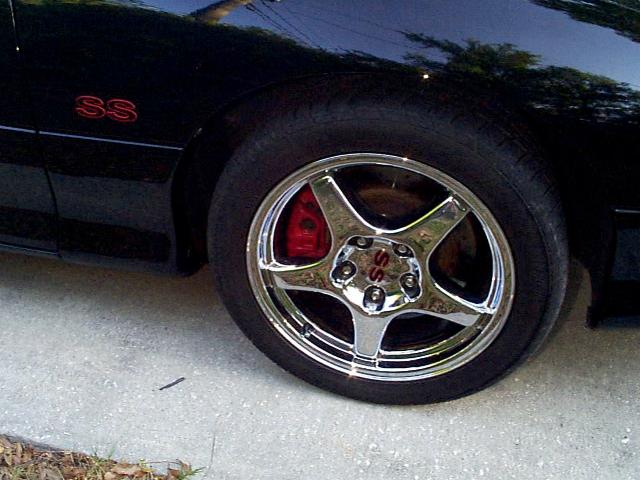
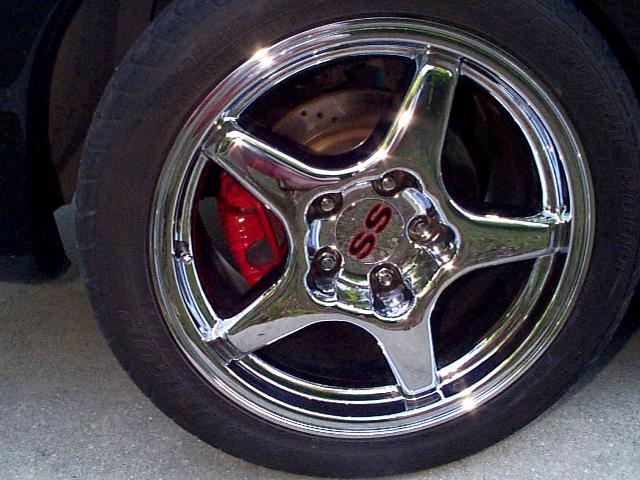
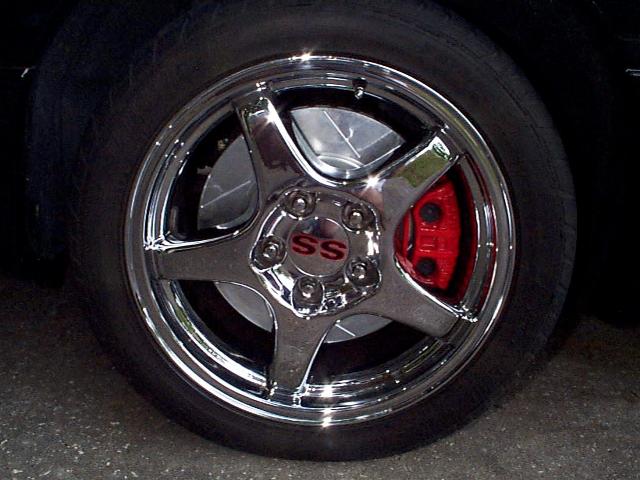
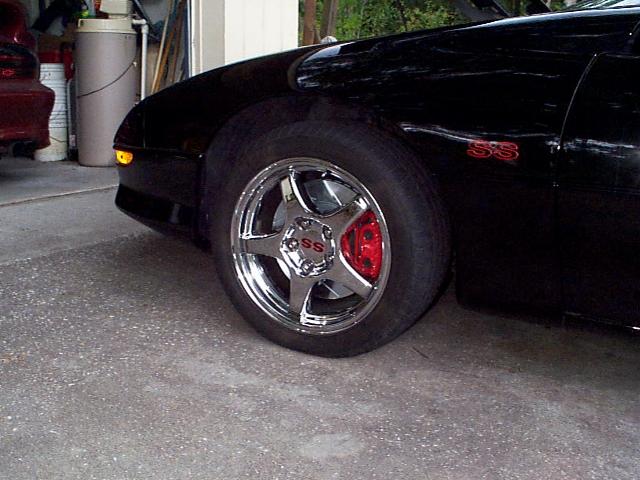
And finally here are some pics of the completed project!
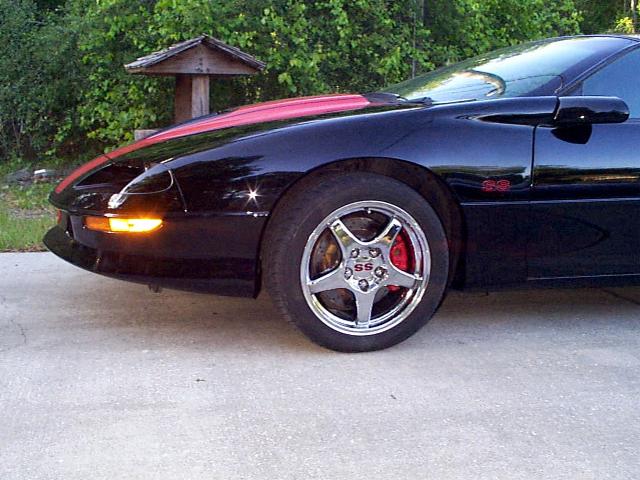
Ok... we'll fast forward a little here :) Now I have got my new rotors in and here are some pics with those. It has been a little while but notice the paint is holding up well.
|
|
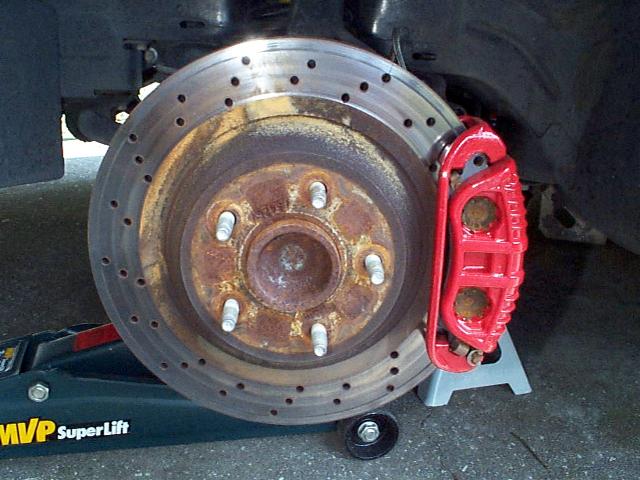
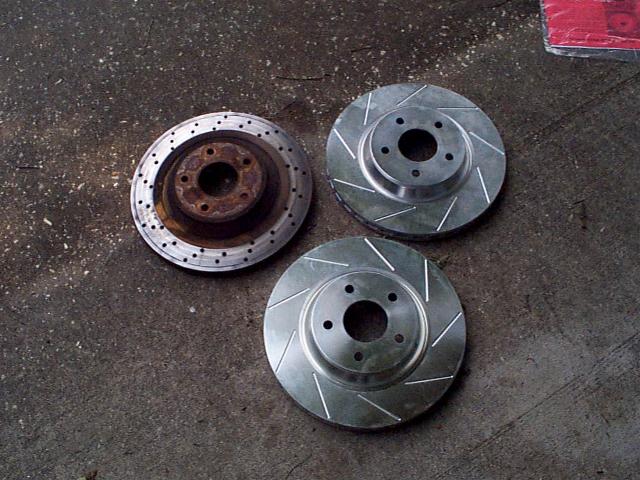
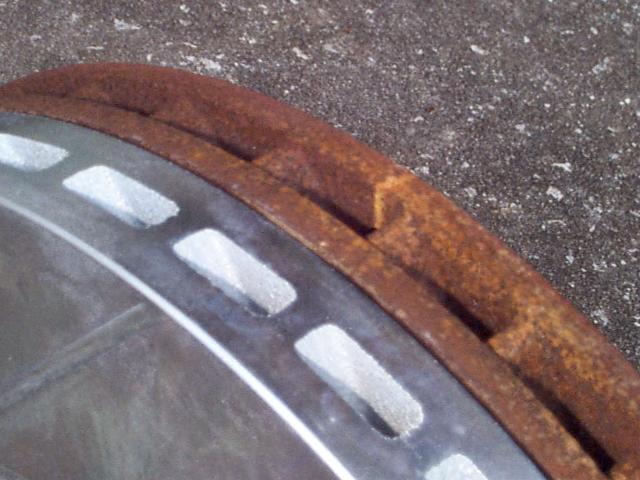
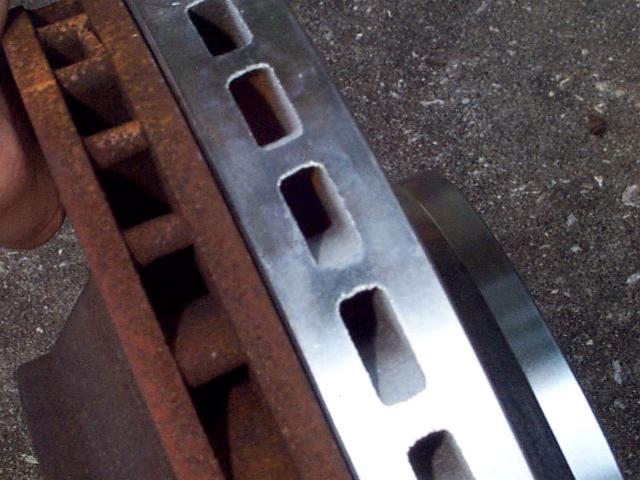
New Baer Rotors Also on this page I'll show you the difference between the "old" style Baer rotors and their new design. I called Baer to order new rotors and they told me they had just come out with a new design. I was like "OK" and wasn't expecting much but as you can see here, the differences are significant. I also did not get them cross drilled this time because cross drilling greatly weakens the rotor and I don't need to be spending $400 every time I want to stop a little fast! Here are some pics of the old rotors just prior to me swapping them out. Notice the cracks at each hole and heading to the outer edge. Also notice how the outer 1" or so got greatly overheated and appears to be a different color. |
|
| Here are just some side by side pics. I decided to get the new ones zinc coated. Looks a little better, eh? :) | 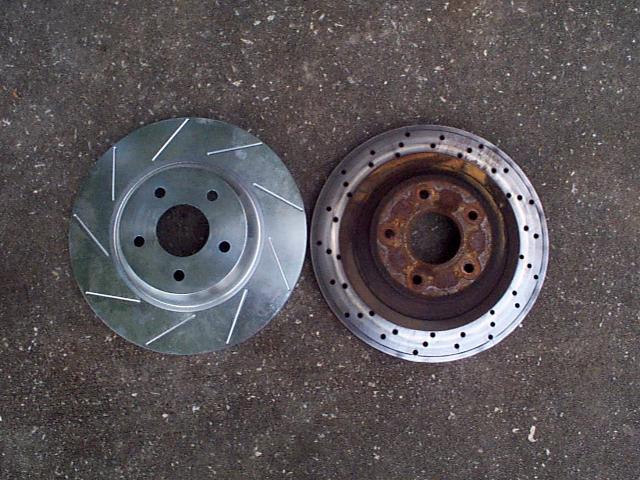
|
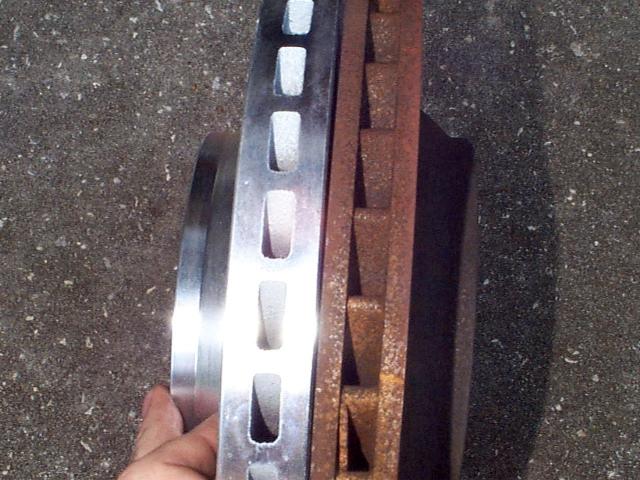
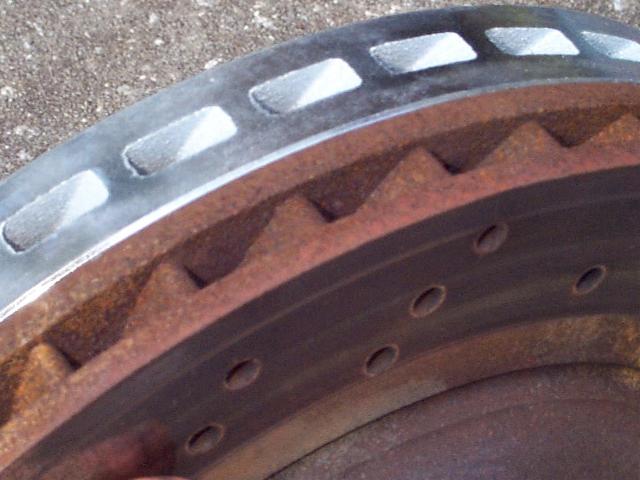
These last pictures show where the major differences are. Notice first of all how much thicker each side is. The overall thickness of the rotor is the same but the inside and outside plates of the rotor are much thicker which hopefully will make them a bit stronger. Also notice how the internal cooling fins go all the way to the edge now as opposed to stopping prior to the edge of the rotor. I've been told the new rotors are actually made larger than desired then machined down to size. It certainly does look like the design of this new rotor is much better than their older one. Still though, I wasn't going to "risk it" and get them drilled :) I'll stick with slotted for now ;)
Well, that's it! Good luck with the paint job ;) |
|
![]()
![]()