| 96 to 98 F-Body Alarm Installation Guide Section #1
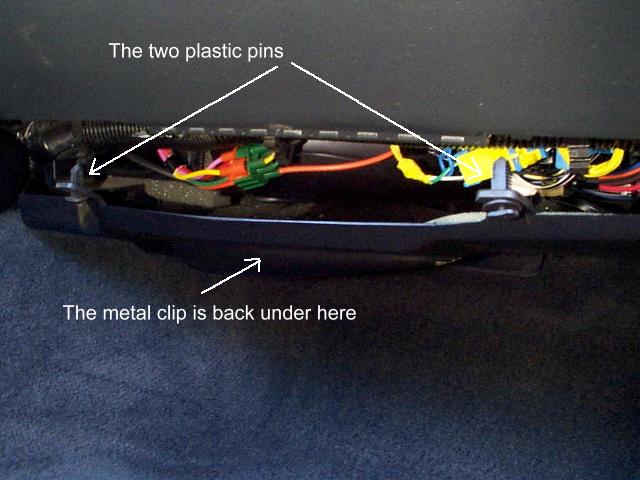
Removing Interior Panels Like it or not, you're going to have to take apart your car a bit :) This doesn't mean you'll cause damage to it... just be careful and keep all the screws and pieces together so you don't loose anything! To help save your knees (if you're wearing shorts like I normally do!) take out your floor mats and place them on the ground just outside your doors. Might as well kneel on these instead of the concrete! You need to decide where you want to mount the alarm "brain." For the Camaro, I personally like to mount it behind the glove box. Some will say that this provides "easy access" to the alarm brain. Well, I got two things to say... 1) Most times alarm brains are mounted under the dash on the driver side and 2) You can always lock your glove box if it bothers you :) You can mount the brain where ever you choose. For this install, mine will be mounted behind the glove box. The first panel to remove is the horizontal panel above the passenger's feet. This is held in place by a couple of plastic pins and a metal clip near the firewall. Pull down firmly on the front of this panel and the plastic pins will come out. Use a pair of pliers to remove the metal clip near the firewall... be careful! It's sharp! Here are a few pics of what you'll be doing.
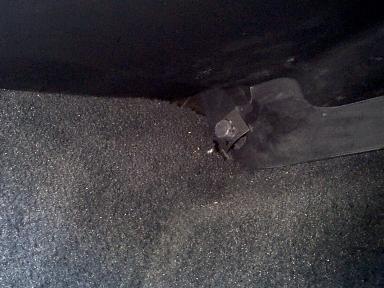
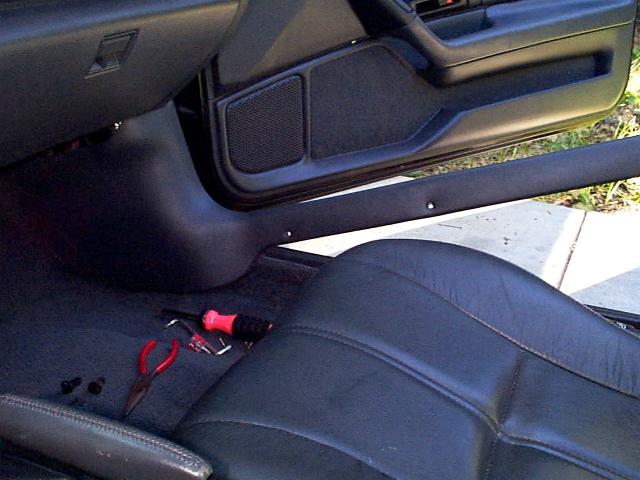
Once you have the metal clip and pins removed, pull this panel out and set it to the side. Set it out of the way so you don't step on it later and break it! :) You also need to remove the plastic kick plate and passenger side kick panel. There are 4 Phillips head screws. You may need a small stubby screwdriver to get to one of them as the seat is in the way. This piece has a portion of it near the front of the door jamb that goes up and under another plastic piece coming from the 'A' pillar.
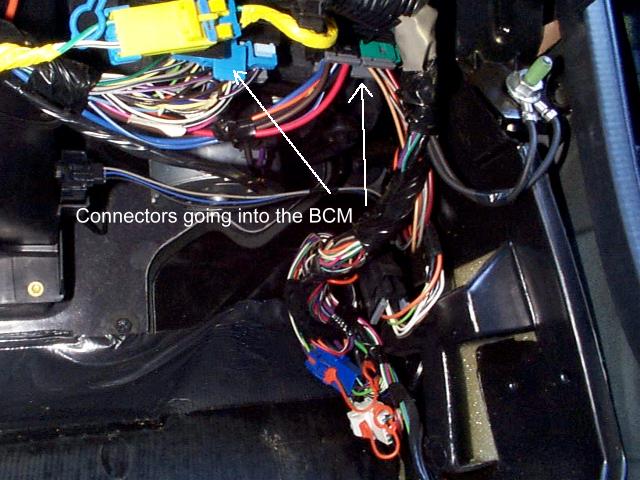
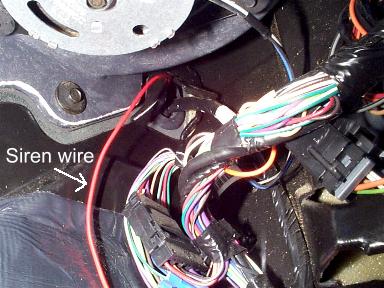
With these pieces removed, you can now see the Body Control Module (BCM). I've talked a bit about this BCM but haven't really explained what it is. The BCM is kinda like an "all in one" device for a lot of different things in your F-Body. It controls things such as the theater dimming feature. It contains the logic of the PASS-Key II system. The BCM has inputs from the battery, ignition circuits, key resistor, shock sensor (if you have a factory alarm), and door lock, door jamb and hatch switches. The BCM has outputs to the starter enable circuit, the fuel enable circuit, the security lamp circuit, and the remote hatch release. The BCM also controls power locks, interior lights, horn chirps and parking light flashes for locking and arming functions if you have a factory alarm. The BCM also has some diagnostic features. It's a pretty neat little device but it reeks havoc with installing an aftermarket alarm system or keyless entry. For this reason, we need to be able to "get at it" to make numerous connections to it for the alarm system. Pictured below is the BCM as it sets installed in the car.
Go ahead and kinda peel the carpet down from the corner. It's not connected or glued in any way and it will just fold over for you. Let's move now to mounting the siren. For whatever reason, I like to do this first and get it out of the way :-)
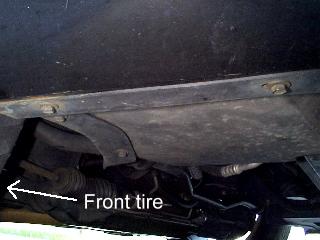
Siren Mounting The siren can be mounted in a number of different locations. It can be screwed to the fender well under the hood. It can be tie-wrapped to something under the hood. It can be mounted out of site under the hood. It can be mounted IN the rear bumper cover... wherever you want. There are a few things to consider when mounting the siren 1) Keep it away from extreme heat. i.e., don't let it rest against the manifold or header 2) Always mount it so the siren is facing down. If you mount it with the siren facing up, you'll be buying a new one because water will get in the siren and ruin it 3) Depending on how concerned you are about your car getting stolen will determine how much trouble you are going to go to to "hide" the siren from view even if a thief were to gain access to under the hood. For this install, I mounted one siren buried in the passenger side front fender. On my 94Z I actually have 3 full sized sirens. Two mounted under the hood area and one mounted in the rear bumper cover. I live in an area where I could probably park my car on the corner of town for a week with the keys in it and it wouldn't get stolen but since I had the extra sirens, I used them! (Most all the alarms I've installed have been for the sole purpose of keyless entry. Since I sell the alarms to my friends so cheap, it doesn't pay to install just a keyless entry system. The markup on alarms is very high :) So, I probably wouldn't need to go to much trouble to mount the siren but for the benefit of "you guys" I went ahead and mounted the siren in a secure and hidden location. The siren is mounted via the 7mm screw that holds the passenger side turn signal in place. To get to this area is a bit of a pain in the butt... which is what is desired, right? :) In order to get to this area, there is a fairly large thick plastic piece that needs to be removed from the underside of the car. It is pictured below.
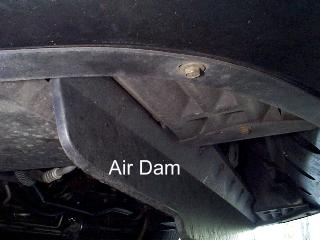
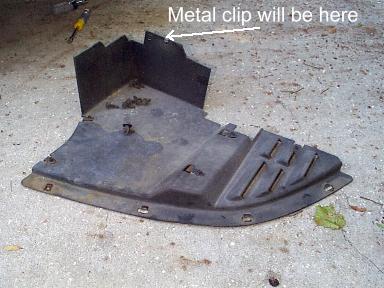
This piece is held in place by seven 10mm screws and two 15/16" screws. The 15/16" screws hold the air dam to this piece. Don't ask me why they go back and forth like that, but that's the sockets that fit best for me!?!? Maybe they are really a different size, but the above sizes will work :) Take out all these screws and carefully pry and pull this piece out. There is a metal clip on the horizontal portion of this piece closest to the engine. If it doesn't feel like it wants to come out, just yank a little and this clip will release. It's more difficult to put back on than take off :) Here is what it will look like when removed.
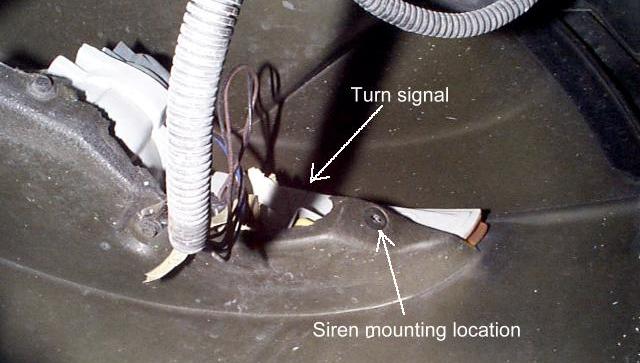
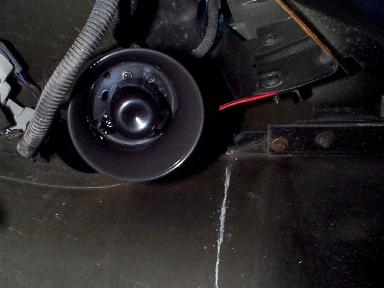
With this piece removed, you now have access to the rear of your turn signal. Here is what it looks like up in there. I already have the screw removed where the siren will be mounted. Yeah, Yeah, there are three holes on the siren to be used to mount it and I'm only using one. Trust me, the siren won't go anywhere :)
Mount your siren using the screw you removed. Be sure to keep the siren pointed down to prevent water from collecting in the siren!
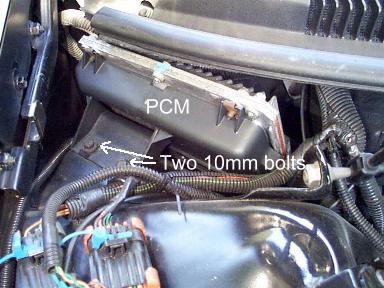
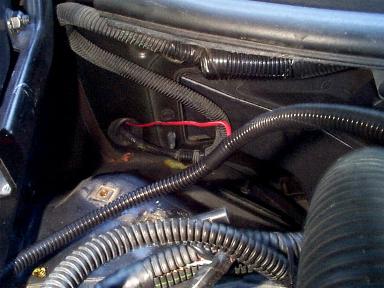
Go ahead and put the plastic piece back on under the car since we're done with the siren. OK, now that the laying on your back part is done :) it's time to run the siren wire into the car. On the 4th gen F-Body there is only really one convenient place to do this without drilling your own hole. There is an area behind the PCM where there is a rubber grommet. This is an ideal place to run the wire for your siren through the firewall. But, to get to this grommet, requires pulling out the PCM. There is no need to disconnect the PCM. For those of you who don't know, the PCM is the "brains" of the car. It is often referred to as the car's computer or ECM... all the same thing :) It is located near the firewall under the hood on the passenger side. Here is what it looks like.
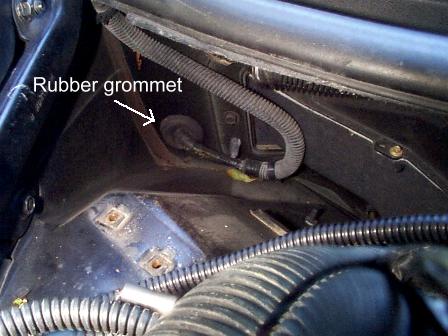
Remove the two 10mm bolts which hold the PCM in place. Carefully pull the PCM up and out of the way... don't scratch your paint! Here is what you'll see when you get the PCM out of the way. Notice the grommet we'll be using.
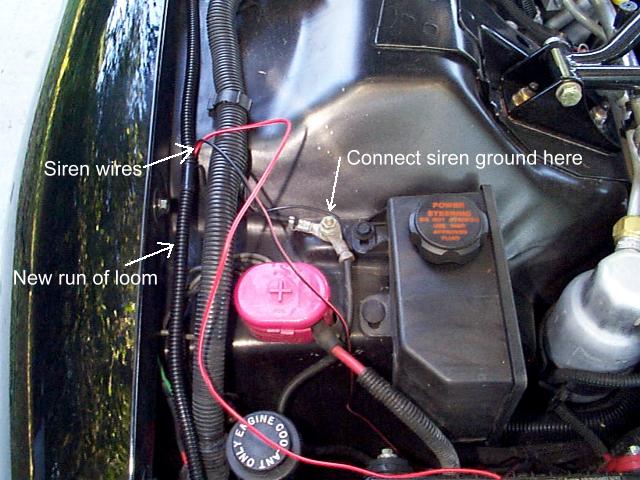
You now need to use something semi sharp (like a small screwdriver or knife) to poke a small hole in this rubber grommet. Be careful not to slice any of the wires going through there! Since most, if not all, alarms use only the Positive lead of the siren, there is no need to run both wires through the firewall. You can connect the Negative lead of the siren to a ground in your engine compartment. Just double check to make sure that your alarm actually connects to the Positive lead of the siren! Shown below is an excellent place to connect for a ground. I also highly recommend running your siren wires in a plastic loom. It keeps the engine compartment looking good and also helps to confuse a would be thief because it will be difficult to tell this run of loom from the factory loom. Oh, I already had a section of loom in the car for the knock sensor bypass switch so I just used that loom. You can buy loom at any autoparts store.
Run the Positive lead of your siren wire to the firewall. Below are pictures from what it looks like on both sides.
OK, the hard part of the siren is done. That was easy, huh? :-)
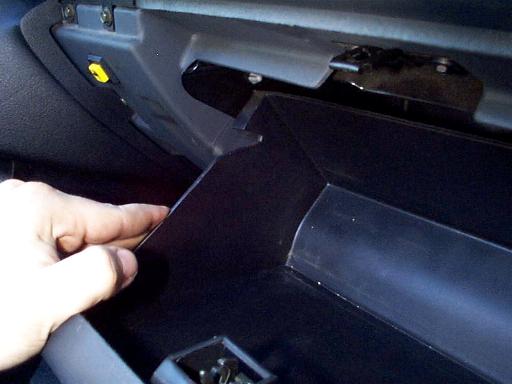
Glove Box & Driver Side Panel Removal We have to dig a little deeper into the internals of your interior now :) Next we will be taking off the glove box so we can get behind it for a place to mount the alarm brain. Remove the two or maybe three 9/32" (might be off here because I don't remember this exactly for some reason :) screws from the bottom of the glove box. Then to actually remove the glove box, open it and slightly pull in on each side as shown below so the "ear" will make it past the catch. You just kinda have to "force" it out.
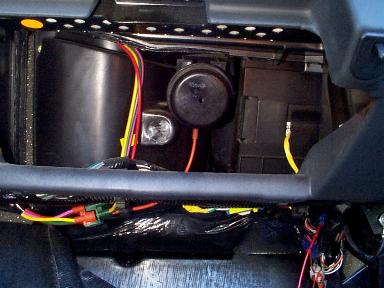
The glove box will now fall right out. Place it to the side and out of the way. Here is what you'll be looking at.
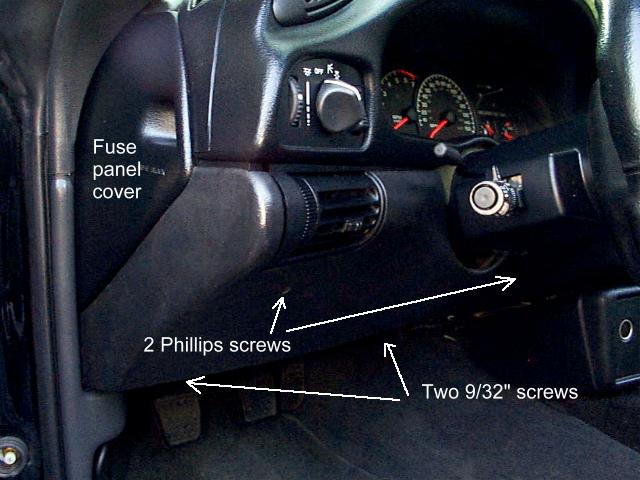
OK, now with the passenger side panels out of the way, we need to get some of the driver side panels taken off. You'll need to remove the fuse panel cover, the driver side knee kick panel, and the horizontal panel above the driver's feet. First remove the fuse panel cover and the knee kick panel (as shown below). When you remove the knee kick panel, you'll have to unplug the rear window defroster if you have one. To do this, remove the white clip first then unplug it by using a screwdriver to slightly pry it loose.
Once the driver side knee panel is removed, you will be able to remove the horizontal panel above the driver's feet. Removing this panel isn't entirely necessary, but it will make running the wires a bit easier. I didn't remove it, but feel free to do so if you want! It is held in place by a couple plastic pins (not nearly the quality of the plastic pins on the passenger side... I wonder why??? :) and another metal clip in the back. Here is what you'll have with these panels removed. (Except I didn't remove the horizontal panel)
Now we're getting somewhere! Time to hook something up! :-)
|