*Taking apart Dash in ‘93-96 Camaro*
1. First, you will want to start of by removing these two screws at the top.
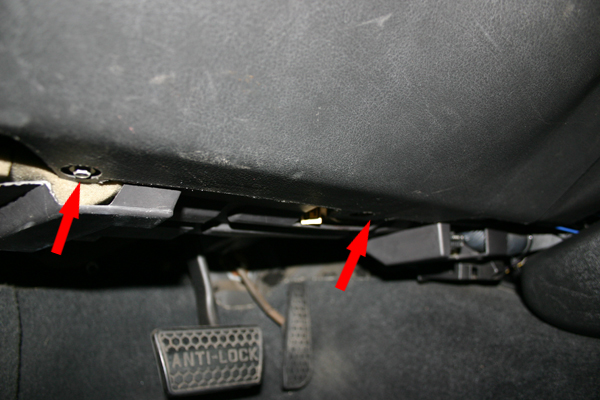
2. Now, move down below the same panel pictured above, and remove these two bolts. You cannot see the second one in the picture, but you’ll be able to find it once you’re under there. You can now remove this panel. Don’t forget to unhook you’re rear defog switch if you have one.
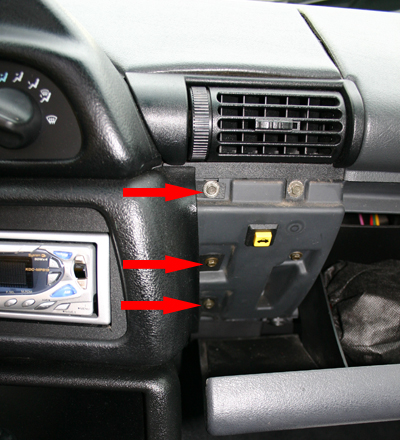
3. Next, open your glove box and you will see these three bolts that need to come out.
4. Back to the driver’s side, under the panel you took off in step 2, you will see these two bolts. Go ahead and take these out at this time.
Once these are out, the cover around your cd/tape player, can be removed.
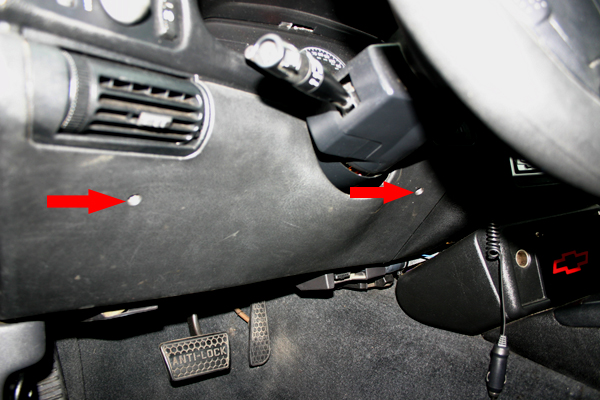
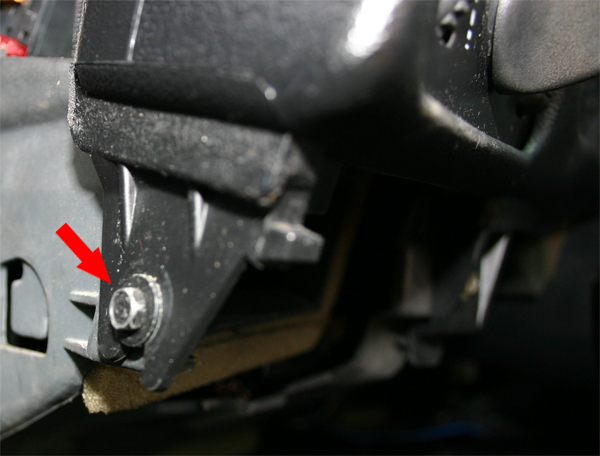
5. Still on the driver’s side, you will see this bolt on the far left, next to your fuses. Take this out.
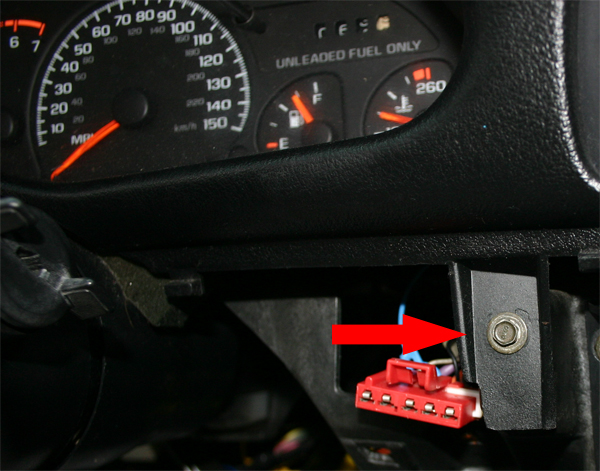
6. This bolt is under the speedo on the left hand side.
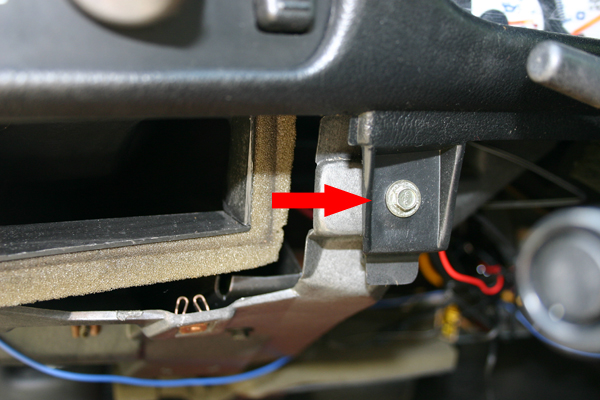
7. Remove this bolt that is next to the cd/tape player
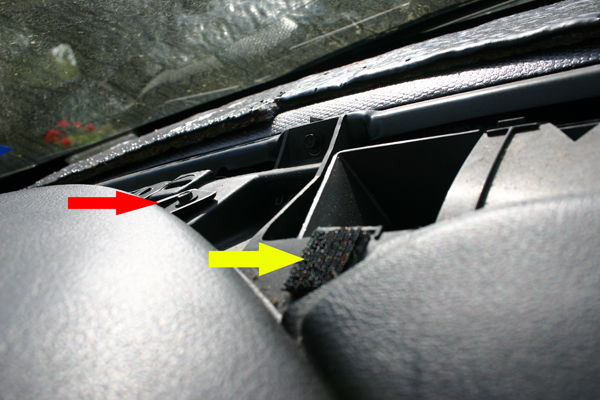
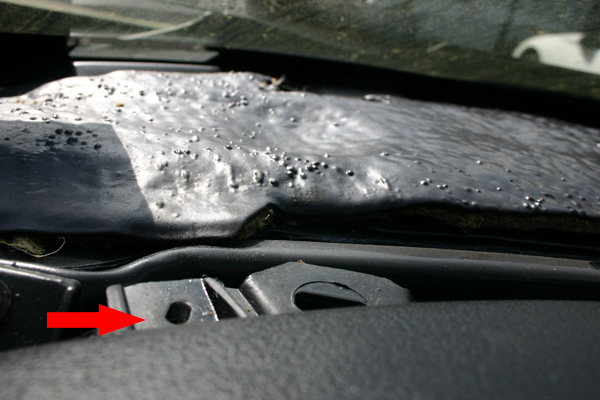
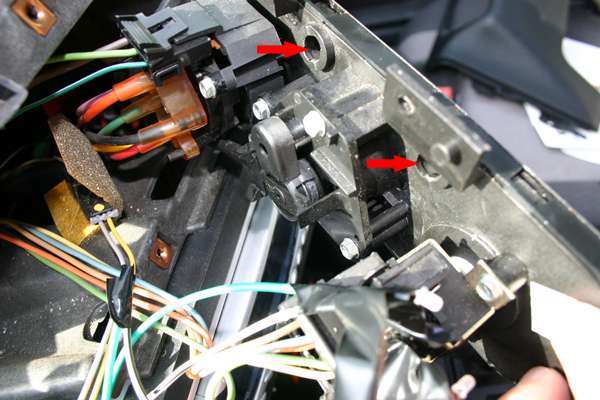
8. Before the dash around the speedo will come off, you must remove two more bolts that are at the top. They are under the dash pad (large piece under windshield). These are the hardest to get to. I recommend taking off you’re a-pillars, and then carefully popping the dash pad out . You will then have plenty of room to remove these two bolts. The red arrow is pointing to the bolt on the right that will need to come out. The yellow arrow shows how the dash pad is held on. It is a strong Velcro type connector.
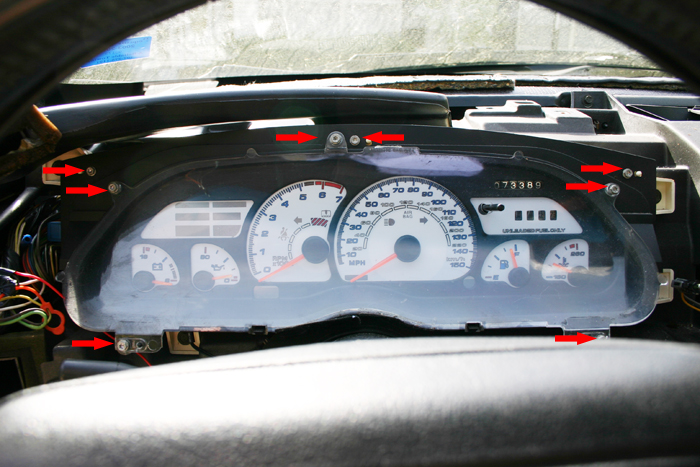
9. There should be a bolt here in the right, I just didn’t get a picture of it in on mine.
Once these four bolts are out, you will need to pop the headlight controls out. Take both of your thumbs, and put them at the top of the headlight control area, and push away from you. This should pop them out. Now you should have access to your speedometer, headlight controls, and a/c controls.
10. If you are putting an overlay on your speedometer or doing something else behind there, you will need to take out all of these screws. I’m not sure if all of them are show in the picture or not, but they should easily be visible to you when you have the dash apart.
*Indiglo Install*
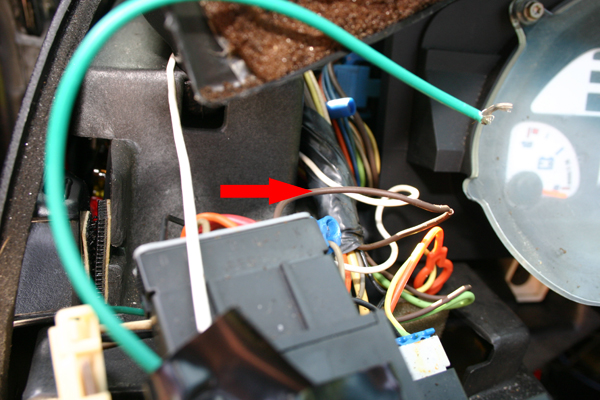
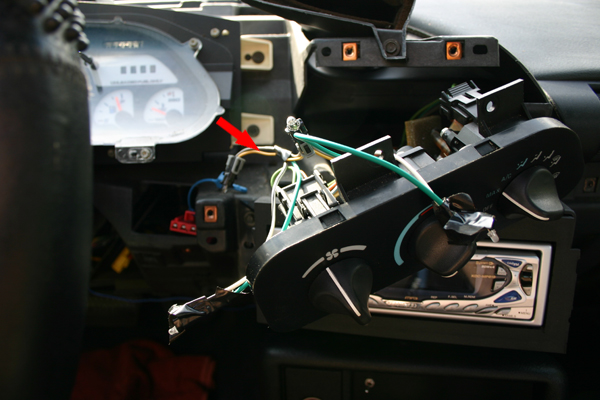
If you are adding an indiglo overlay like I did, you will want to use the power wire that is connected to your headlight switch. This is the dark brown wire shown in the picture below. Just strip back a small part of the insulation, and connect your wire any way you wish.
*LED’s behind A/C and Headlight control*
This guide was first made just to show you how to take apart your dash, but I decided to show you what you need to do to change the color of the lighting behind your headlight and a/c controls. This part is not meant to show you exactly how to do it, but to give you a general idea of what needs to be done.
Here you can see the led that I added. The hole that I have mine in is just where the original bulb used to be. To remove it, insert a small flat head screw driver and twist it out. To power my led, I used the power wire running to the headlight control. This wire can be seen above.

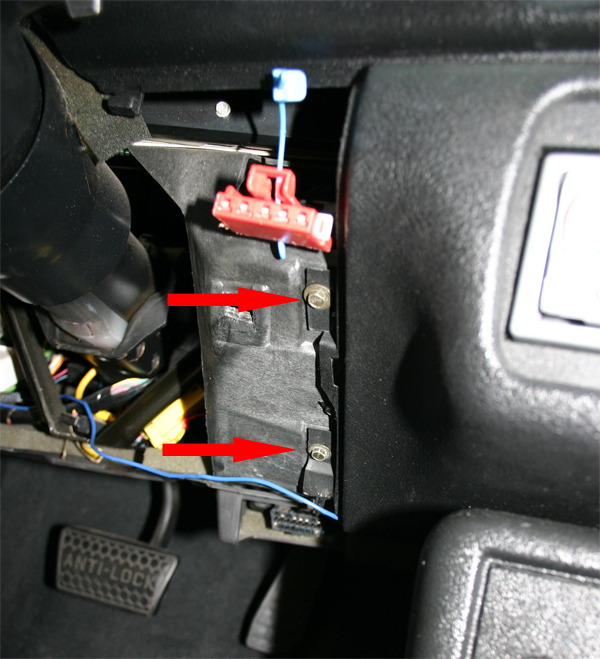
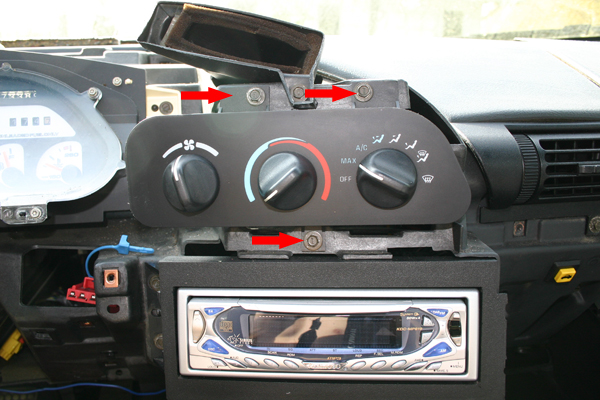
To change the color of the a/c controls, you will first need to remove these three bolts.
From here, you can see the backside of the a/c controls. The arrows are pointing to where the original bulbs were held.
To power the led’s I just used the original wiring that the white bulbs used. You can see in the picture that these wires are yellow and grey. The grey is your power wire while the yellow is the ground…
From these pictures, you should see basically what all needs to be done to change the color of your gauges…
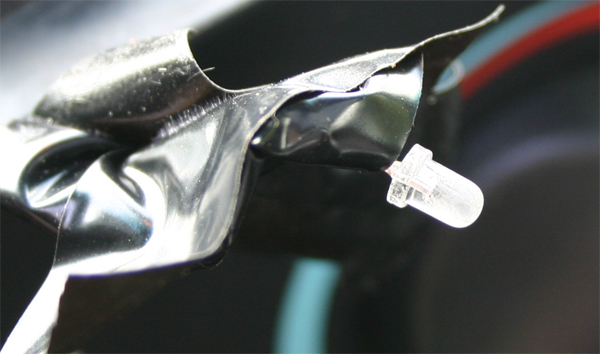
To make the led give off more of a glow like that of a bulb, I lightly sanded the led. I tried getting a picture of my sanded led, but it didn’t turn out very well.
If you have any questions, you can email me at
splitfire414@aol.com