4th Generation Firebird Clear Rear Side
Markers
by David
TheV6Bird on www.camaroz28.com
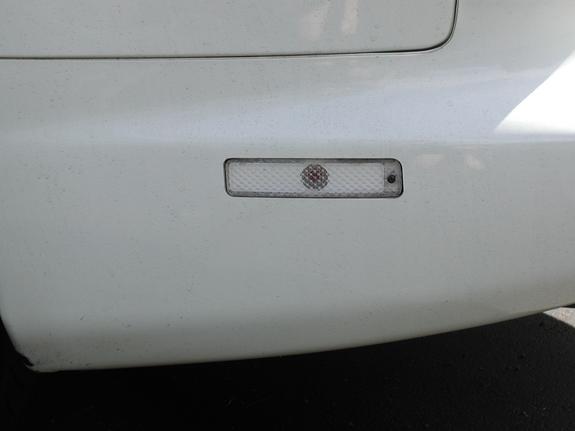
CLEAR REAR SIDEMARKERS
- First, buy a clear plastic sheet of plastic from Home Depot. I
don't know the name of the stuff, but it’s the stuff used in drop ceiling panels in
offices. You will need a Dremel, or some rotary tool (variable speed ones are best, since
a one speed, 35,000 RPM one will cut so fast it will melt the plastic that you must cut
later) Also, buy some clear silicone and white spray paint (I used white engine enamel).
- Take the lenses off your car. You will then have to pry off the red
lens from the housing. This is the toughest part of the whole project. Try heating it up
with a hairdryer, and then try to pry it off gently with a flathead screwdriver. Don't
worry if you crack the red lens plastic, because this stuff is VERY brittle. All you need
is the gray housing anyway.
- Once you have separated the lenses, trace an outline of the housing
on the plastic sheet (don't forget to trace the little stub the sticks out on one side).
It was hard getting the pencil or marker to show on plastic, so I put down some masking
tape on the plastic sheet, then traced with a marker. That allowed the lines to be shown
on clear plastic. Always remember: it is better to be a little larger than a little
smaller.
- Next, with the masking tape still on, you must cut out the plastic
with a rotary tool. After cutting it out, test fit it to the housing. You may have to sand
some rough edges with some sand paper or use the rotary tool if you have a sanding drum
piece (like I did). You must also drill a hole where the screw will go to hold the lenses
in place on the car. BE CAREFUL!! The plastic is very brittle, and I had my
whole plastic lens crack off when I drilled the first time I did this.
- You should ask around on this step, since I don't know how many
people have done it: Since the housing was a gray, and I wanted a white, smooth look for
my white car, I painted the housing white with engine enamel (I used that because I
thought the heat from the bulb would cause normal paint to flake or melt). Without it, the
clear lens would show the gray part of the housing. So I put two coats of the white paint
on the housing. If you don’t have a white car (say you own blue for example), you
could buy some blue paint, paint the gray housing blue, then put the clear lens over it.
That way, it would look blue when the light is off, but red when the light is on (rather
than gray with the light off)
- Next you must silicone the clear lenses to the housing. This sounds
simple, but it gets a little complicated. Since the stock red housing was thick, and the
new clear lens was thin on my car, if I siliconed the clear lens to the housing with just
one layer of silicone, the lens would sink in drastically from the car, making it look
like a hole was in the car.
- I ran two thick layers of silicone down the edges of the housing
(let the first one dry, put down second layer, attach lens, let dry) When the silicone
dries, you may have to sand the edges so it will fit well. If you still see a small
recession in the body because your silicone wasn't thick enough, then put some small blobs
on the back of the housing to raise the ENTIRE housing up (rather than just the lens,
which what you were doing before). This step is mostly trial and error.
- Also, remember that stub on the housing? Don't put silicone on
that, it must fit in with the body. If you do get silicone on it, just use the rotary tool
to saw it off. You will also need a red bulb so your lens will be street legal. The PN for
the bulb is 194 for rear markers (If I remember correctly) I used the APC ones from Pep
Boys, and they are fine to me and have not blown out. However, the red bulb gives off a
“pink” tint when illuminated. That didn’t bother me, but if it bothers you,
I am sure there must be some way to hook up a red LED bulb to give the real “red”
look.
If you have any questions, please email
daspeed428@snet.net
For more guides similar to this, check out
http://www.bfranker.badz28.com/fbody/guides.htm